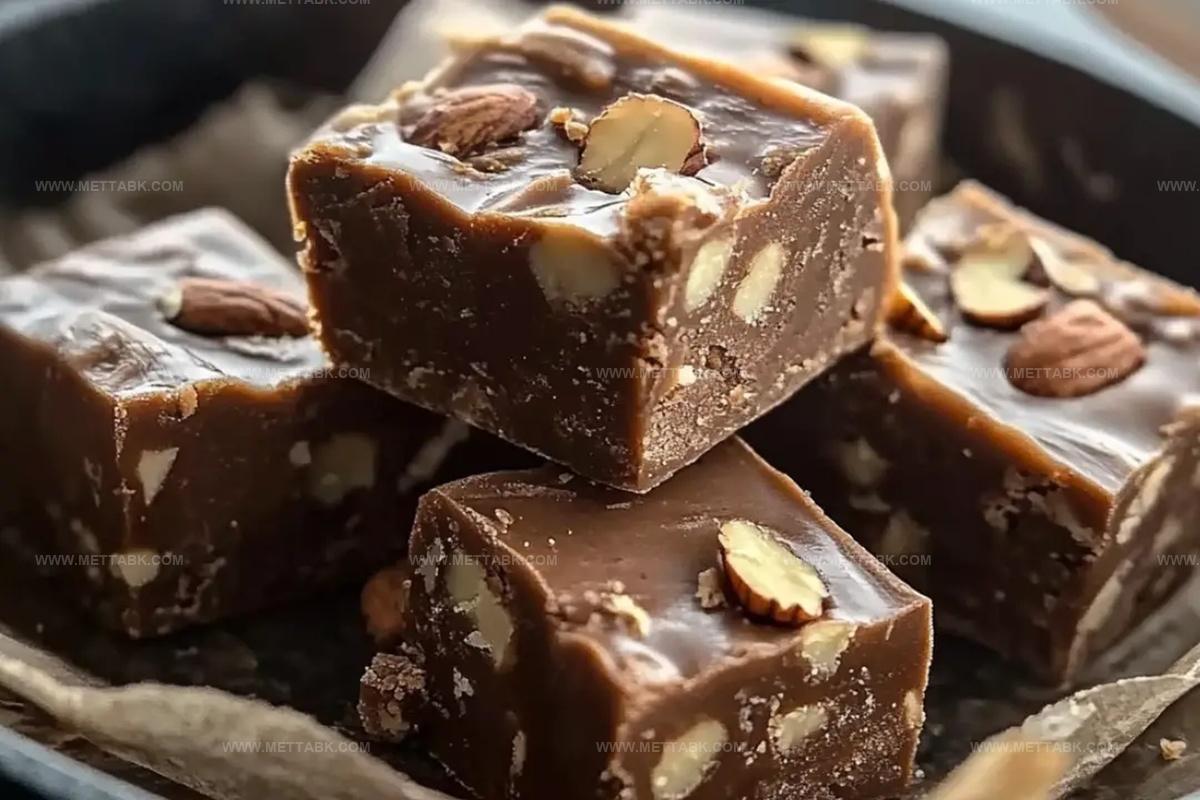
Cast Iron Magic: Old-Fashioned Black Walnut Fudge Recipe
Crafting an old-fashioned black walnut fudge in a cast iron skillet brings nostalgic memories of grandma’s kitchen to life.
Sweet aromas will quickly fill your home with warmth and comfort.
Generations have cherished this rich, decadent treat that speaks to traditional American dessert making.
Robust walnut flavors blend perfectly with smooth chocolate undertones, creating a deeply satisfying confection.
Cooking in cast iron adds a subtle depth that modern techniques cannot replicate.
Careful preparation ensures each bite delivers a perfect balance of sweetness and nutty complexity.
Mastering this classic recipe connects you to culinary traditions passed down through loving hands.
Why This Fudge Is Worth Remembering
Ingredients in Skillet Black Walnut Fudge
For the Base:For the Flavor Enhancers:For Additional Preparation:Cooking Instructions for Skillet Walnut Fudge
Step 1: Melt Decadent Base
Grab your trusty cast iron skillet and combine butter, sugar, cocoa powder, and evaporated milk. The rich ingredients will start transforming into a luxurious chocolate canvas.
Step 2: Create Smooth Chocolate Mixture
Heat the skillet over medium flame, stirring the ingredients until they blend into a silky, glossy mixture. Keep stirring to prevent any burning or sticking.
Step 3: Boil to Perfection
Increase the heat and bring the mixture to a vigorous, rolling boil. Continue stirring constantly for exactly 4 minutes.
This critical stage develops the deep, intense flavor profile.
Step 4: Enhance with Flavor Boosters
Remove the skillet from heat and gently fold in:These ingredients will add incredible depth and nutty complexity to your fudge.
Step 5: Cool and Thicken
Let the fudge rest, stirring occasionally. Watch as the mixture transforms and starts to set, becoming wonderfully thick and glossy.
Step 6: Transfer and Set
Pour the fudge into a buttered pan, allowing it to cool completely at room temperature. The fudge will continue to firm up as it rests.
Step 7: Slice and Enjoy
Once fully cooled, cut the fudge into delectable squares. Store in an airtight container at room temperature for maximum enjoyment.
Tips That Help With Fudge in Cast Iron
New Styles for Cast Iron Fudges
Foods That Pair With Skillet Fudge Best
How to Store Cast Iron Fudge Properly
Place fudge in an airtight container, separating layers with parchment paper to prevent sticking. Keeps for up to 2 weeks in the refrigerator.
Wrap individual fudge pieces in plastic wrap, then store in a freezer-safe container. Freezes perfectly for 3 months. Thaw at room temperature for best texture.
Keep fudge in a sealed container away from direct sunlight and heat. Maintains quality for 7-10 days in a cool, dry spot.
Briefly microwave individual pieces for 5-10 seconds to soften. Alternatively, let fudge sit at room temperature for 15-20 minutes before serving to restore creamy consistency.
FAQs
Cast iron provides even heat distribution and helps prevent burning, ensuring a smooth and consistent fudge texture without hot spots.
Black walnuts have a stronger, more intense flavor compared to regular walnuts, offering a richer and more robust taste to the fudge.
When stirring becomes more difficult and the mixture starts to thicken, and it pulls away from the sides of the skillet, it’s ready to be poured.
Yes, you can use regular walnuts, pecans, or even chocolate chips as an alternative, though the flavor profile will be slightly different.
Print
Old-Fashioned Black Walnut Fudge In A Cast Iron Skillet Recipe
- Total Time: 19 minutes
- Yield: 16 1x
Description
Rich, nostalgic black walnut fudge whispers sweet memories of grandma’s kitchen. Creamy chocolate melts with hearty walnuts, creating a classic dessert that connects generations with its simple, irresistible charm.
Ingredients
Main Ingredients:
- 2 cups sugar
- 1/2 cup cocoa powder
- 1 cup black walnuts (chopped)
Dairy Ingredients:
- 1 stick (113 grams / 4 ounces) butter
- 1/2 cup evaporated milk
Flavoring:
- 1 teaspoon vanilla extract
Instructions
- Meld butter, sugar, cocoa powder, and evaporated milk in a seasoned cast iron skillet over medium heat, stirring until ingredients seamlessly integrate.
- Continue heating, constantly agitating the mixture, until it reaches a vigorous, rolling boil that maintains consistent bubbling.
- Maintain the hard boil for precisely 4 minutes, ensuring continuous stirring to prevent scorching and promote even heat distribution.
- Immediately remove skillet from heat source and swiftly incorporate vanilla extract, infusing the mixture with aromatic richness.
- Gently fold black walnuts into the molten fudge, distributing them evenly throughout the silky chocolate base.
- Allow the fudge to gradually cool, periodically stirring to prevent surface hardening and maintain a smooth, glossy texture.
- When the mixture has slightly thickened but remains pourable, transfer it into a generously buttered pan, creating an even layer.
- Permit the fudge to achieve complete room temperature coolness, which typically requires approximately 2-3 hours.
- Slice into uniform squares or desired shapes, creating delectable individual portions ready for enjoyment.
- Store the fudge in an airtight container at room temperature, where it will maintain its rich, decadent quality for several days.
Notes
- Use a heavy-bottomed cast iron skillet for even heat distribution and to prevent burning the fudge mixture.
- Precisely time the 4-minute boiling period to achieve the perfect fudge consistency without overcooking.
- Toast black walnuts lightly before adding to enhance their rich, nutty flavor and create a more complex taste profile.
- For a gluten-free version, ensure all ingredients are certified gluten-free and check the vanilla extract’s source.
- Prep Time: 15 minutes
- Cook Time: 4 minutes
- Category: Desserts, Snacks
- Method: Boiling
- Cuisine: American
Nutrition
- Serving Size: 16
- Calories: 214
- Sugar: 27 g
- Sodium: 15 mg
- Fat: 12 g
- Saturated Fat: 7 g
- Unsaturated Fat: 4 g
- Trans Fat: 0.5 g
- Carbohydrates: 29 g
- Fiber: 2 g
- Protein: 3 g
- Cholesterol: 30 mg
Clara Bennett
Contributing Recipe Developer & Food Writer
Expertise
Baking and Pastry Development, Gluten-Free and Allergy-Friendly Recipe Creation, Culinary Storytelling and Food Journalism, Recipe Testing and Standardization, Southern Comfort Foods and Modern Twists
Education
Sullivan University – National Center for Hospitality Studies
Associate Degree in Culinary Arts
Focus: Baking and Pastry Arts, Recipe Testing, and Culinary Journalism.
Clara specialized in crafting desserts that blend classic Southern comfort with modern techniques, while developing strong writing skills to tell the story behind every dish.
Lane Community College (Certificate Program)
Certificate in Food Writing and Photography
Focus: Culinary storytelling, recipe formatting, food styling, and visual presentation.
Clara’s love of baking started young, powered by homemade pies, biscuits, and stories passed around the family table.
After earning her degree at Sullivan University and a food writing certificate at Lane Community College, she turned her passion into a craft: sharing recipes that are simple, soulful, and always full of heart.
She’s big on bold flavors, flexible ideas, and creating sweets that fit any table (yes, even if you’re gluten-free). When she’s not baking, you’ll find her wandering farmers’ markets, styling food for the next photo shoot, or working on her ever-growing recipe journal.