
Sweet & Nostalgic Peanut Butter And Jelly Cookies Recipe
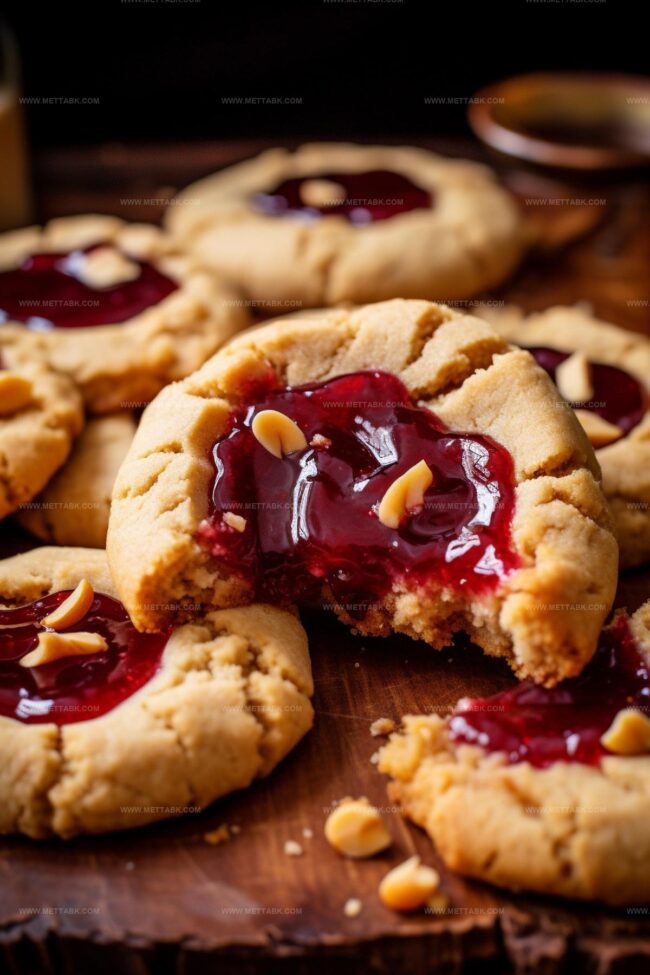
Crispy, chewy peanut butter and jelly cookies spark childhood memories with a delightful twist.
Nostalgic flavors dance across your palate in every delectable bite.
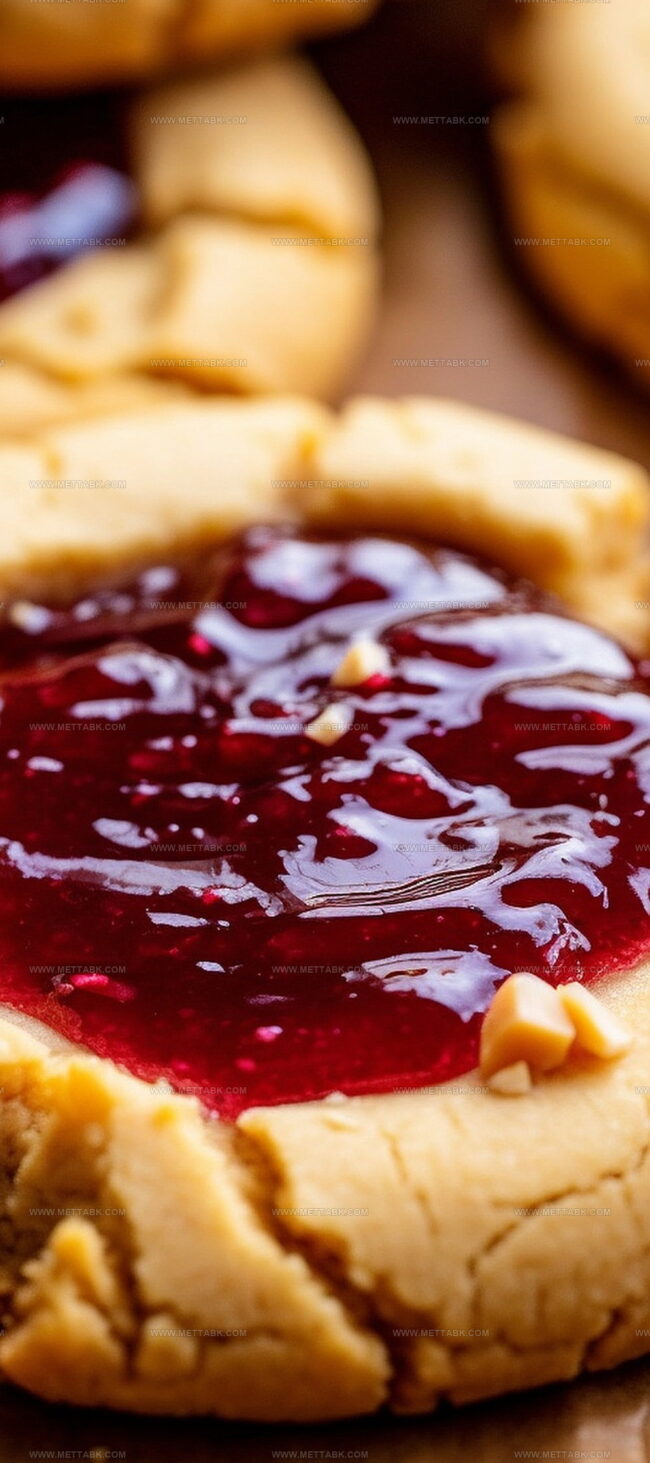
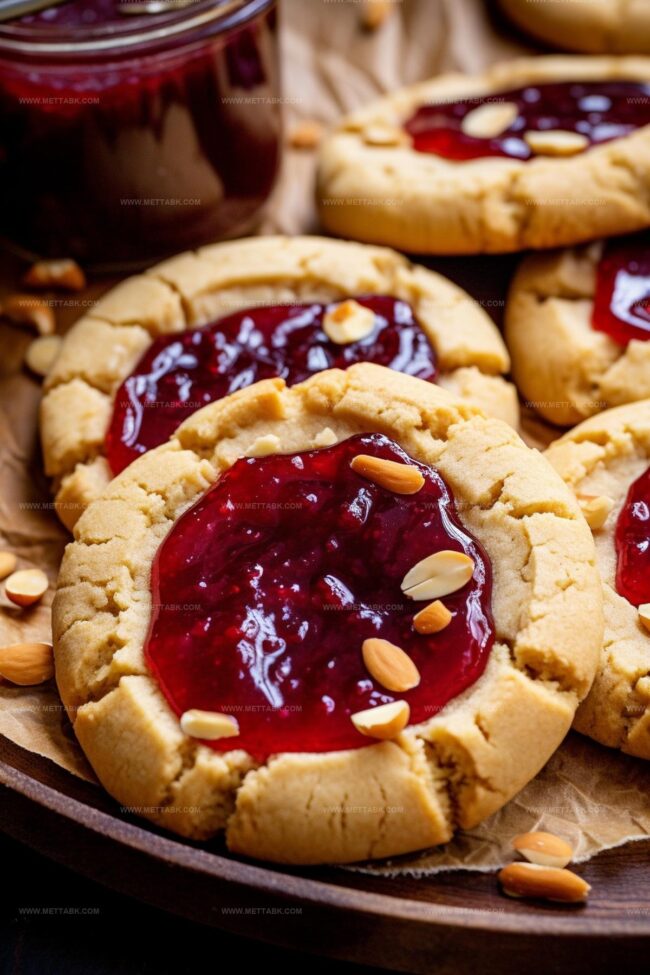
Sweet strawberry jam swirls through rich, creamy peanut butter dough like a classic comfort symphony.
Soft centers contrast with perfectly golden edges, creating an irresistible texture.
Memories of school lunches and after-school snacks come flooding back with each tender morsel.
Simple ingredients blend magic into these classic cookies that feel both familiar and exciting.
Why Peanut Butter and Jelly Cookies Are a Classic Treat
Ingredients for Peanut Butter and Jelly Cookies
How to Make Peanut Butter and Jelly Cookies
Step 1: Prepare the Oven
Heat the oven to 350 degrees Fahrenheit. Line two baking sheets with parchment paper or silicone baking mats.
Step 2: Cream the Butter
In a mixing bowl, cream the butter until smooth and silky. Scrape down the sides of the bowl to ensure even mixing.
Step 3: Add Sugars
Mix in the granulated and brown sugars. Blend until the mixture becomes light and fluffy, with no butter lumps remaining.
Step 4: Incorporate Peanut Butter
Add peanut butter to the sugar mixture. Stir until completely combined and uniform in texture.
Step 5: Mix Wet Ingredients
Combine the egg and vanilla extract. Blend thoroughly into the peanut butter mixture until fully incorporated.
Step 6: Prepare Dry Ingredients
Gather the dry ingredients:Lightly mix these ingredients together before adding to the wet mixture.
Step 7: Create Cookie Dough
Gently fold the dry ingredients into the wet mixture.
Mix until just combined, being careful not to overmix. The dough should be slightly rough with some flour still visible.
Scrape the bowl’s sides and bottom to ensure even mixing.
Step 8: Shape Cookie Balls
Roll the dough into balls, each about 1.5 inches in diameter.
Step 9: Flatten Cookies
Place dough balls on prepared baking sheets.
Dip a fork in sugar or flour to prevent sticking, then press a criss-cross pattern onto each cookie. Flatten to about 1/2 inch thickness.
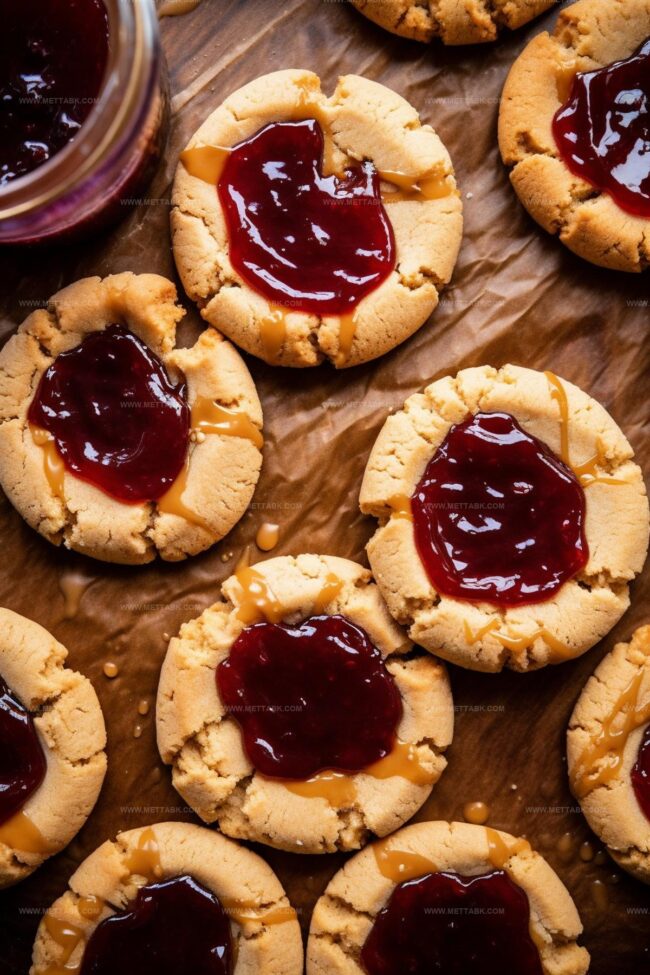
Step 10: Add Jam Filling
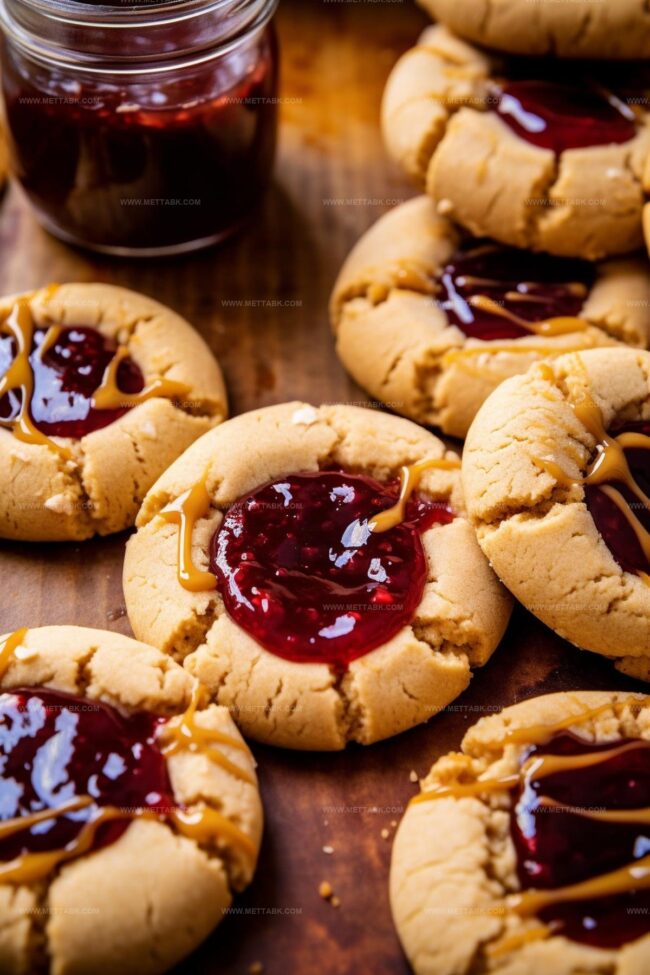
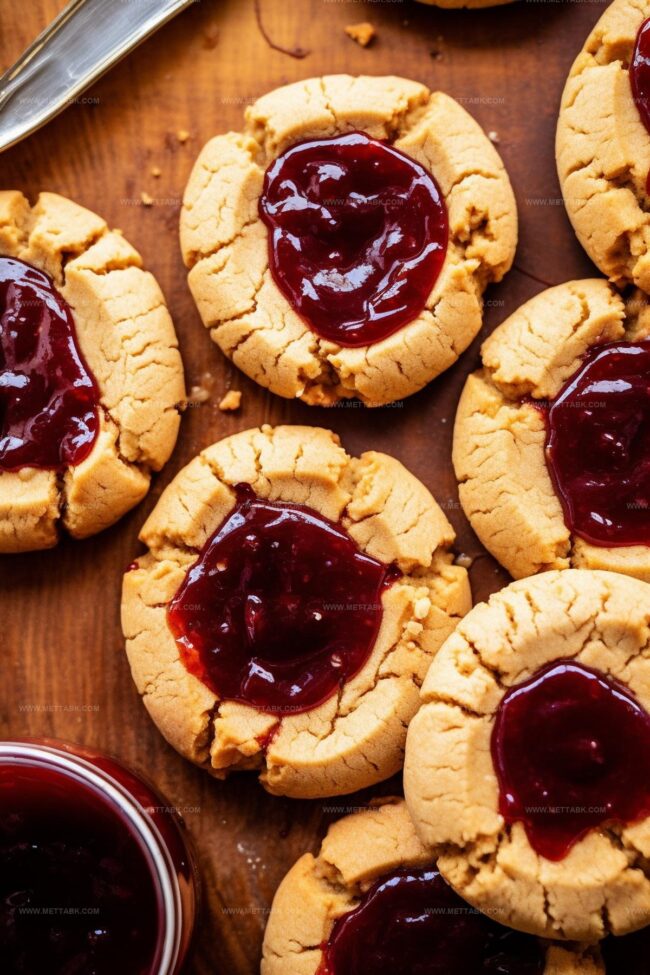
Smooth out the seedless jam to remove any lumps. Carefully place up to 1 teaspoon of jam in the center of each cookie, keeping it away from the edges.
Step 11: Bake the Cookies
Bake in the preheated oven for 13-15 minutes. Look for slight browning around the edges as a sign of doneness.
Step 12: Cool and Rest
Let the cookies sit on the baking sheets for 5-10 minutes. This helps them set and become more stable.
Step 13: Transfer and Cool Completely
Move the cookies to a cooling rack. Allow them to cool completely.
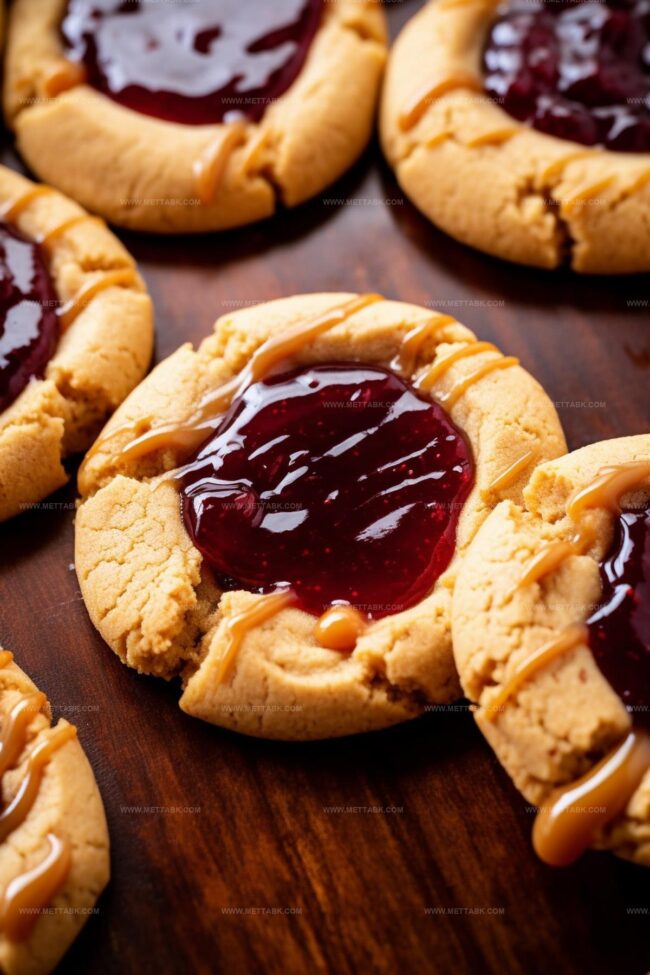
Step 14: Optional Decoration
For an extra touch, consider topping with:Step 15: Store and Enjoy
This recipe makes about 28 cookies. Store in an airtight container for up to three days.
Step 16: Freezing Option
The cookie dough freezes beautifully. Shape and flatten the cookies before freezing.
You can add jam before freezing, but do a quick initial freeze on a baking sheet first. Transfer to a freezer bag for long-term storage.
Tips for Soft and Flavorful PB&J Cookies
Variations of Peanut Butter and Jelly Cookies

Pairing Suggestions for PB&J Cookies
Storage Advice for Peanut Butter and Jelly Cookies
FAQs
Yes, crunchy peanut butter works great and adds extra texture to the cookies. Just ensure it’s well-mixed before adding to the dough.
Make a small indentation in the cookie center before adding jam, and use less than a teaspoon to keep it centered. Cold jam also helps prevent spreading.
While a mixer makes the process easier, you can mix the ingredients by hand using a wooden spoon or spatula. Just ensure ingredients are thoroughly combined without overmixing.
You can use all white sugar, but brown sugar adds moisture and a deeper flavor to the cookies. If substituting, the texture might be slightly different.
Print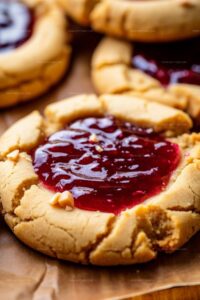
Peanut Butter And Jelly Cookies Recipe
- Total Time: 35 minutes
- Yield: 24 1x
Description
Nostalgic peanut butter and jelly cookies deliver classic childhood sandwich flavors in sweet cookie form. Comfort baking connects memories with delightful homemade treats you’ll savor bite by bite.
Ingredients
- 1 cup creamy peanut butter
- 1/2 cup (1 stick) butter
- 3/4 cup granulated sugar
- 1/4 cup packed brown sugar
- 1 large egg
- 1 tsp vanilla extract
- 1 1/2 cups all-purpose flour
- 1 tsp baking soda
- 1/4 tsp kosher salt
- 1/2 cup seedless jam
- Additional jam
- Melted peanut butter
- Chopped peanuts
Instructions
- Preheat the oven to 350°F and line two baking sheets with parchment paper or silicone mats.
- In a mixing bowl, cream butter until smooth, carefully scraping the bowl’s sides.
- Blend granulated and brown sugars into the butter, ensuring a fluffy, lump-free consistency.
- Incorporate peanut butter thoroughly into the sugar-butter mixture.
- Add egg and vanilla extract, mixing until completely integrated.
- Sift flour, baking soda, and kosher salt together on top of the wet ingredients.
- Gently mix dry and wet ingredients, stopping when a uniform dough forms. Avoid overmixing to maintain cookie tenderness.
- Roll the dough into 1.5-inch balls, spacing them evenly on prepared baking sheets.
- Use a fork dipped in sugar to create classic criss-cross patterns, flattening cookies to 1/2-inch thickness.
- Smooth out seedless jam, creating a small well in the center of each cookie.
- Carefully add a teaspoon of jam to the center of each cookie, keeping it contained within the cookie’s surface.
- Bake for 13-15 minutes until edges turn golden brown.
- Allow cookies to rest on baking sheets for 5-10 minutes before transferring to a cooling rack.
- Optional: Garnish with additional jam, melted peanut butter, or chopped peanuts for extra visual appeal.
- For make-ahead option, freeze formed cookies. Can be baked directly from frozen state with slight time adjustment.
- Store in an airtight container for up to three days, maintaining optimal freshness and texture.
Notes
- Swap peanut butter with almond or sunflower seed butter for nut-free alternatives that maintain similar creamy texture and richness.
- Consider using natural jam or preserves with lower sugar content to reduce overall sweetness and create a more balanced flavor profile.
- Chill the dough for 30 minutes before shaping to prevent excessive spreading and ensure more defined cookie edges during baking.
- Test cookie doneness by checking for golden-brown edges and slightly soft centers, which will continue firming up during cooling process.
- Prep Time: 20 minutes
- Cook Time: 15 minutes
- Category: Desserts, Snacks
- Method: Baking
- Cuisine: American
Nutrition
- Serving Size: 24
- Calories: 128 kcal
- Sugar: 7 g
- Sodium: 102 mg
- Fat: 7 g
- Saturated Fat: 2 g
- Unsaturated Fat: 4 g
- Trans Fat: 0 g
- Carbohydrates: 15 g
- Fiber: 1 g
- Protein: 3 g
- Cholesterol: 13 mg
Clara Bennett
Contributing Recipe Developer & Food Writer
Expertise
Baking and Pastry Development, Gluten-Free and Allergy-Friendly Recipe Creation, Culinary Storytelling and Food Journalism, Recipe Testing and Standardization, Southern Comfort Foods and Modern Twists
Education
Sullivan University – National Center for Hospitality Studies
Associate Degree in Culinary Arts
Focus: Baking and Pastry Arts, Recipe Testing, and Culinary Journalism.
Clara specialized in crafting desserts that blend classic Southern comfort with modern techniques, while developing strong writing skills to tell the story behind every dish.
Lane Community College (Certificate Program)
Certificate in Food Writing and Photography
Focus: Culinary storytelling, recipe formatting, food styling, and visual presentation.
Clara’s love of baking started young, powered by homemade pies, biscuits, and stories passed around the family table.
After earning her degree at Sullivan University and a food writing certificate at Lane Community College, she turned her passion into a craft: sharing recipes that are simple, soulful, and always full of heart.
She’s big on bold flavors, flexible ideas, and creating sweets that fit any table (yes, even if you’re gluten-free). When she’s not baking, you’ll find her wandering farmers’ markets, styling food for the next photo shoot, or working on her ever-growing recipe journal.