Zesty Pineapple Cheese Ball Recipe: A Tangy Party Delight
Crafting a delightful pineapple cheese ball can transform your next gathering into a memorable culinary adventure.
Creamy textures blend with sweet and tangy notes, creating an irresistible appetizer.
Soft cream cheese provides the perfect canvas for tropical flavors.
Unexpected ingredients dance together, promising a crowd-pleasing sensation that sparks conversation.
Guests will be intrigued by the unique combination of smooth cheese and bright pineapple.
Quick preparation means you can whip up this delectable treat in minutes.
Each bite promises a burst of flavor that keeps everyone coming back for more.
Pineapple Cheese Ball That Shines

Ingredients Needed for Pineapple Cheese Ball

Main Ingredients:
Cheese Base:Flavor Enhancers:Binding and Coating Ingredients:Coating:Preparation Ingredients:Serving Accompaniments:How to Make Pineapple Cheese Ball
Step 1: Mix Creamy Cheese Ingredients
Grab a medium mixing bowl and toss in softened cream cheese. Dive into creating a flavor explosion by adding:Whip these ingredients with an electric mixer until they transform into a silky smooth blend.
Pop the bowl into the refrigerator for a quick 30-minute flavor fusion.
Step 2: Shape The Magical Cheese Ball
Pull out the chilled mixture and transfer it onto a sheet of plastic wrap.
Use the wrap as your sculpting tool to shape a perfect round ball. Don’t stress about messiness – the plastic wrap is your secret weapon for creating a smooth, uniform sphere.
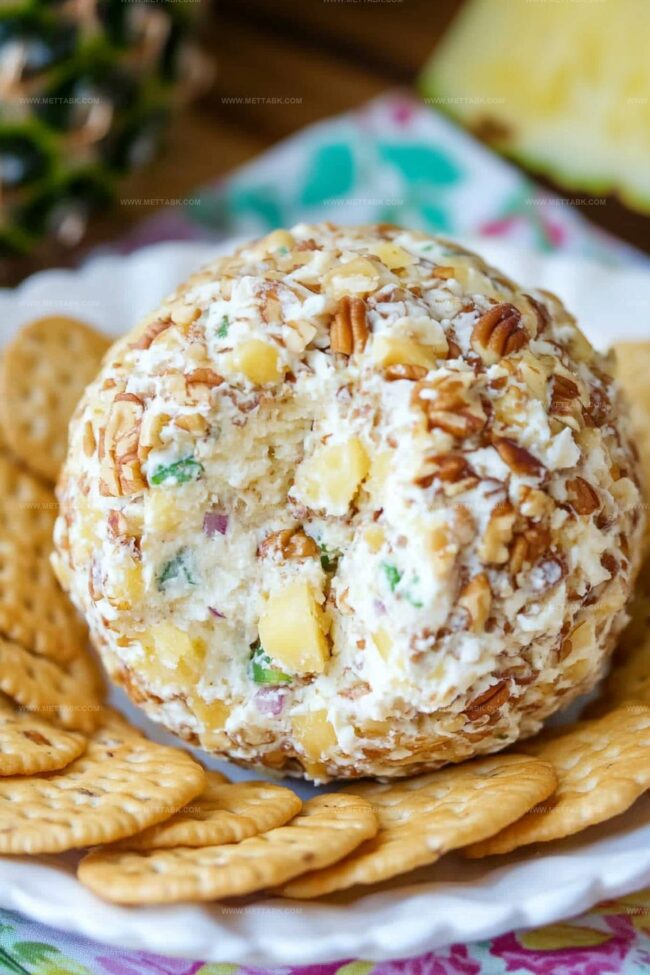
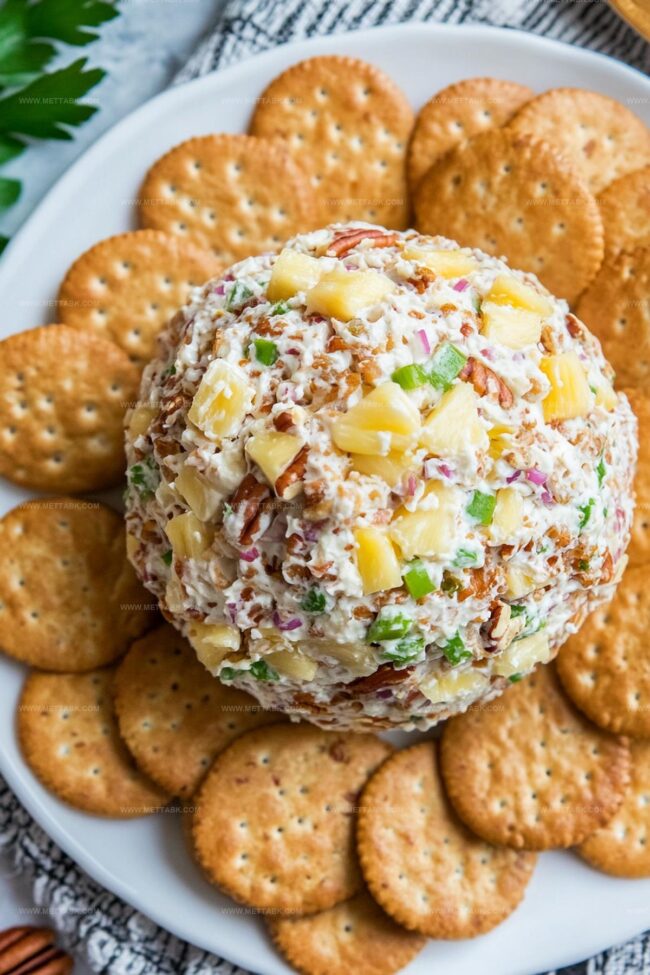
Step 3: Roll In Crunchy Walnut Coating
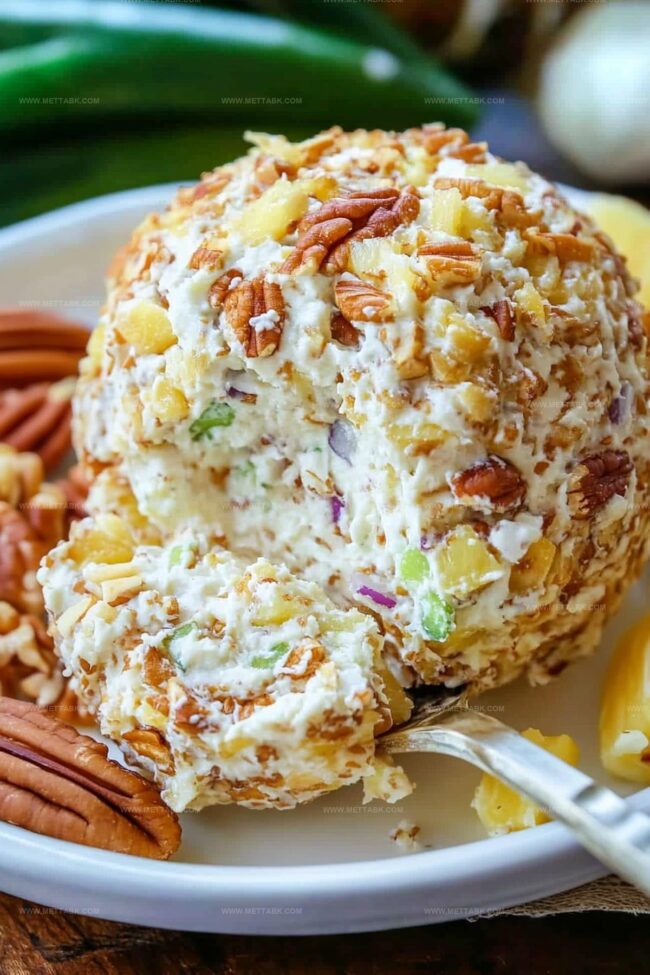
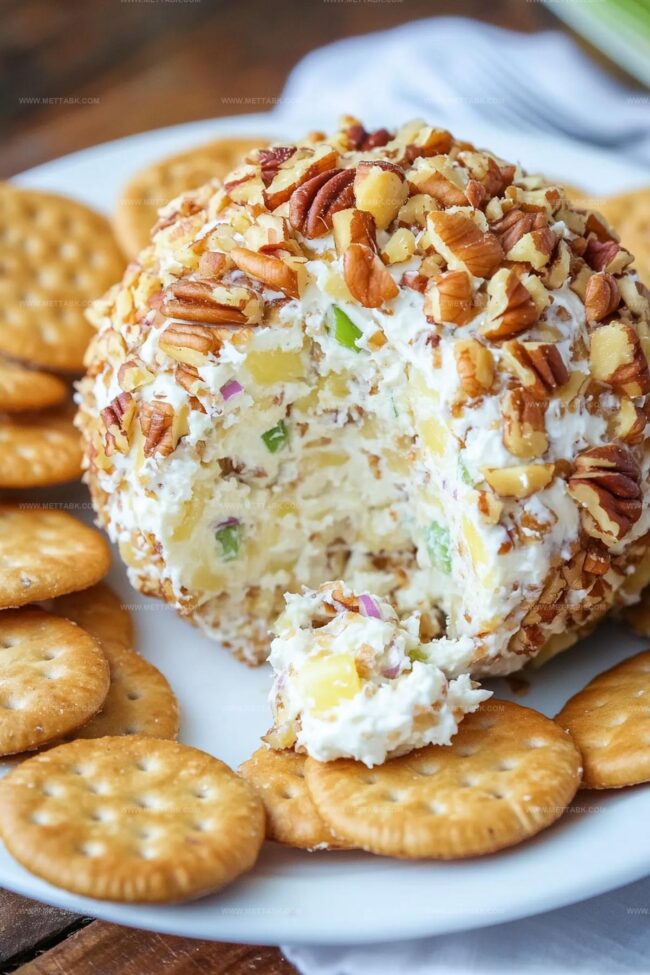
Spread chopped walnuts on a flat surface. Unwrap your cheese mixture and gently roll it through the nuts, ensuring every inch gets a delicious nutty embrace.
Press softly to help the walnuts stick and create a gorgeous textured exterior.
Step 4: Chill And Prepare For Serving
Rewrap the nutty cheese ball in fresh plastic wrap.
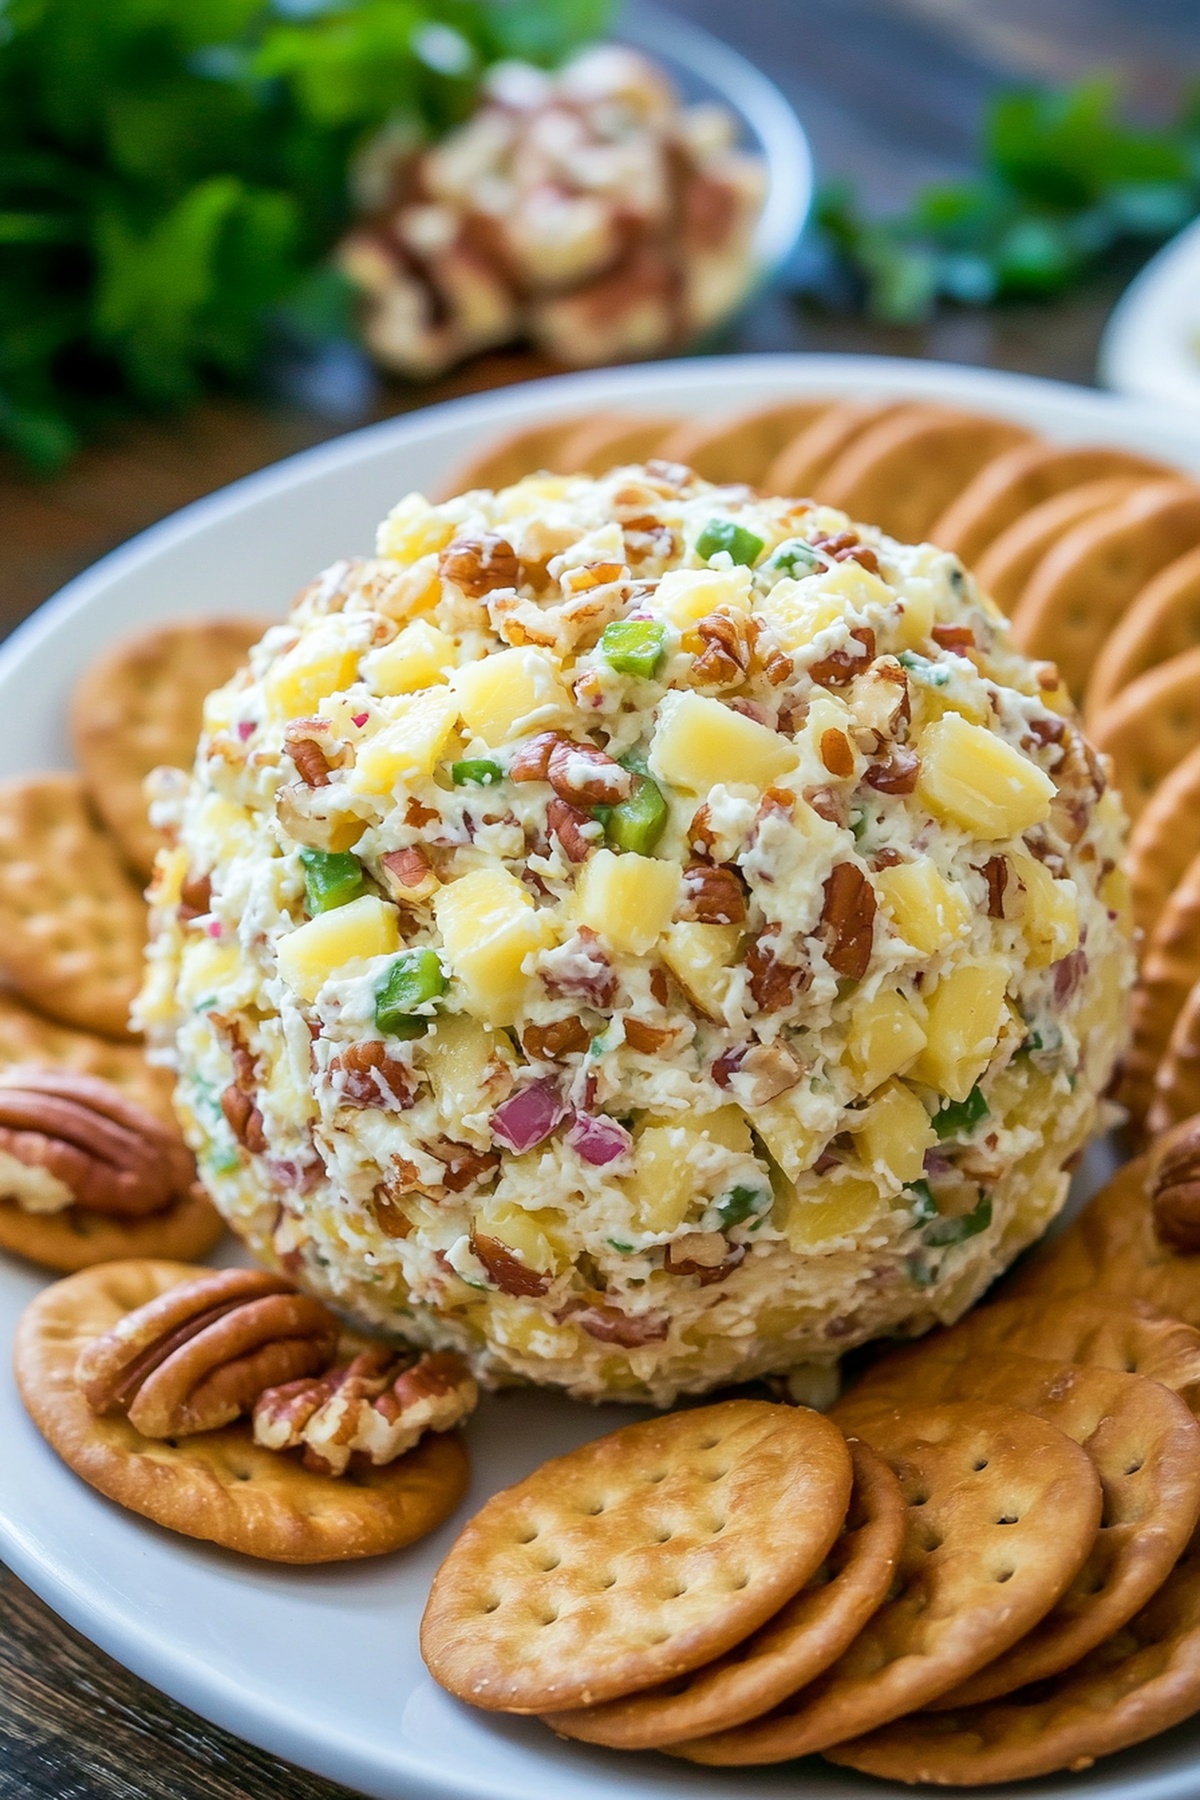
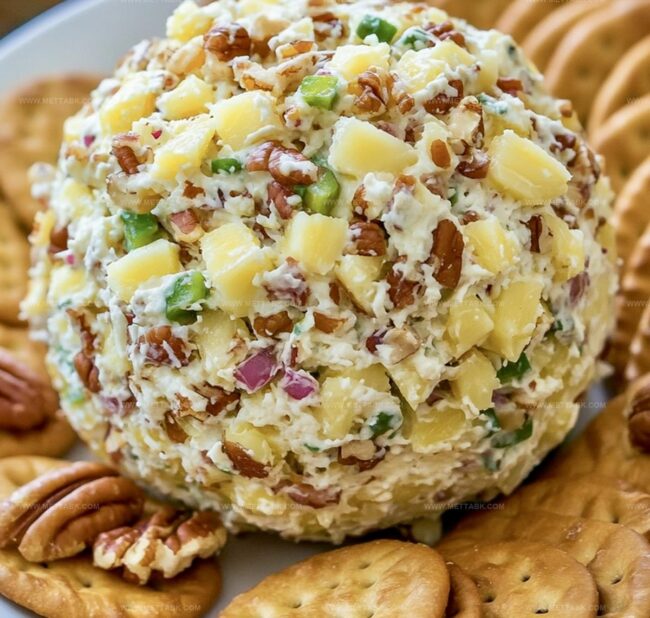
Let it rest in the refrigerator overnight to firm up and develop deeper flavors. When ready to serve, transfer to a beautiful platter and surround with crisp crackers and fresh vegetable sticks for dipping.
Tips to Perfect Pineapple Cheese Ball
Flavor Variations on Pineapple Cheese Ball
Pairing Ideas for Pineapple Cheese Ball
Storing Pineapple Cheese Ball Properly
FAQs

Yes, except for the walnuts and cream cheese, this recipe is vegetarian-friendly. Those with nut allergies can substitute the walnuts with toasted seeds or breadcrumbs.
Absolutely! You can prepare this cheese ball up to 2-3 days in advance. Keep it wrapped tightly in plastic wrap in the refrigerator until ready to serve.
A sweet onion or white onion provides the best flavor. Avoid using strong red onions as they can overpower the delicate pineapple and cream cheese blend.
Print
Pineapple Cheese Ball Recipe
- Total Time: 12 hours 50 minutes
- Yield: 12 1x
Description
Creamy pineapple cheese ball delights guests with tropical flavors from Southern kitchens. Smooth cream cheese mingles with crushed pineapple, creating a party-perfect appetizer you’ll crave at gatherings.
Ingredients
- 16 oz (454 g) cream cheese (softened)
- 8 oz (227 g) unsweetened crushed pineapple (thoroughly drained)
- 1.5 cups (180 g) walnuts (finely chopped)
- 2 tsp seasoned salt
- 1/4 cup (40 g) green pepper (finely chopped)
- 2 tbsps onion (finely chopped)
- Assorted crackers for serving
- Fresh vegetables for serving
Instructions
- Craft the creamy base by combining softened cream cheese with drained crushed pineapple, minced green pepper, finely diced onion, and seasoned salt in a mixing bowl. Whip the ingredients using an electric mixer until smooth and uniform.
- Refrigerate the mixture for 30 minutes to allow flavors to develop and texture to slightly firm up.
- Transfer the chilled mixture onto plastic wrap, using the wrap to shape the mixture into a compact, rounded form. The wrap will help manage the soft consistency and maintain a neat spherical shape.
- Spread chopped walnuts on a flat surface, then carefully roll the cheese mixture, ensuring complete and even nut coverage by gently pressing the nuts into the exterior.
- Wrap the walnut-crusted cheese ball in fresh plastic wrap and refrigerate overnight. This extended chilling period helps the cheese ball solidify and intensify its flavor profile.
- When ready to serve, unwrap the cheese ball and place on a decorative serving platter. Accompany with an array of crisp crackers and fresh vegetable crudités for a delightful appetizer presentation.
Notes
- Draining pineapple thoroughly prevents excess moisture from making the cheese ball soggy, ensuring a perfect texture and consistency.
- Softening cream cheese at room temperature helps create a smoother, more easily blended mixture without lumps.
- Consider using low-fat cream cheese for a lighter version, which works great for health-conscious guests without compromising flavor.
- Experiment with alternative nut coatings like pecans or almonds for different flavor profiles and dietary preferences.
- Prep Time: 20 minutes
- Cook Time: 12 hours 30 minutes
- Category: Appetizer, Snacks
- Method: Blending
- Cuisine: American
Nutrition
- Serving Size: 12
- Calories: 273 kcal
- Sugar: 2 g
- Sodium: 340 mg
- Fat: 24 g
- Saturated Fat: 5 g
- Unsaturated Fat: 17 g
- Trans Fat: 0 g
- Carbohydrates: 7 g
- Fiber: 2 g
- Protein: 6 g
- Cholesterol: 30 mg
Clara Bennett
Contributing Recipe Developer & Food Writer
Expertise
Baking and Pastry Development, Gluten-Free and Allergy-Friendly Recipe Creation, Culinary Storytelling and Food Journalism, Recipe Testing and Standardization, Southern Comfort Foods and Modern Twists
Education
Sullivan University – National Center for Hospitality Studies
Associate Degree in Culinary Arts
Focus: Baking and Pastry Arts, Recipe Testing, and Culinary Journalism.
Clara specialized in crafting desserts that blend classic Southern comfort with modern techniques, while developing strong writing skills to tell the story behind every dish.
Lane Community College (Certificate Program)
Certificate in Food Writing and Photography
Focus: Culinary storytelling, recipe formatting, food styling, and visual presentation.
Clara’s love of baking started young, powered by homemade pies, biscuits, and stories passed around the family table.
After earning her degree at Sullivan University and a food writing certificate at Lane Community College, she turned her passion into a craft: sharing recipes that are simple, soulful, and always full of heart.
She’s big on bold flavors, flexible ideas, and creating sweets that fit any table (yes, even if you’re gluten-free). When she’s not baking, you’ll find her wandering farmers’ markets, styling food for the next photo shoot, or working on her ever-growing recipe journal.