
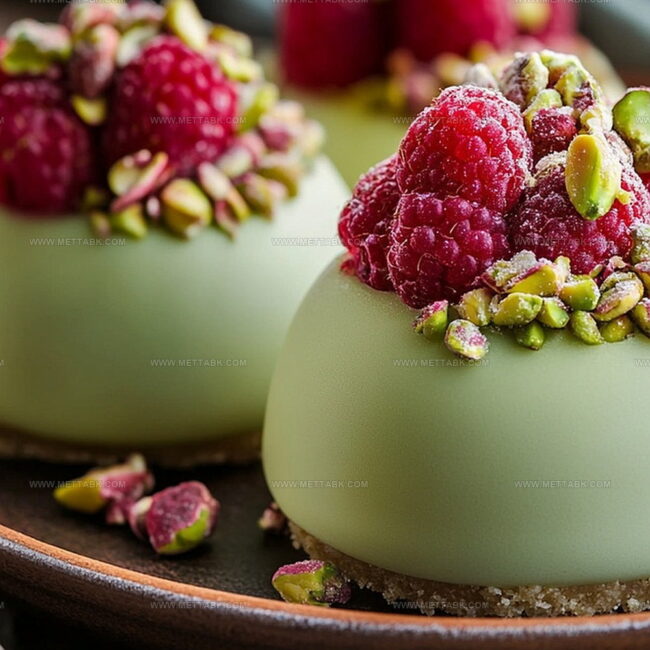
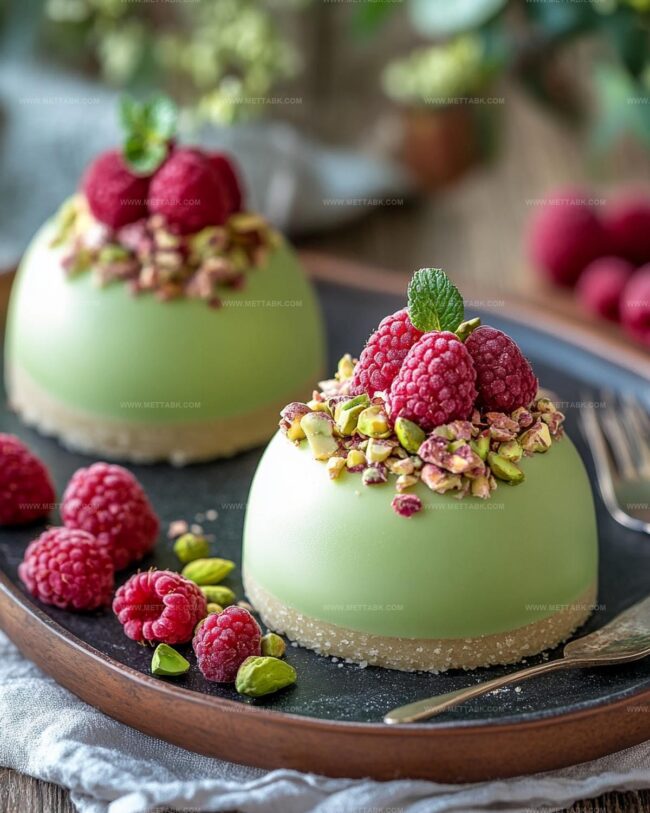
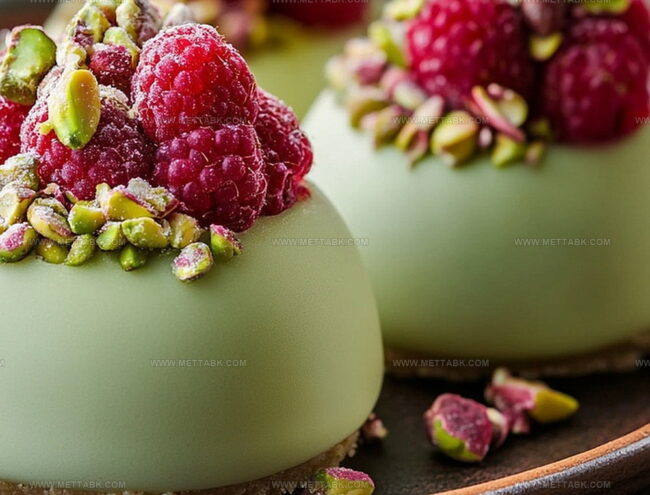
The Dreamiest Pistachio & Raspberry Cheesecake Domes Recipe
Nestled between creamy layers and vibrant fruit, this pistachio & raspberry cheesecake dome offers a mesmerizing culinary adventure.
Smooth cream cheese blends with delicate nutty notes, creating an irresistible harmony of flavors.
Delicate pistachio crumbles dance alongside tangy raspberry swirls, promising a sensory experience that delights every palate.
Rich textures meld seamlessly, inviting you to savor each luxurious bite.
Elegant yet approachable, these miniature desserts showcase a perfect balance of sophistication and comfort.
Soft, velvety surfaces give way to bursts of intense fruity sweetness and subtle nuttiness.
Prepare to indulge in a dessert that transforms an ordinary moment into something extraordinary.
Why Cheesecake Domes Are a Stunning Dessert
What’s Inside These Raspberry Cheesecake Domes
Fruit Base:Cheesecake Filling:Glaze and Decoration:How to Make These Gorgeous Cheesecake Domes
Step 1: Create Raspberry Heart
Toss raspberries, sugar, and water into a saucepan. Simmer the mixture until raspberries dissolve completely.
Strain the puree to remove any seeds. Sprinkle gelatin over cold water and let it bloom.
Stir the bloomed gelatin into warm puree until fully integrated. Pour the vibrant mixture into silicone molds or ice cube trays.
Slide into freezer and let solidify.
Step 2: Whip Pistachio Cheesecake Base
Scatter gelatin over cold water and allow it to rest.
Whisk cream cheese with sugar, pistachio paste, and vanilla extract until silky smooth. Gently incorporate the dissolved gelatin.
Tenderly fold in whipped heavy cream until perfectly blended.
Step 3: Shape Dreamy Domes
Fill half-sphere silicone molds halfway with pistachio cheesecake mixture.
Nestle frozen raspberry centers into each mold’s middle. Cover with remaining cheesecake mixture, smoothing the surface elegantly.
Transfer to freezer and chill for minimum 4 hours or overnight.
Step 4: Craft Emerald Glaze
Bloom gelatin in cold water.
Combine water, sugar, and sweetened condensed milk in saucepan. Warm gently without boiling.
Mix in bloomed gelatin and melted white chocolate. Add green food coloring and blend until velvety.
Cool glaze to approximately 90°F.
Step 5: Finish With Flair
Unmold frozen cheesecake domes onto wire rack.
Cascade green glaze over each dome, allowing excess to drip away. Once set, embellish with delicate edible gold leaf and sprinkle of crushed pistachios.
Tips That Help Cheesecake Domes Turn Out Right
Fun Spins on Raspberry Cheesecake Dome Creations
What Complements Raspberry Cheesecake Domes Best
Perfect Pairings for Pistachio & Raspberry Cheesecake Domes
Select a delicate white tea or jasmine green tea to complement the subtle pistachio and bright raspberry notes, enhancing the dessert’s elegant flavor profile without overpowering its nuanced sweetness.
Pair with a chilled limoncello or raspberry liqueur to amplify the fruity undertones and provide a smooth, refreshing contrast to the creamy cheesecake texture, creating a luxurious tasting experience.
Serve alongside fresh raspberries and crushed pistachio brittle to echo the dessert’s core ingredients, adding textural contrast and intensifying the existing flavor dimensions with a delightful crunch.
Storing Your Cheesecake Domes the Right Way
FAQs
Raspberries, sugar, water, and gelatin are the main components. The mixture is cooked, strained, and then frozen to create a solid center for the cheesecake domes.
Blooming gelatin helps it dissolve smoothly and evenly in the mixture, preventing lumps and ensuring a consistent texture in both the raspberry center and cheesecake filling.
While pistachio paste gives the unique flavor, you can use ground pistachios or pistachio extract as alternatives, though the intensity of flavor might differ slightly.
Print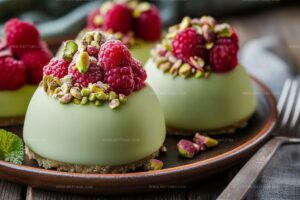
Pistachio & Raspberry Cheesecake Domes Recipe
- Total Time: 6 hours 45 minutes
- Yield: 6 1x
Description
Pistachio & Raspberry Cheesecake Domes deliver an elegant dessert experience that marries creamy textures with nutty crunch and fruity brightness. Smooth cheesecake nestled in delicate pistachio crusts promises a sophisticated treat you’ll savor with pure culinary pleasure.
Ingredients
Cheesecake Base:
- 8 ounces (225 grams) softened cream cheese
- 1/4 cup granulated sugar
- 1/4 cup pistachio paste
- 1/2 teaspoon pure vanilla extract
Stabilizing Ingredients:
- 1 teaspoon gelatin powder
- 2 tablespoons cold water
Creamy Texture Enhancers:
- 1/4 cup heavy cream, whipped to soft peaks
Instructions
- Create a vibrant raspberry core by simmering raspberries, sugar, and water over medium heat until completely broken down.
- Strain the raspberry mixture to eliminate seeds, ensuring a smooth texture.
- Dissolve gelatin in cold water and incorporate into the warm raspberry puree until fully integrated.
- Transfer the raspberry mixture into silicone molds or ice cube trays, then freeze until solidly set.
- Activate gelatin by sprinkling over cold water and allowing to rest for 5 minutes.
- Whip cream cheese with sugar, pistachio paste, and vanilla extract until achieving a silky consistency.
- Gently integrate the dissolved gelatin into the cream cheese mixture.
- Delicately fold whipped heavy cream into the mixture, creating a light and airy texture.
- Fill half-sphere silicone molds partially with the pistachio cheesecake filling.
- Position a frozen raspberry center in the middle of each mold, then cover completely with remaining cheesecake mixture.
- Freeze for 4-6 hours or overnight until thoroughly set.
- Activate gelatin by soaking in cold water.
- Warm water, sugar, and sweetened condensed milk in a saucepan, avoiding boiling.
- Incorporate bloomed gelatin and melted white chocolate, mixing thoroughly.
- Add green food coloring and blend until achieving a uniform shade, cooling to 90F (32C).
- Unmold frozen cheesecake domes onto a wire rack positioned over a collection tray.
- Drizzle green glaze evenly over each dome, allowing excess to drain.
- Finish by adorning with edible gold leaf and crushed pistachios for an elegant presentation.
Notes
- Chill your tools and bowls beforehand to keep the cheesecake mixture cool and smooth during preparation.
- Use fresh, high-quality raspberries for the most vibrant and intense fruit flavor in the center.
- Ensure gelatin is completely dissolved to prevent lumpy textures in both the raspberry center and cheesecake filling.
- For a gluten-free version, verify that all ingredients, especially pistachio paste and gelatin, are certified gluten-free.
- Prep Time: 45 minutes
- Cook Time: 6 hours
- Category: Desserts
- Method: Freezing
- Cuisine: American
Nutrition
- Serving Size: 6
- Calories: 181 kcal
- Sugar: 6 g
- Sodium: 110 mg
- Fat: 15 g
- Saturated Fat: 7 g
- Unsaturated Fat: 6 g
- Trans Fat: 0.2 g
- Carbohydrates: 7 g
- Fiber: 1 g
- Protein: 4 g
- Cholesterol: 50 mg
Clara Bennett
Contributing Recipe Developer & Food Writer
Expertise
Baking and Pastry Development, Gluten-Free and Allergy-Friendly Recipe Creation, Culinary Storytelling and Food Journalism, Recipe Testing and Standardization, Southern Comfort Foods and Modern Twists
Education
Sullivan University – National Center for Hospitality Studies
Associate Degree in Culinary Arts
Focus: Baking and Pastry Arts, Recipe Testing, and Culinary Journalism.
Clara specialized in crafting desserts that blend classic Southern comfort with modern techniques, while developing strong writing skills to tell the story behind every dish.
Lane Community College (Certificate Program)
Certificate in Food Writing and Photography
Focus: Culinary storytelling, recipe formatting, food styling, and visual presentation.
Clara’s love of baking started young, powered by homemade pies, biscuits, and stories passed around the family table.
After earning her degree at Sullivan University and a food writing certificate at Lane Community College, she turned her passion into a craft: sharing recipes that are simple, soulful, and always full of heart.
She’s big on bold flavors, flexible ideas, and creating sweets that fit any table (yes, even if you’re gluten-free). When she’s not baking, you’ll find her wandering farmers’ markets, styling food for the next photo shoot, or working on her ever-growing recipe journal.