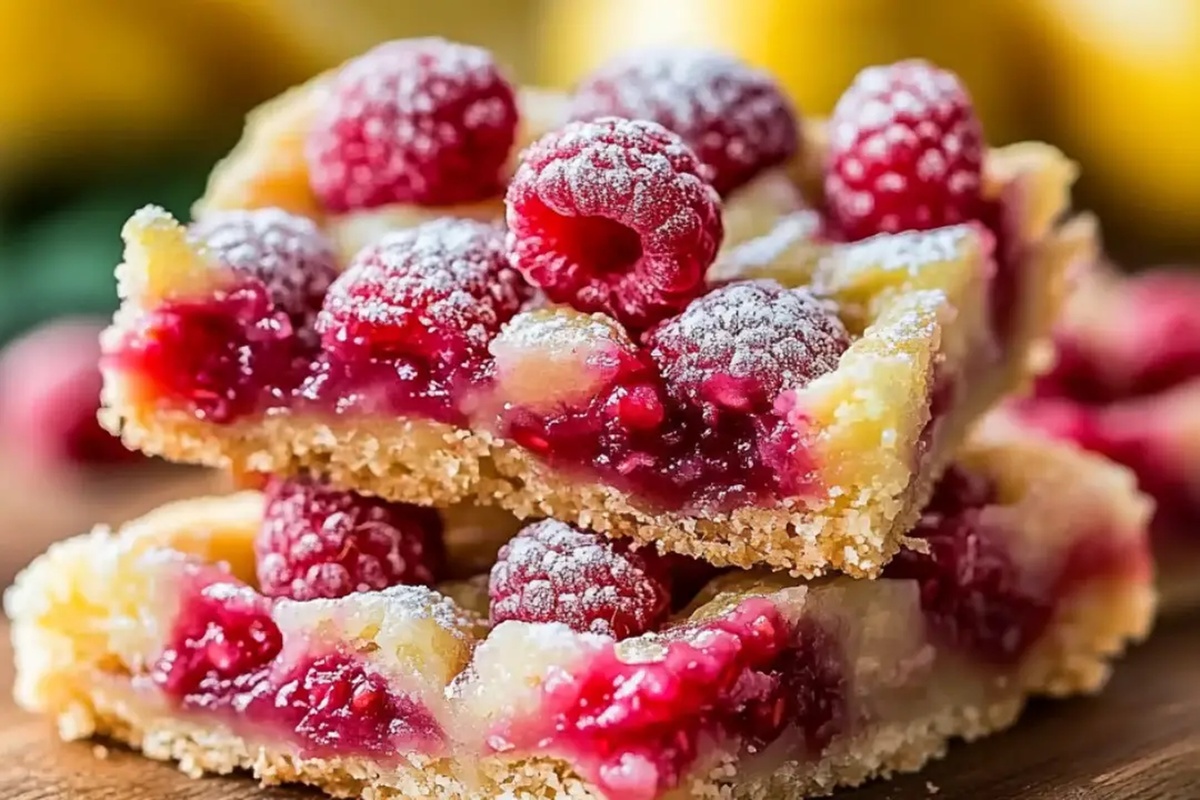
The Zesty Raspberry Lemon Tart Bars Recipe You’ll Adore
Crafting a delightful raspberry lemon tart bars recipe promises a burst of vibrant flavors that dance across your palate.
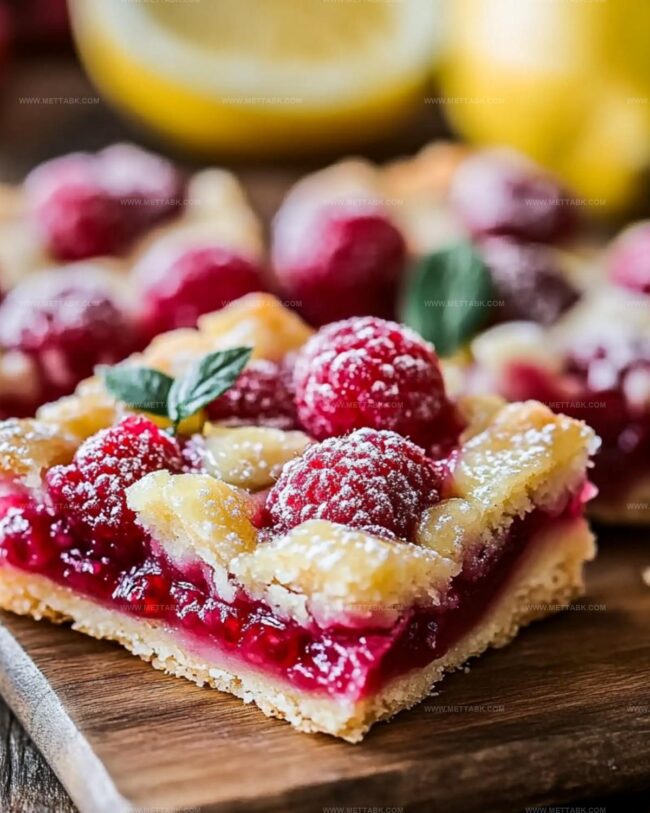
Bright citrus notes intertwine with sweet, juicy berries in this elegant dessert.
Summer afternoons feel magical when you slice into these tangy-sweet treats.
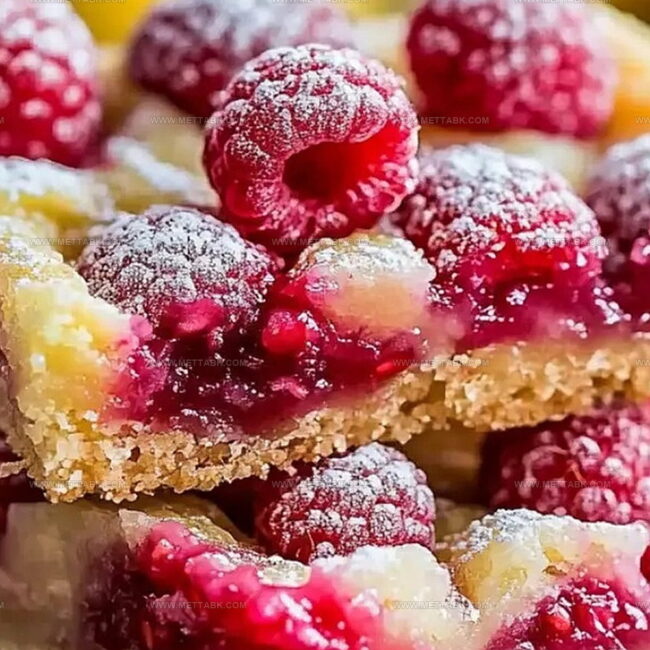
Each bite combines silky smooth lemon curd with fresh raspberry intensity.
Delicate pastry creates a perfect crisp foundation for the luscious filling.
Light and refreshing, these bars become an instant crowd-pleaser at any gathering.
Why These Tart Bars Hit All the Notes
What Goes in Raspberry Lemon Tart Bars
For the Crust:For the Filling:For the Serving:How to Make Raspberry Lemon Tart Bars Today
Step 1: Mix Crust Ingredients
Grab your food processor and combine flour, powdered sugar, and salt. Pulse these dry ingredients until well mixed.
Slice cold butter into small chunks and add to the processor. Pulse until the mixture looks like tiny pebbles.
In a separate bowl, whisk together buttermilk, egg yolks, and vanilla extract. While the processor runs, slowly pour in the wet ingredients and mix until the dough starts clumping together.
Step 2: Chill and Shape Crust
Transfer the dough onto plastic wrap and shape into a smooth disc. Wrap tightly and refrigerate for one hour or freeze for 15-20 minutes.
Preheat the oven to 375°F. Grease an 8×8 inch baking pan.
Press the chilled dough evenly across the bottom and slightly up the sides of the pan. Freeze the pan for an additional 20 minutes.
Step 3: Partially Bake Crust
Remove the plastic wrap and bake the crust for 20-25 minutes until set but not golden brown. Reduce oven temperature to 325°F.
Step 4: Prepare Raspberry Topping
In a bowl, gently mix raspberries with sugar. Let the berries sit and release their juices while preparing the filling.
Step 5: Create Lemon Filling
In a separate bowl, whisk together:Mix until the color turns pale yellow. Stir in lemon juice until fully combined.
Step 6: Assemble and Bake Bars
Scatter prepared raspberries over the warm crust. Pour any raspberry juice into the lemon filling and whisk again.
Pour the lemon filling evenly over the raspberries and crust. Bake at 325°F for 20-30 minutes until the center is set and no longer wobbles.
Step 7: Cool and Serve
Allow bars to cool completely before slicing. Serve immediately or refrigerate overnight for enhanced flavor.
The bars can be stored wrapped in the refrigerator and enjoyed within 2-3 days.
Tricks to Get Tart Bars Just Right
Raspberry Tart Bars You Can Twist Creatively
What Tastes Great With Lemon Tart Bars
Keep Raspberry Lemon Tart Bars Fresh and Bright

Wrap the tart bars tightly in plastic wrap or aluminum foil, keeping them in an airtight container. Enjoy within 3-4 days for optimal freshness and taste.
Layer bars between parchment paper in a freezer-safe container. Freeze up to 2 months. Thaw overnight in the refrigerator before serving.
Warm individual bars in the microwave for 10-15 seconds on low power to maintain texture. Alternatively, let bars sit at room temperature for 15-20 minutes to soften naturally.
Dust with powdered sugar or add fresh raspberries before serving to refresh the appearance and enhance the flavor profile.
FAQs
Yes, you can use frozen raspberries. Thaw and drain them completely before mixing with sugar to prevent excess moisture in the filling.
Freeze the crust before baking and pre-bake it until set. This helps create a barrier that prevents the filling from making the crust soggy.
You can use a pastry cutter or two knives to cut the cold butter into the flour mixture until it resembles coarse crumbs. Mix wet ingredients by hand until the dough comes together.
The filling is done when the center is set and no longer jiggles when you gently shake the pan. It should look slightly firm but not completely solid.
Print
Raspberry Lemon Tart Bars Recipe
- Total Time: 1 hour 45 minutes
- Yield: 12 1x
Description
Delightful raspberry lemon tart bars blend zesty citrus with sweet berry essence, creating a perfect summer dessert. Creamy filling nestled on a buttery crust promises refreshing flavors you’ll savor with each elegant bite.
Ingredients
Main Ingredients:
- 1 cup cold unsalted butter, cubed
- 2 1/2 cups flour
- 1 1/3 cups powdered sugar
- 1 1/3 cups raspberries
- 1 3/4 cups sugar
- 4 large eggs
- 2/3 cup lemon juice
Supporting Ingredients:
- 2 tablespoons buttermilk
- 2 large egg yolks
- 3/4 teaspoon vanilla extract
- 3 tablespoons flour
- 1 teaspoon lemon zest
Finishing Ingredients:
- Pinch of salt
Instructions
- Craft the foundation by combining buttermilk, egg yolks, and vanilla in a compact vessel. Set aside momentarily.
- Utilize a food processor to blend flour, powdered sugar, and salt into a uniform mixture.
- Incorporate cold butter and pulse until the texture resembles coarse pebbles.
- Stream wet ingredients while processor operates, allowing dough to cohesively form.
- Transfer dough onto plastic wrap, shape into a compact disc, and refrigerate for 60 minutes or freeze for 15-20 minutes.
- Heat oven to 375F (190C).
- Gently press chilled dough into a greased 8×8 pan, ensuring complete bottom coverage and slight side elevation.
- Freeze prepared crust for 20 minutes, then bake for 20-25 minutes until firmly set but not golden.
- Reduce oven temperature to 325F (163C).
- Delicately combine raspberries with sugar, allowing natural juices to emerge.
- Whisk eggs, remaining sugar, flour, and lemon zest until achieving a pale yellow consistency.
- Integrate lemon juice thoroughly into the mixture.
- Distribute macerated raspberries across warm crust.
- Pour raspberry liquid into lemon filling, whisking again, then evenly spread over crust.
- Bake at 325F for 20-30 minutes until center stabilizes and no longer trembles.
- Allow complete cooling before slicing.
- Serve immediately or refrigerate overnight to enhance flavor complexity.
Notes
- Chill the dough thoroughly to prevent shrinkage and ensure a crisp, flaky crust that holds its shape perfectly.
- Macerate raspberries with sugar to release natural juices, intensifying their sweetness and creating a more vibrant flavor profile.
- Use room temperature eggs for the filling to guarantee smooth, even mixing and a silky texture without lumps.
- Consider swapping raspberries with other seasonal berries like blackberries or strawberries for delightful flavor variations.
- Prep Time: 30 minutes
- Cook Time: 1 hour 15 minutes
- Category: Desserts
- Method: Baking
- Cuisine: American
Nutrition
- Serving Size: 12
- Calories: 203 kcal
- Sugar: 14 g
- Sodium: 37 mg
- Fat: 11 g
- Saturated Fat: 7 g
- Unsaturated Fat: 4 g
- Trans Fat: 0.1 g
- Carbohydrates: 23 g
- Fiber: 2 g
- Protein: 3 g
- Cholesterol: 57 mg
Clara Bennett
Contributing Recipe Developer & Food Writer
Expertise
Baking and Pastry Development, Gluten-Free and Allergy-Friendly Recipe Creation, Culinary Storytelling and Food Journalism, Recipe Testing and Standardization, Southern Comfort Foods and Modern Twists
Education
Sullivan University – National Center for Hospitality Studies
Associate Degree in Culinary Arts
Focus: Baking and Pastry Arts, Recipe Testing, and Culinary Journalism.
Clara specialized in crafting desserts that blend classic Southern comfort with modern techniques, while developing strong writing skills to tell the story behind every dish.
Lane Community College (Certificate Program)
Certificate in Food Writing and Photography
Focus: Culinary storytelling, recipe formatting, food styling, and visual presentation.
Clara’s love of baking started young, powered by homemade pies, biscuits, and stories passed around the family table.
After earning her degree at Sullivan University and a food writing certificate at Lane Community College, she turned her passion into a craft: sharing recipes that are simple, soulful, and always full of heart.
She’s big on bold flavors, flexible ideas, and creating sweets that fit any table (yes, even if you’re gluten-free). When she’s not baking, you’ll find her wandering farmers’ markets, styling food for the next photo shoot, or working on her ever-growing recipe journal.