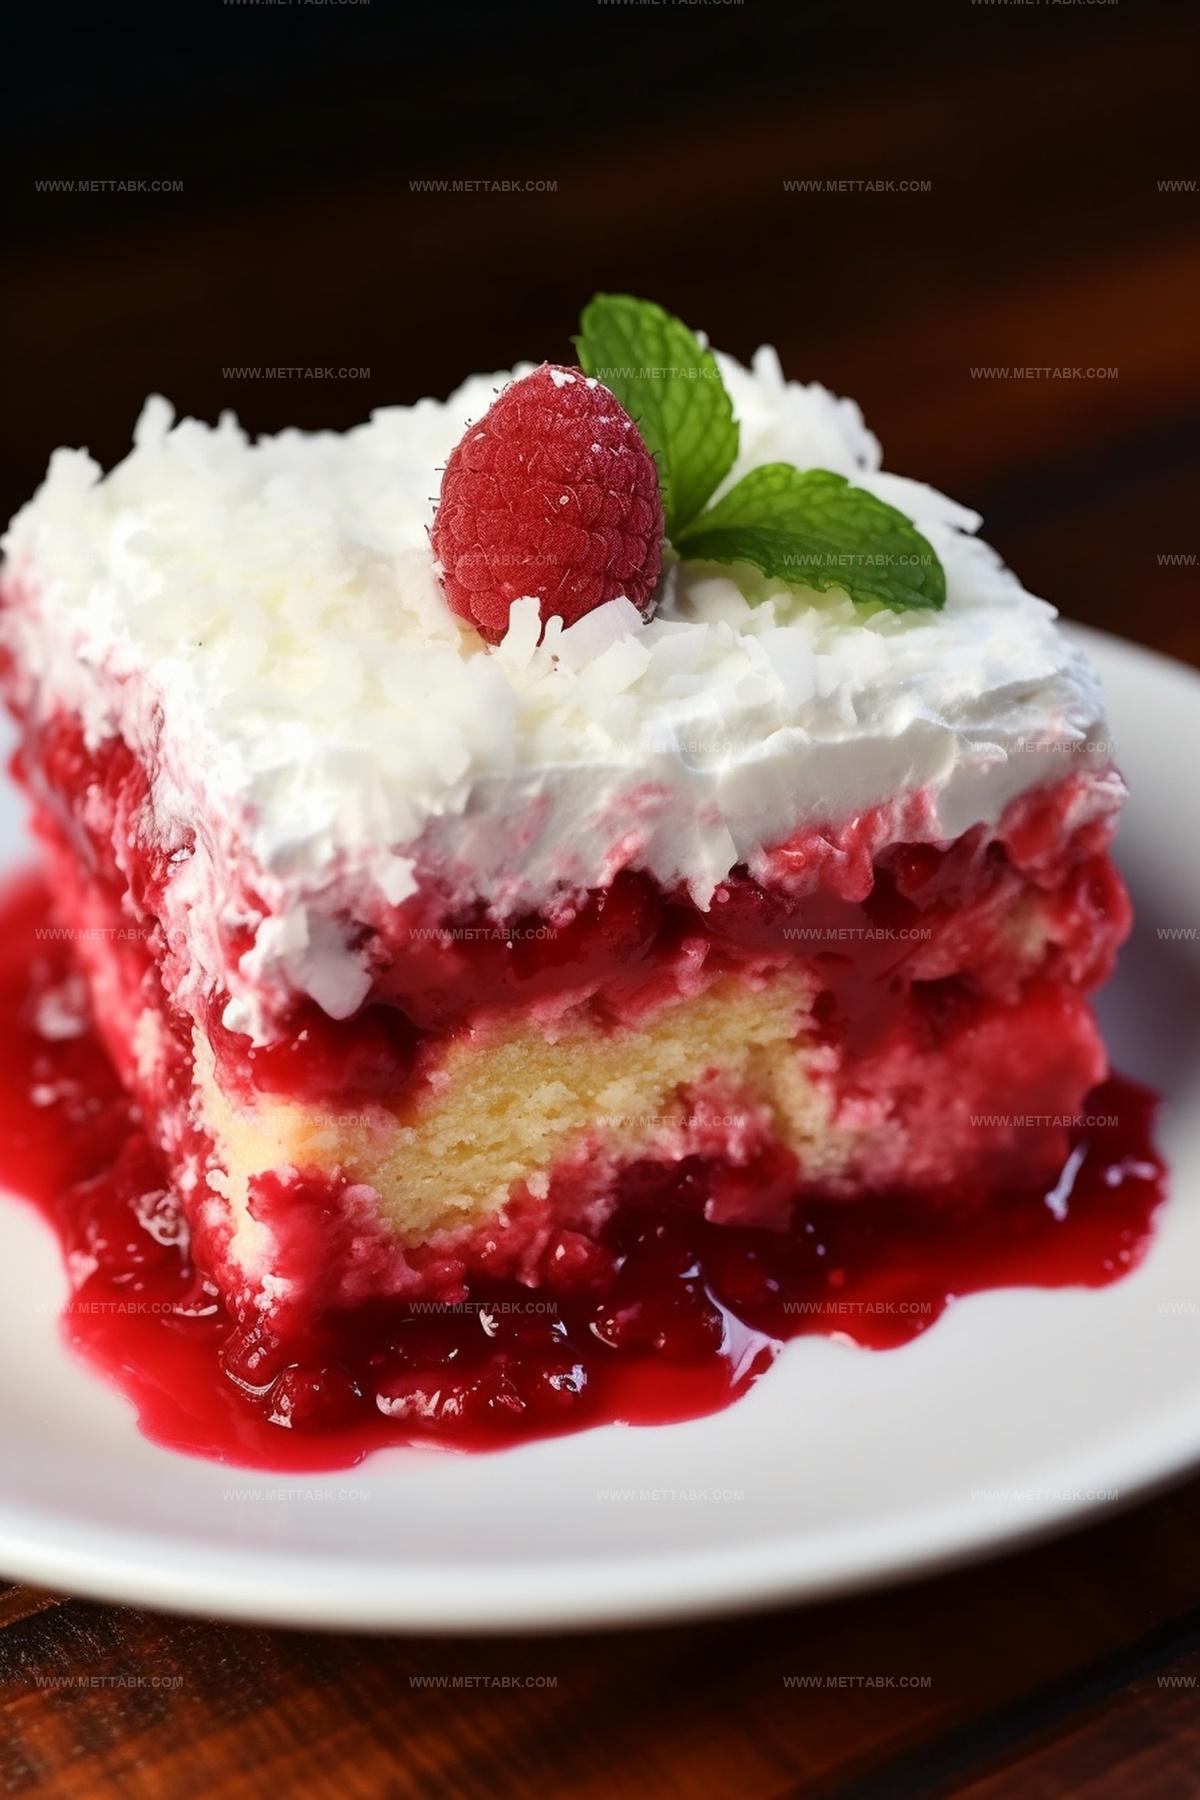
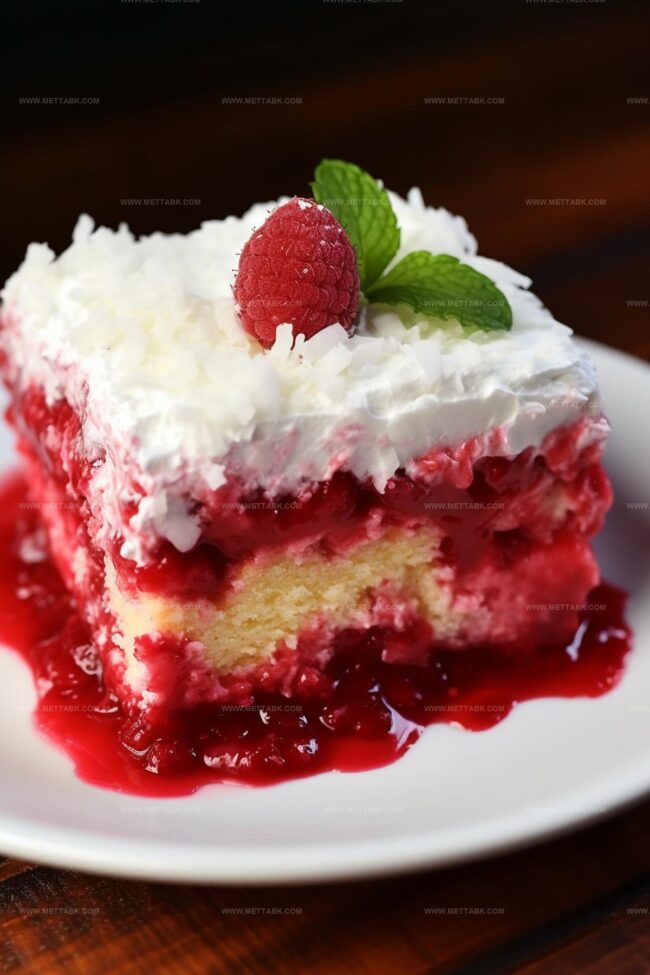
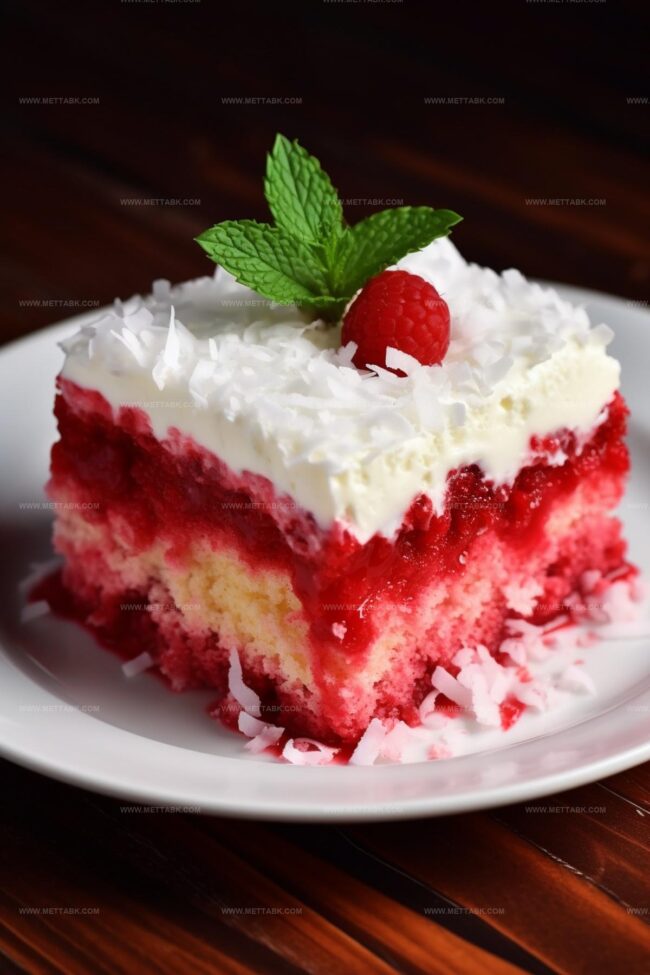
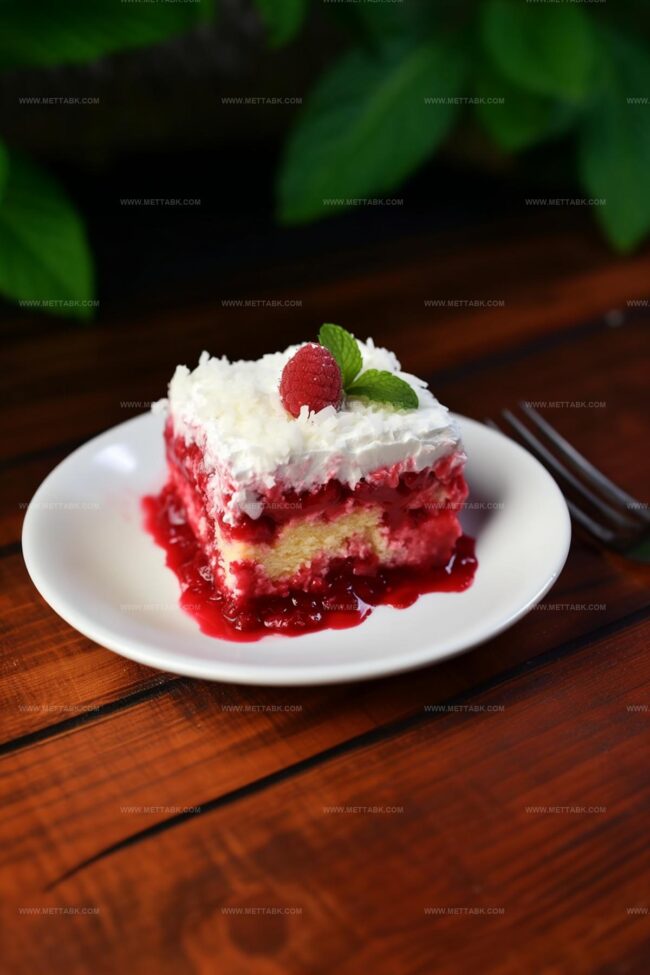
Zingy Raspberry Poke Cake Recipe: A Sweet Summer Delight
Raspberry zinger magic turns ordinary desserts into extraordinary culinary adventures that spark joy at every gathering.
Sweet memories bloom when unexpected flavors dance together on your plate.
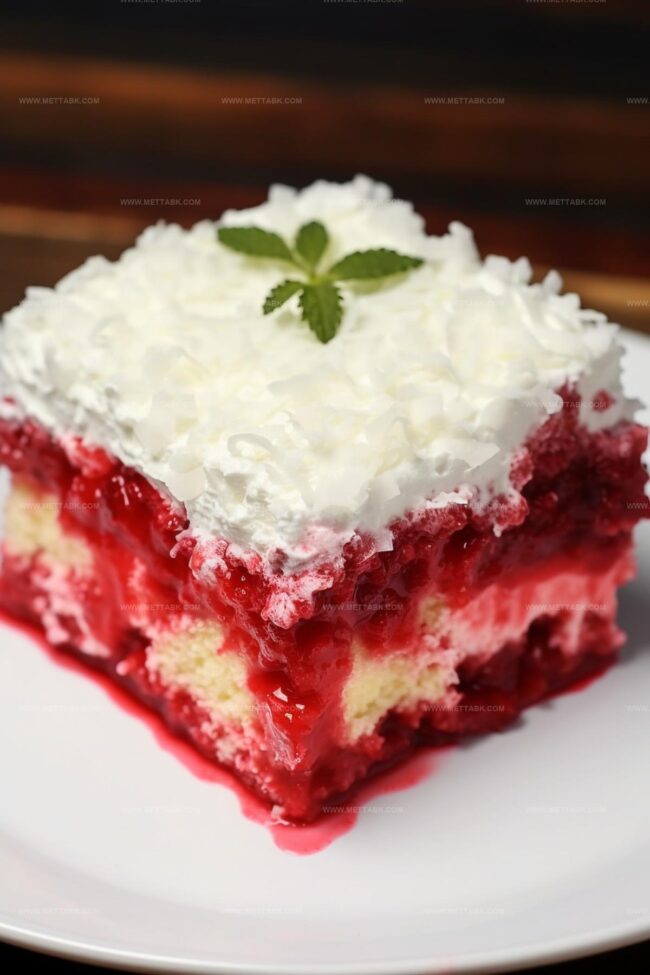
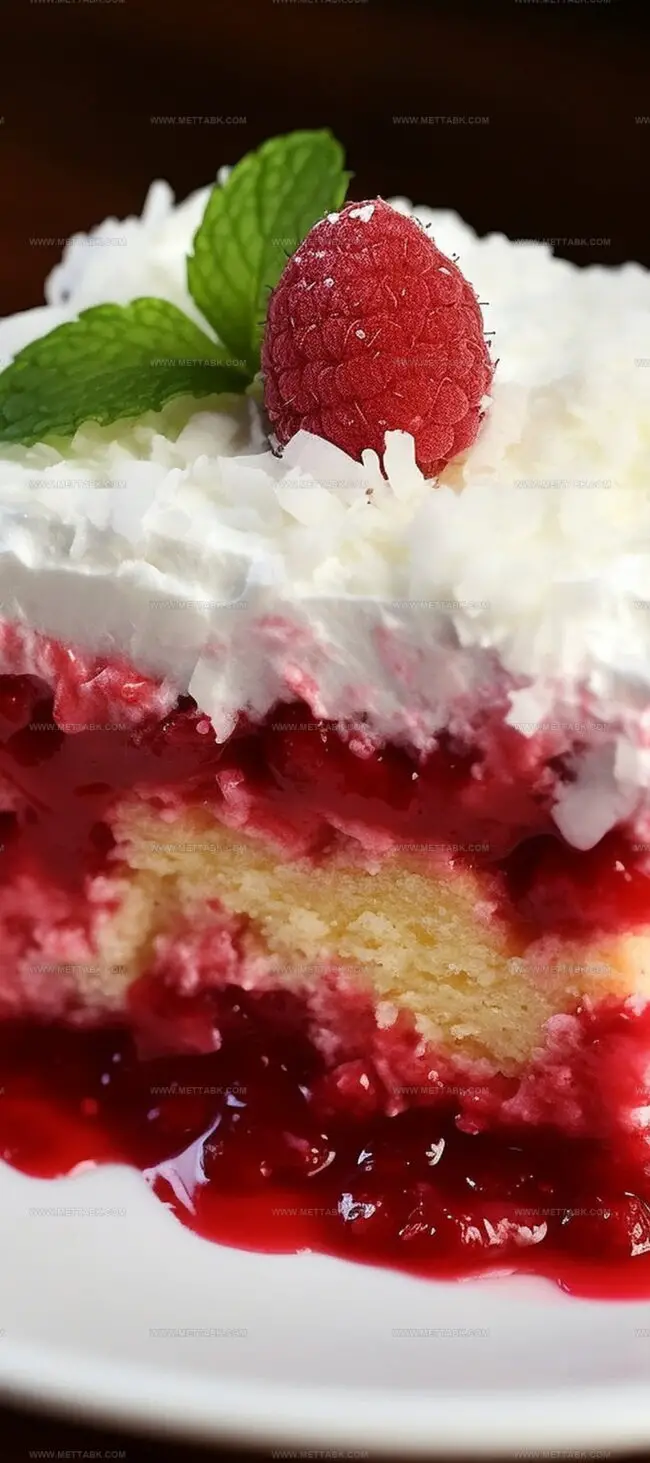
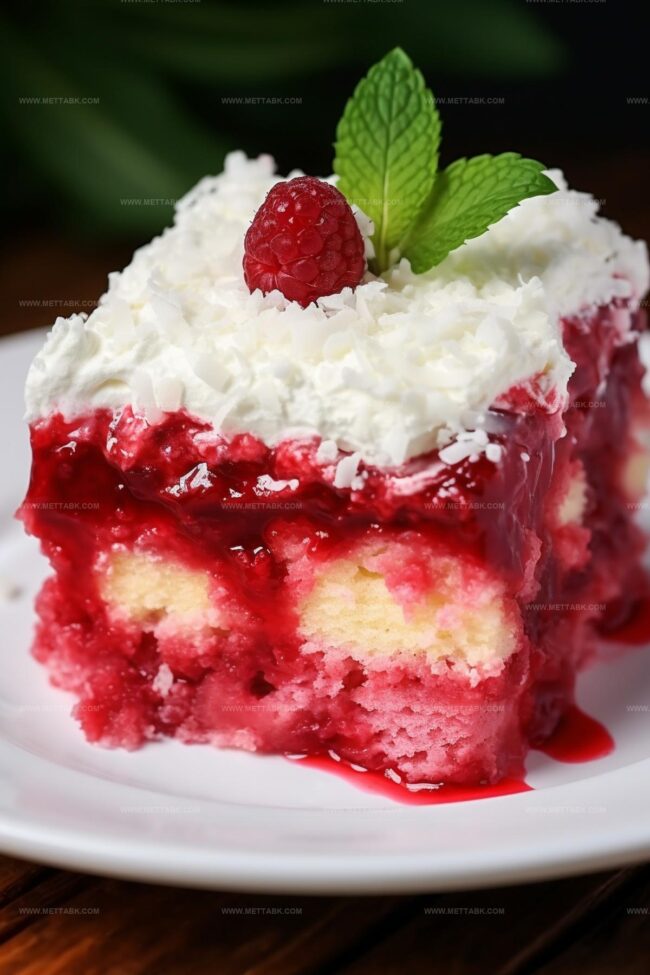
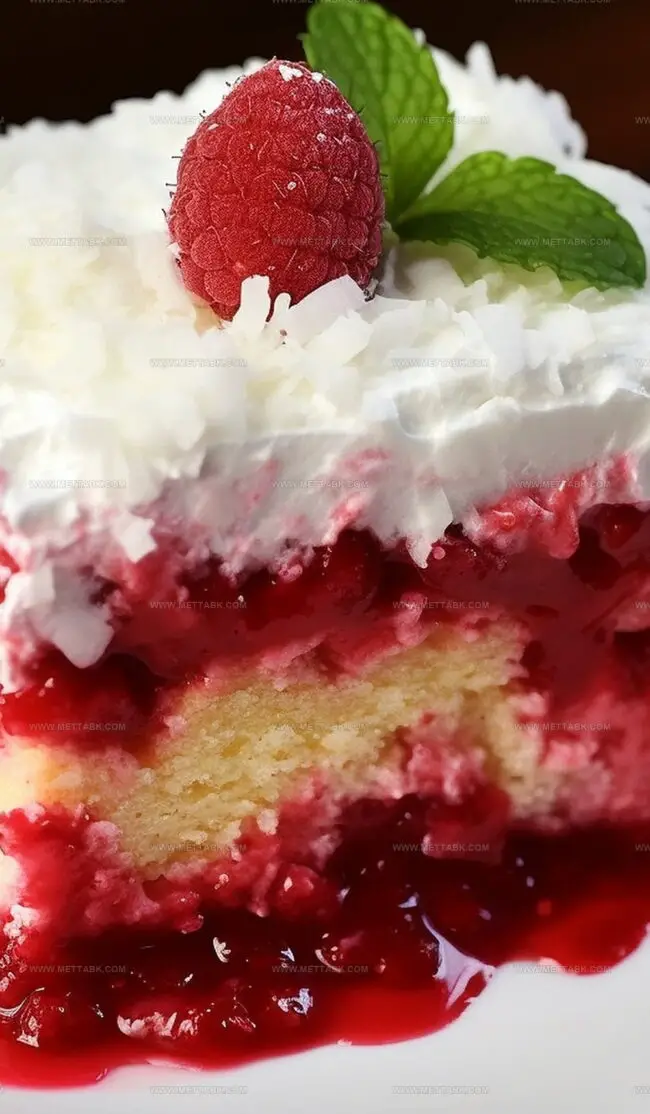
Soft cake layers become playful canvases for vibrant raspberry swirls and creamy textures.
Delicate crumbs absorb luscious raspberry syrup, creating moisture-rich bites that melt delightfully.
Kitchen experiments rarely feel this exciting or rewarding.
Simple ingredients combine to create something spectacular that makes people smile.
What Makes Raspberry Zinger Poke Cake So Delightful
Ingredients Needed for Raspberry Zinger Poke Cake
Main Ingredients:
Cake Base:Gelatin and Preserves:Topping Ingredients:
Creamy and Crunchy Toppings:Additional Ingredients:
Miscellaneous Components:Instructions for Making Raspberry Zinger Poke Cake
Step 1: Whip Up The Cake Base
Grab your white cake mix and follow the package instructions. Pour the smooth batter into a 9×13-inch baking pan and bake until perfectly golden.
Step 2: Let The Cake Chill
Allow the cake to cool down at room temperature for about half an hour. Patience is key here!
Step 3: Poke Some Holes
Using the handle of a wooden spoon or a meat fork, create even holes across the cake. Make sure you go about halfway down into the cake’s soft surface.
Step 4: Splash With Raspberry Magic
Dissolve raspberry-flavored gelatin in hot water:Pour the vibrant liquid evenly over the cake, letting it seep into those lovely holes.
Step 5: Spread Fruity Goodness
Warm up raspberry preserves in the microwave until it’s easily spreadable.
Drizzle and spread the preserves across the gelatin-soaked cake.
Step 6: Add Fluffy Cloud Topping
Gently spread the thawed whipped topping over the raspberry layer.
Cover every inch with creamy deliciousness.
Step 7: Sprinkle Coconut Snowflakes
Shower the top with unsweetened shredded coconut for a delightful textural finish.
Step 8: Chill And Set
Slide the cake into the refrigerator for at least 4 hours. This helps all the flavors mingle and settle.
Step 9: Store With Care
Keep any leftover cake covered in the refrigerator to maintain its fresh, zingy taste.
Pro Tips for a Perfect Raspberry Zinger Poke Cake
Flavorful Variations on Raspberry Zinger Poke Cake
Best Pairings with Raspberry Zinger Poke Cake
How to Store Raspberry Zinger Poke Cake
FAQs
The holes allow the raspberry gelatin to seep deep into the cake, creating a moist, flavorful interior that enhances the overall taste and texture of the dessert.
Yes, you can experiment with other gelatin flavors like strawberry or cherry to create a unique variation of the poke cake while maintaining the same basic technique.
Stir the gelatin mixture until all crystals have completely disappeared and the liquid appears clear and uniform, with no granules visible at the bottom of the mixing container.
Print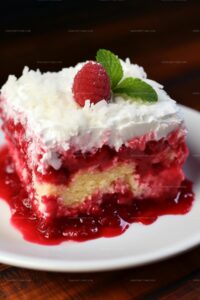
Raspberry Zinger Poke Cake Recipe
- Total Time: 50 minutes
- Yield: 12 1x
Description
Raspberry zinger poke cake combines tangy raspberries with moist white cake for a delightful dessert. Raspberry layers create a refreshing treat that satisfies sweet cravings with each delicious bite.
Ingredients
- 1 package (18.25 oz) premium white cake mix
- Cake mix package required ingredients
- 2 cups hot purified water
- 1 package (3 oz) raspberry-flavored gelatin
- 1 container (10 oz) high-quality raspberry preserves
- 1 container (8 oz) whipped topping (thawed)
- 1 packet (7 oz) unsweetened shredded coconut
Instructions
- Prepare the white cake mix according to package instructions, ensuring a smooth, lump-free batter. Pour into a 9×13-inch pan and bake at the recommended temperature until a toothpick inserted comes out clean.
- Allow the cake to cool completely at room temperature for about 30 minutes, preventing any moisture condensation.
- Create consistent perforations across the entire cake surface using the handle of a wooden spoon or a meat fork, puncturing approximately halfway through the cake’s depth.
- Dissolve raspberry-flavored gelatin thoroughly in hot water, stirring until completely integrated and no granules remain.
- Slowly pour the warm gelatin mixture over the cake, carefully guiding it into the created perforations to ensure complete absorption throughout the dessert.
- Microwave raspberry preserves for 30 seconds until slightly warm and easily spreadable, then distribute evenly across the gelatin-soaked cake surface.
- Gently spread thawed whipped topping over the preserves, creating a smooth, uniform layer that covers the entire cake.
- Sprinkle unsweetened shredded coconut generously over the whipped topping, ensuring complete and even coverage.
- Refrigerate the cake for a minimum of 4 hours to allow flavors to meld and the dessert to set completely. Store covered in the refrigerator to maintain optimal texture and freshness.
Notes
- Customize the cake mix by using gluten-free white cake mix for a celiac-friendly version that doesn’t compromise on taste or texture.
- Experiment with different gelatin flavors like strawberry or mixed berry to create unique variations of this classic dessert.
- Use low-fat whipped topping and sugar-free preserves to reduce the overall calorie content while maintaining the cake’s delightful sweetness.
- Create a dairy-free alternative by substituting whipped topping with coconut whipped cream for those with lactose intolerance.
- Prep Time: 20 minutes
- Cook Time: 30 minutes
- Category: Desserts
- Method: Baking
- Cuisine: American
Nutrition
- Serving Size: 12
- Calories: 287
- Sugar: 26 g
- Sodium: 181 mg
- Fat: 10 g
- Saturated Fat: 6 g
- Unsaturated Fat: 4 g
- Trans Fat: 0.1 g
- Carbohydrates: 43 g
- Fiber: 2 g
- Protein: 2 g
- Cholesterol: 15 mg
Clara Bennett
Contributing Recipe Developer & Food Writer
Expertise
Baking and Pastry Development, Gluten-Free and Allergy-Friendly Recipe Creation, Culinary Storytelling and Food Journalism, Recipe Testing and Standardization, Southern Comfort Foods and Modern Twists
Education
Sullivan University – National Center for Hospitality Studies
Associate Degree in Culinary Arts
Focus: Baking and Pastry Arts, Recipe Testing, and Culinary Journalism.
Clara specialized in crafting desserts that blend classic Southern comfort with modern techniques, while developing strong writing skills to tell the story behind every dish.
Lane Community College (Certificate Program)
Certificate in Food Writing and Photography
Focus: Culinary storytelling, recipe formatting, food styling, and visual presentation.
Clara’s love of baking started young, powered by homemade pies, biscuits, and stories passed around the family table.
After earning her degree at Sullivan University and a food writing certificate at Lane Community College, she turned her passion into a craft: sharing recipes that are simple, soulful, and always full of heart.
She’s big on bold flavors, flexible ideas, and creating sweets that fit any table (yes, even if you’re gluten-free). When she’s not baking, you’ll find her wandering farmers’ markets, styling food for the next photo shoot, or working on her ever-growing recipe journal.