Heavenly Salted Caramel Chocolate Chip Cookie Bars Recipe
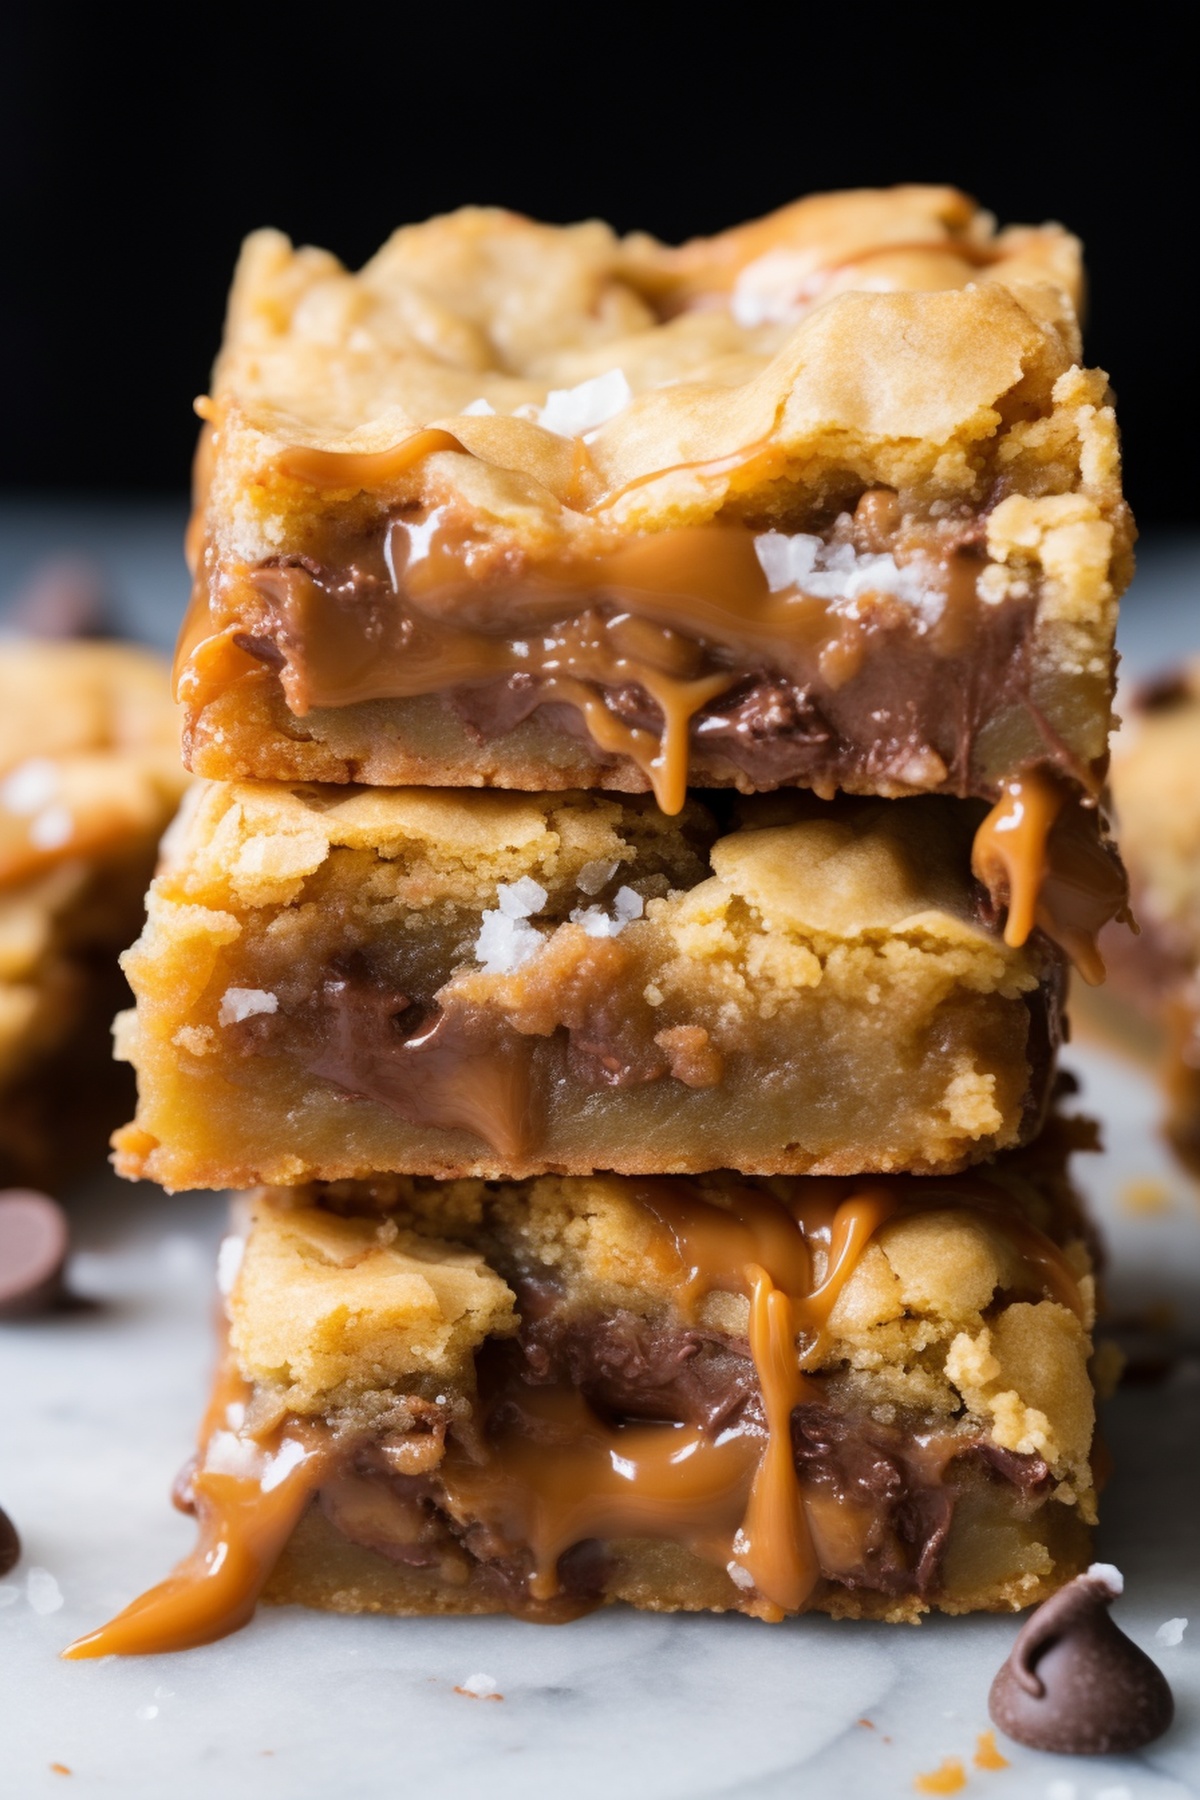
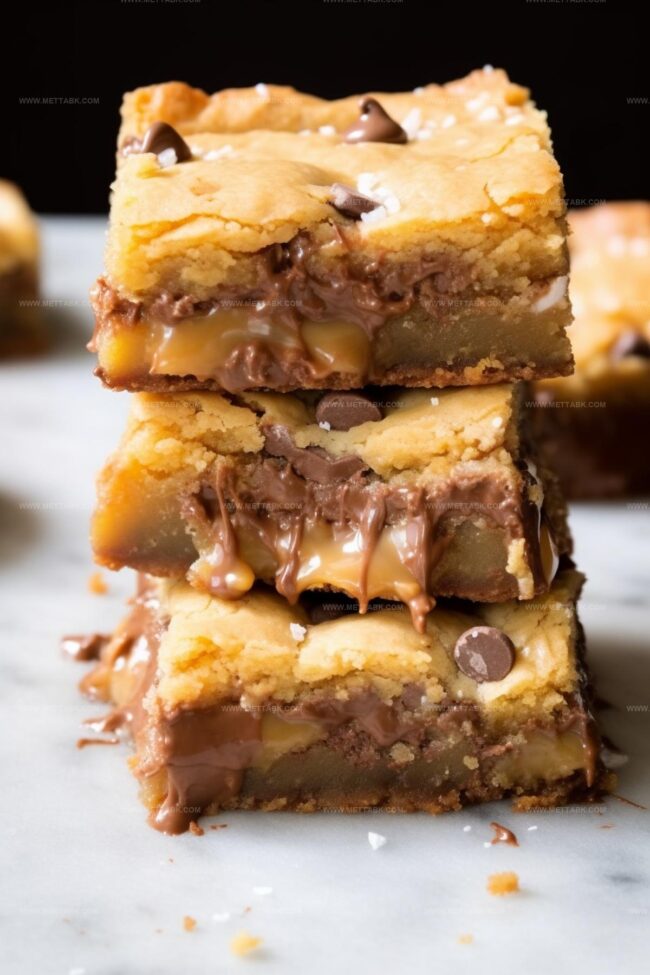
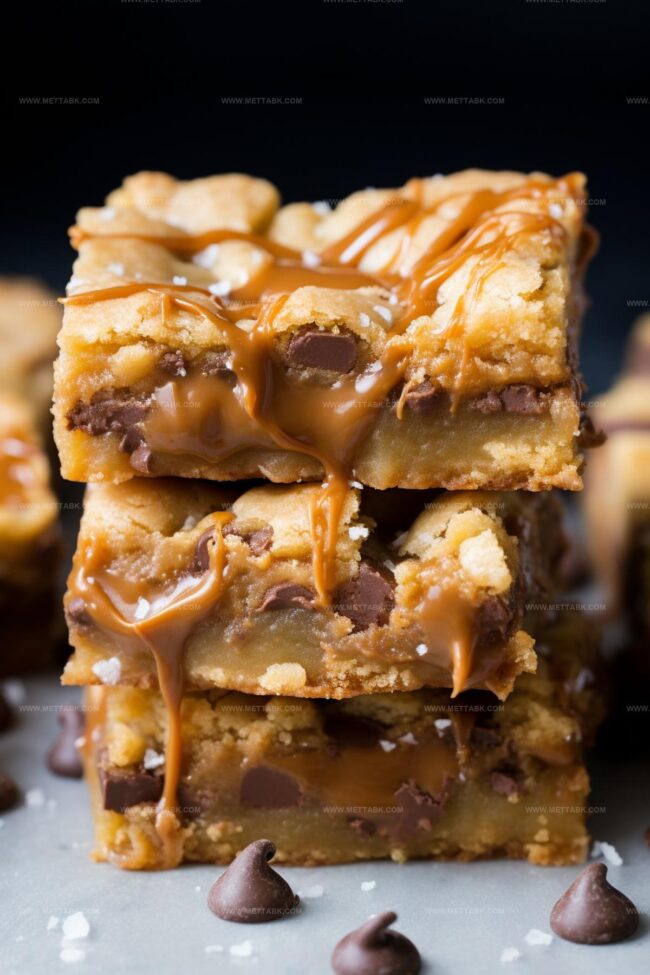
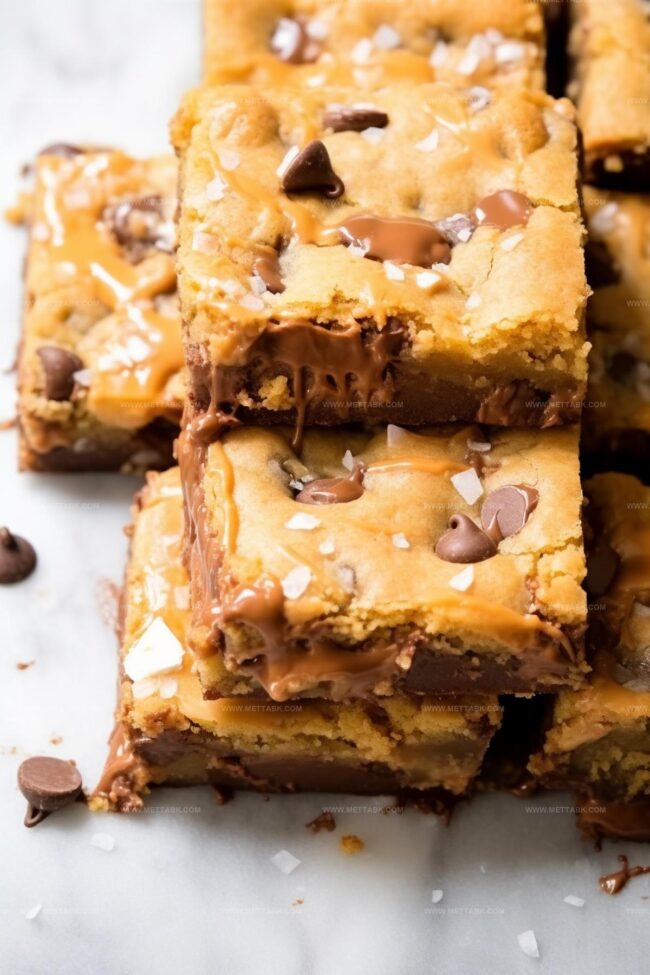
Crafting the perfect salted caramel chocolate chip cookie bars requires a delightful dance of sweet and salty flavors that’ll make your taste buds sing.
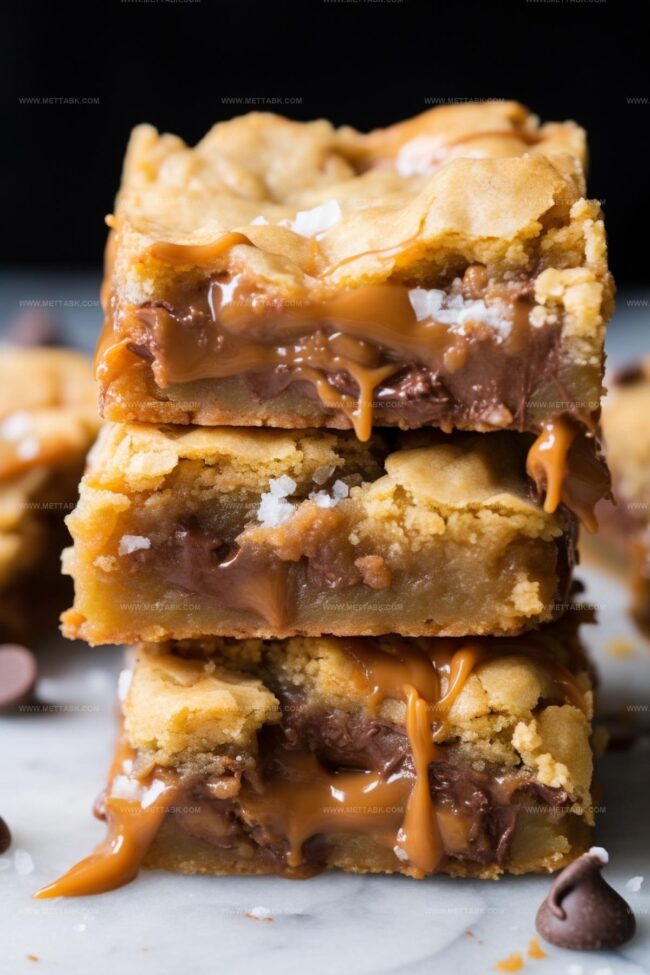
Caramel’s golden richness mingles beautifully with rich chocolate chunks, creating a dessert that beckons from the kitchen.
Layers of buttery dough promise comfort in every single bite.
Soft yet crisp edges give way to gooey centers that melt slowly across your palate.
Sprinkled sea salt crystals add unexpected depth, turning an ordinary treat into something extraordinary.
Quick to assemble and even faster to disappear, these bars will become your new go-to dessert for any occasion.
Bake a batch and watch everyone’s eyes light up with pure delicious anticipation.
Ingredients for Salted Caramel Chocolate Chip Cookie Bars
Base Ingredients:Chocolate and Caramel Components:Flavor Enhancers and Finishing Touches:Preparation Helpers:How to Bake Salted Caramel Chocolate Chip Cookie Bars
Step 1: Prepare Baking Setup
Warm up the oven to 350°F. Grab a 9×13-inch baking dish and line it with foil.
Spray the foil generously with nonstick cooking spray to prevent sticking.
Step 2: Create Cookie Dough Base
Grab your electric mixer and blend together:Whip until the mixture looks fluffy and light, about 2 minutes.
Add in eggs, vanilla extract, kosher salt, and baking soda. Mix thoroughly and scrape down the bowl’s sides to ensure everything combines perfectly.
Step 3: Finish Mixing Dough
Lower the mixer speed and slowly add all-purpose flour. Beat until just combined.
Gently fold in semisweet chocolate chips.
Step 4: Layer First Dough Section
Press half of the cookie dough evenly across the bottom of the prepared baking dish.
Step 5: Prepare Caramel Filling
In a medium saucepan, combine:Heat over medium-low, stirring constantly until caramels melt completely and create a smooth mixture. Pour this golden caramel layer over the cookie dough.
Step 6: Add Remaining Dough and Bake
Drop remaining cookie dough in small teaspoon-sized clumps across the caramel layer. Slide the dish into the preheated oven and bake for 25-30 minutes until the center sets.
Step 7: Final Touches and Cooling
Immediately sprinkle flaked sea salt over the hot bars. Let them cool completely in the baking dish.
Once cooled, use foil edges to lift out the entire dessert. Slice and serve.
Store in an airtight container at room temperature for up to 3 days.
Pro Tips for Chewy Salted Caramel Cookie Bars
Variations to Enhance Salted Caramel Chocolate Chip Cookie Bars
Perfect Pairings with Salted Caramel Chocolate Chip Cookie Bars
Storage Tips for Salted Caramel Chocolate Chip Cookie Bars
FAQs
Yes, you can substitute semisweet chocolate chips with milk, dark, or even white chocolate chips based on your preference.
Regular kosher salt or coarse salt can work as an alternative, though flaked sea salt provides the best texture and visual appeal.
While an electric mixer makes the process easier and ensures better mixing, you can use a hand whisk or wooden spoon, though it will require more arm strength and time to cream the butter and sugar properly.
Absolutely! You can prepare the dough in advance and refrigerate it for up to 2 days before baking, which can actually enhance the flavor and texture of the bars.
Chewy Salted Caramel Chocolate Chip Cookie Bars

Salted Caramel Chocolate Chip Cookie Bars Recipe
- Total Time: 45 minutes
- Yield: 24 1x
Description
Salted caramel chocolate chip cookie bars blend rich chocolate and sweet caramel in a perfect dessert harmony. Gooey layers of indulgence invite bakers to savor each delectable bite with pure culinary bliss.
Ingredients
- 2 cups (480 ml) semisweet chocolate chips
- 2 large eggs
- 2 1/2 cups (313 g) all-purpose flour
- 1 cup (227 g) unsalted butter, at room temperature
- 1 cup (220 g) light brown sugar, firmly packed
- 1/2 cup (100 g) granulated sugar
- 14 oz (397 g) sweetened condensed milk
- 10 oz (283 g) soft caramels, unwrapped
- 1 tsp vanilla extract
- 1 tsp kosher salt
- 1 tsp baking soda
- 1 tsp flaked sea salt
Instructions
- Preheat the oven to 350°F and line a 9×13-inch baking dish with foil, generously coating with nonstick spray.
- Using an electric mixer, blend softened butter with brown and granulated sugars until fluffy, about 2 minutes. Add eggs, vanilla, salt, and baking soda, mixing thoroughly and scraping bowl sides.
- On low speed, gradually incorporate flour until combined. Gently fold in chocolate chips.
- Distribute half the cookie dough evenly across the bottom of the prepared baking dish.
- Melt sweetened condensed milk and caramels in a medium saucepan over medium-low heat, stirring constantly until smooth and fully integrated. Pour caramel mixture over the cookie dough layer.
- Drop remaining cookie dough in small teaspoon-sized clusters across the caramel layer. Bake for 25-30 minutes until center is just set.
- Immediately after removing from oven, sprinkle with flaked sea salt. Cool completely in the dish.
- Lift entire dessert out using foil edges for easy cutting. Store in an airtight container at room temperature for up to 3 days.
Notes
- Soften butter completely at room temperature for easier creaming and smoother texture.
- Use high-quality caramels for richer, more intense caramel flavor that melts seamlessly.
- Avoid overmixing the dough to prevent tough, dense cookie bars.
- Sprinkle sea salt immediately after baking to enhance the caramel and chocolate flavors.
- Chill the bars for 15-20 minutes before cutting for cleaner, more precise slices.
- For gluten-free version, substitute all-purpose flour with 1:1 gluten-free baking blend.
- Reduce sugar by 25% if you prefer less sweetness without compromising texture.
- Swap chocolate chips with dark chocolate for a more intense, less sweet profile.
- Prep Time: 15 minutes
- Cook Time: 30 minutes
- Category: Desserts, Snacks
- Method: Baking
- Cuisine: American
Nutrition
- Serving Size: 24
- Calories: 298 kcal
- Sugar: 24 g
- Sodium: 151 mg
- Fat: 14 g
- Saturated Fat: 8 g
- Unsaturated Fat: 6 g
- Trans Fat: 0.3 g
- Carbohydrates: 40 g
- Fiber: 2 g
- Protein: 3 g
- Cholesterol: 27 mg
Clara Bennett
Contributing Recipe Developer & Food Writer
Expertise
Baking and Pastry Development, Gluten-Free and Allergy-Friendly Recipe Creation, Culinary Storytelling and Food Journalism, Recipe Testing and Standardization, Southern Comfort Foods and Modern Twists
Education
Sullivan University – National Center for Hospitality Studies
Associate Degree in Culinary Arts
Focus: Baking and Pastry Arts, Recipe Testing, and Culinary Journalism.
Clara specialized in crafting desserts that blend classic Southern comfort with modern techniques, while developing strong writing skills to tell the story behind every dish.
Lane Community College (Certificate Program)
Certificate in Food Writing and Photography
Focus: Culinary storytelling, recipe formatting, food styling, and visual presentation.
Clara’s love of baking started young, powered by homemade pies, biscuits, and stories passed around the family table.
After earning her degree at Sullivan University and a food writing certificate at Lane Community College, she turned her passion into a craft: sharing recipes that are simple, soulful, and always full of heart.
She’s big on bold flavors, flexible ideas, and creating sweets that fit any table (yes, even if you’re gluten-free). When she’s not baking, you’ll find her wandering farmers’ markets, styling food for the next photo shoot, or working on her ever-growing recipe journal.