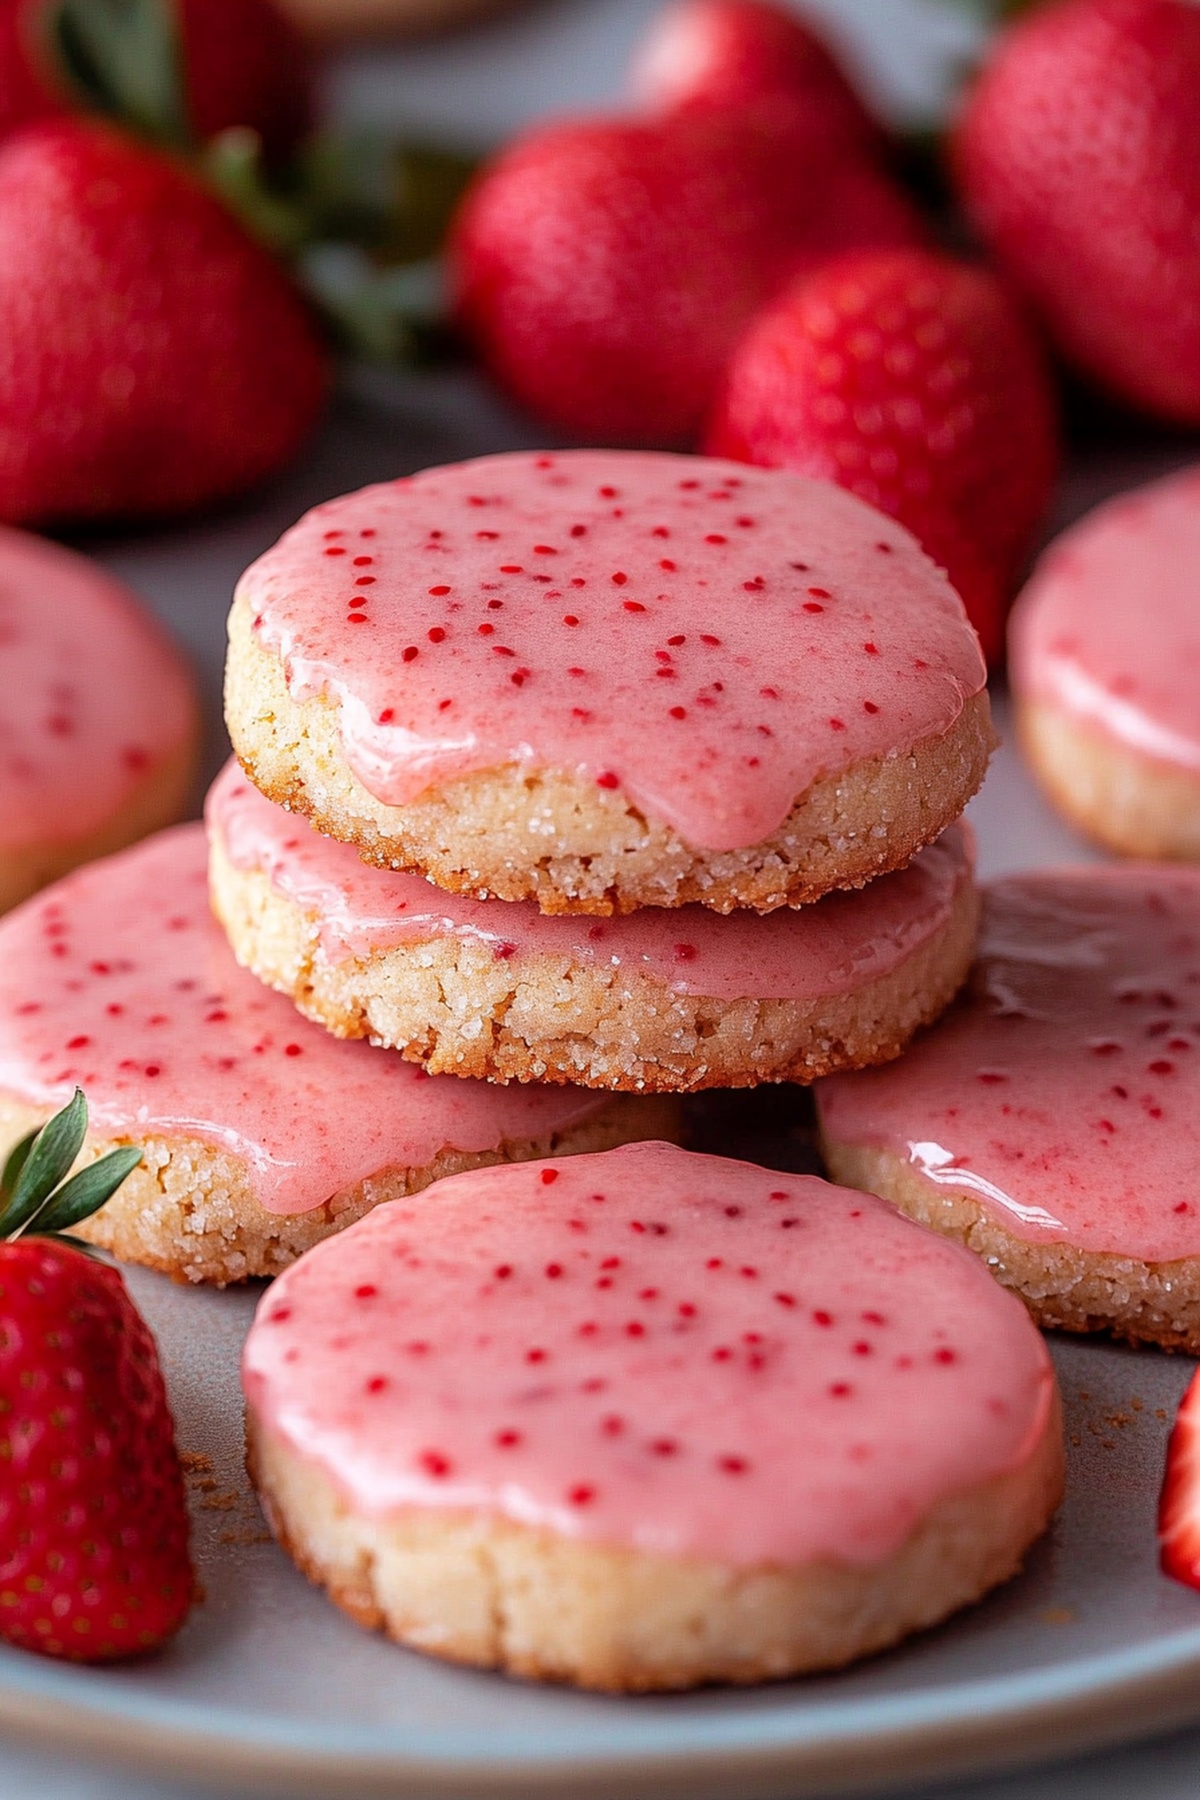
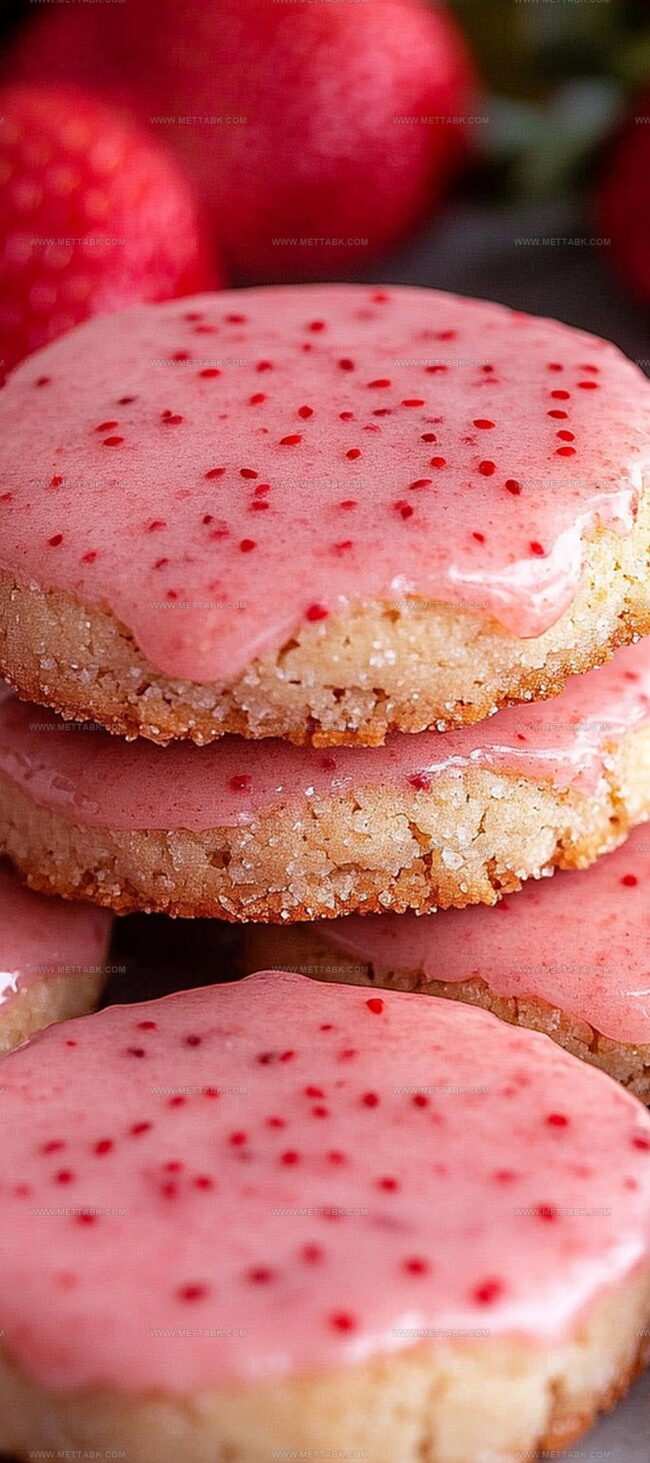
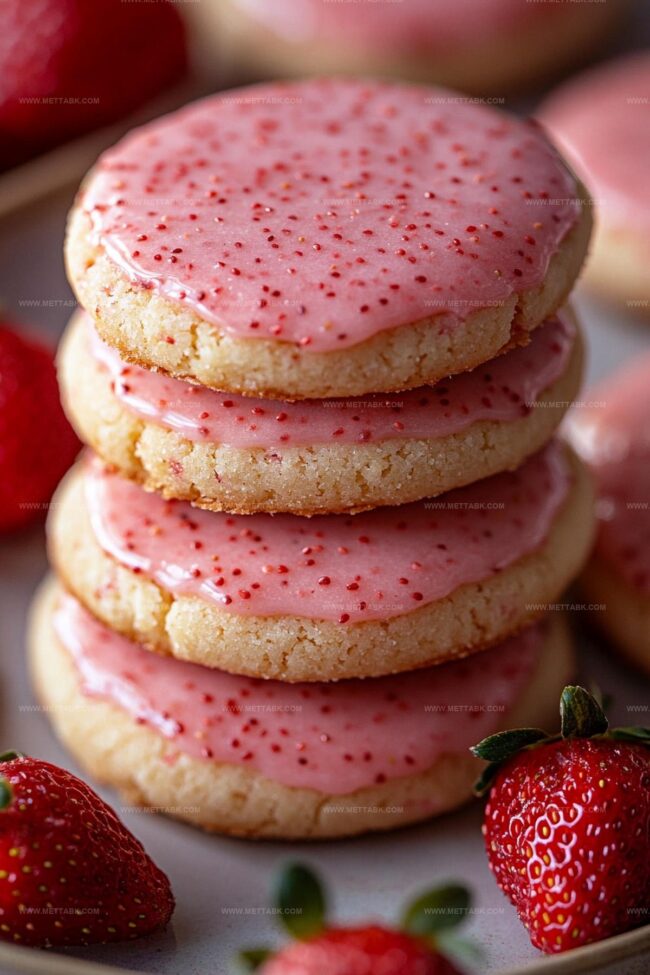
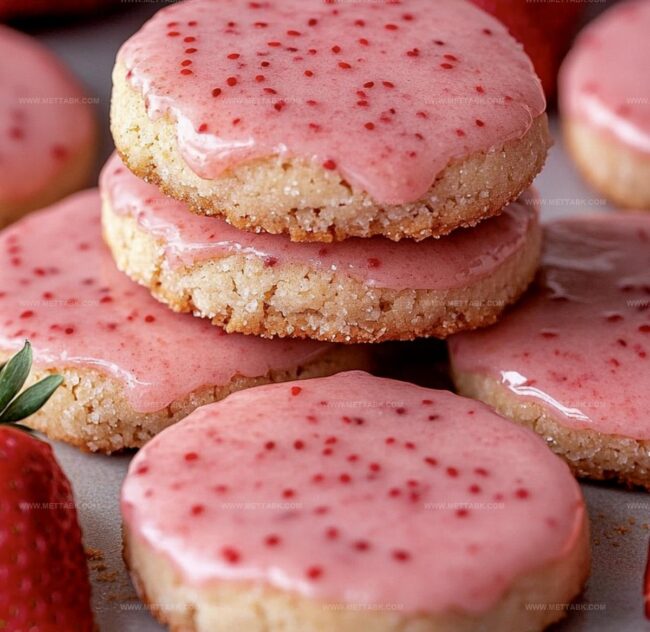
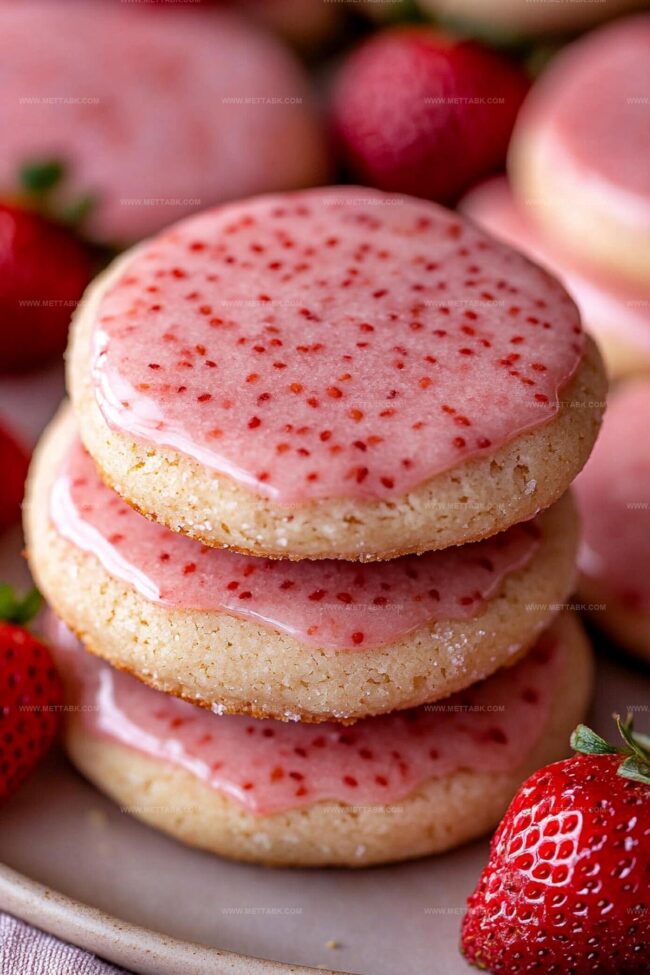
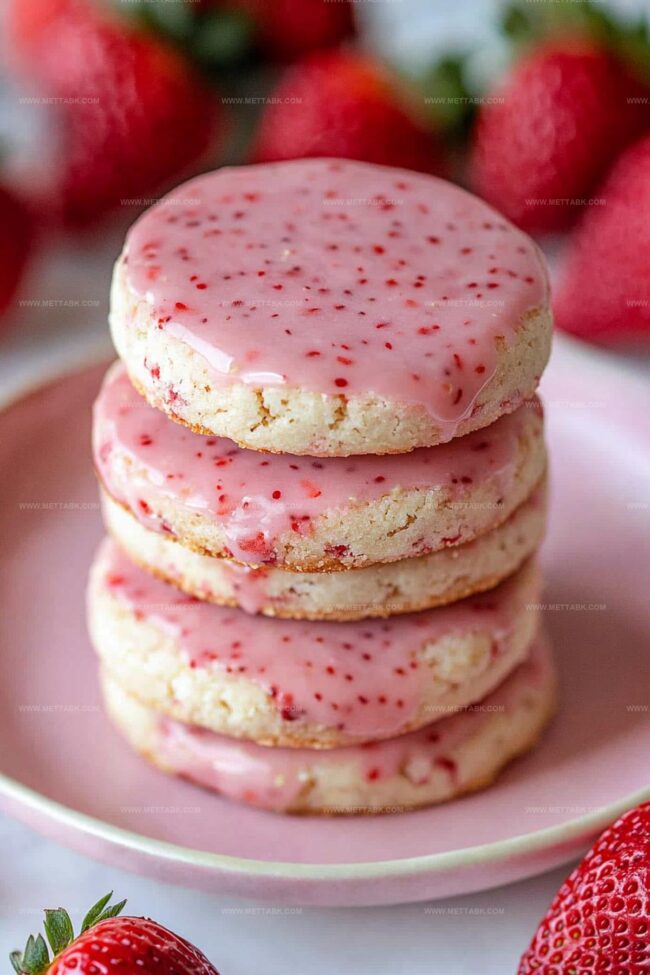
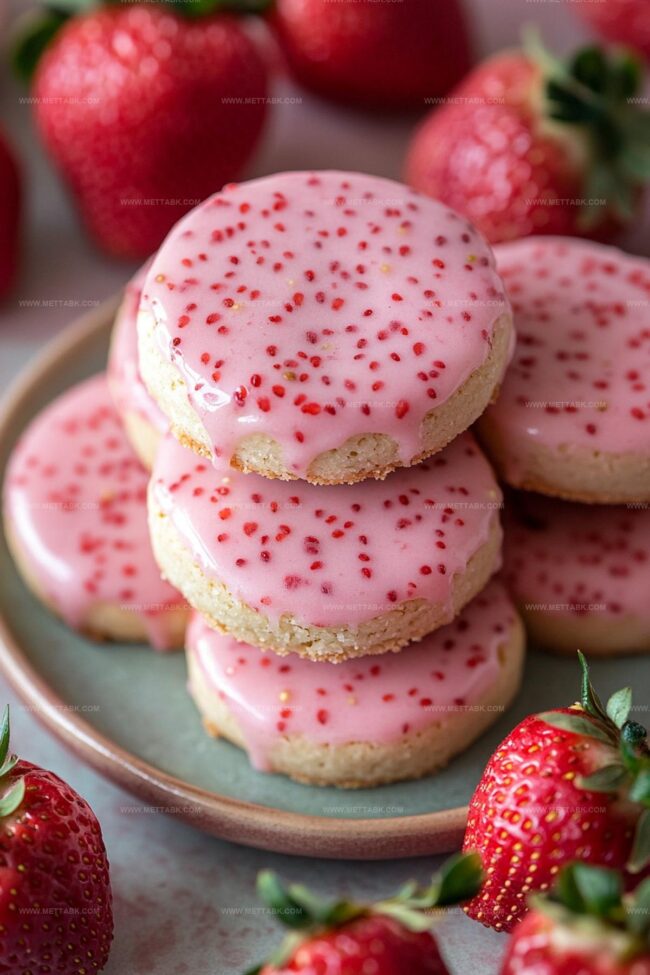
Dreamy Strawberry Shortbread Cookies Recipe for Sweet Bliss
Sweet strawberry shortbread cookies dance between crisp and tender, promising a delightful treat that melts in your mouth.
Buttery layers crumble with each gentle bite, releasing intense fruity essence.
Delicate strawberry pieces nestled throughout add bursts of vibrant color and natural sweetness.
Summer memories blend seamlessly with classic Scottish shortbread techniques, creating an irresistible dessert.
Baking these cookies fills your kitchen with warm, inviting aromas that beckon everyone closer.
Simple ingredients transform into an elegant confection that feels both nostalgic and innovative.
Strawberry Shortbread Cookies That Delight

Ingredients for Strawberry Shortbread Cookies
Main Ingredients:
Flour and Sugar Base:Butter Components:Strawberry Enhancement:Glaze Ingredients:Decoration and Finishing:How to Make Strawberry Shortbread Cookies
Step 1: Crush Strawberry Magic
Toss freeze-dried strawberries into a blender. Pulse until the berries transform into a fine, dusty powder that looks like delicate pink snow.
Step 2: Powder Power Preparation
Set aside a teaspoon of strawberry powder for the glaze. This secret ingredient will add a burst of fruity flavor.
Step 3: Mix Dry Ingredients
Combine the remaining strawberry powder with all-purpose flour in a mixing bowl. Whisk them together until they become best friends.
Step 4: Butter Bliss
In a stand mixer, cream together softened butter and powdered sugar. Whip them until they become light, fluffy, and look like a cloud of sweetness.
Step 5: Create Cookie Dough
Slow down the mixer and gently add the flour-strawberry mixture. Mix until everything comes together in a beautiful, cohesive dough.
Step 6: Perfect the Dough
Grab a spatula and scrape down the bowl’s sides. Give the dough a final mix to ensure no lonely flour lumps remain.
Step 7: Chill Out
Shape the dough into a disc and wrap it up snugly in plastic wrap. Send it to the refrigerator for a 15-minute cool-down session.
Step 8: Roll and Shape
Dust your work surface with flour. Roll out the chilled dough to a quarter-inch thickness.
Use cookie cutters to create your favorite shapes and place them on a parchment-lined baking sheet.
Step 9: Second Chill
Pop the baking sheet back into the refrigerator for another 15-minute relaxation period.
Step 10: Bake to Perfection
Heat the oven to 350°F. Bake the cookies for 15-17 minutes until they’re just set, watching carefully to prevent over-browning.
Step 11: Glaze Glory
While cookies bake, whip up the glaze:Whisk these ingredients in a small bowl until smooth and dreamy.
Step 12: Decorate with Flair
Once cookies cool, drizzle or dip them in the glaze.
Sprinkle extra strawberry crumbs on top for a stunning finish.
Step 13: Final Touch
Let the glazed cookies sit and set for about 15 minutes.
They’re now ready to delight and impress!
Tips to Nail Strawberry Shortbread Cookies
Flavor Variations on Strawberry Shortbread Cookies
Pairing Ideas for Strawberry Shortbread Cookies
Storage Advice for Strawberry Shortbread Cookies
FAQs

No, fresh strawberries contain too much moisture and will ruin the texture of the cookies. Freeze-dried strawberries provide intense flavor without adding liquid to the dough.
Pulse them until they become a fine powder similar to powdered sugar. The goal is a consistent, smooth texture that will mix evenly into the dough.
You can use a hand mixer or even mix by hand with a wooden spoon. Just ensure the butter and sugar are well creamed and the flour is fully incorporated without overmixing.
Print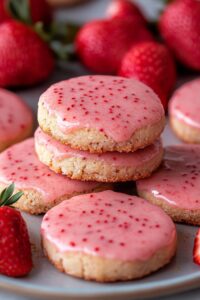
Strawberry Shortbread Cookies Recipe
- Total Time: 1 hour 22 minutes
- Yield: 24 1x
Description
Delightful strawberry shortbread cookies bring Italian countryside charm to your baking adventure. Sweet, buttery shortbread meets fresh strawberry essence for an irresistible treat you’ll savor with pure culinary joy.
Ingredients
- 1 package (1 oz/28 g) freeze-dried strawberries
- 2 cups (240 g) all-purpose flour
- 1 cup (2 sticks/226 g) butter, softened
- 1/2 cup (60 g) powdered sugar
- 1 tsp pure vanilla extract
- 1 cup (120 g) powdered sugar
- 2 tbsps (30 ml) milk
Instructions
- Pulverize freeze-dried strawberries in a blender until they transform into a fine, dust-like powder, creating an intense fruity foundation for the cookies.
- Separate one teaspoon of strawberry powder for potential glaze enhancement, setting aside the remainder for the cookie base.
- Integrate the strawberry powder with flour, whisking thoroughly to distribute the vibrant ingredient evenly throughout the dry mixture.
- Cream softened butter and powdered sugar in a stand mixer, whipping until the mixture becomes airy and pale, approximately one minute.
- Gradually fold the flour-strawberry blend into the creamed mixture, mixing on low speed until a cohesive dough forms without overmixing.
- Use a spatula to scrape bowl edges, ensuring all ingredients are uniformly incorporated and no flour pockets remain.
- Form the dough into a compact disc, wrap securely in plastic, and refrigerate for 15 minutes to solidify and enhance flavor melding.
- Roll out the chilled dough on a floured surface to a quarter-inch thickness, using cookie cutters to create precise shapes and transferring them onto a parchment-lined baking sheet.
- Return the cookie-laden sheet to the refrigerator for an additional 15-minute chill, which helps maintain their structured shape during baking.
- Preheat the oven to 350°F and bake cookies for 15-17 minutes, monitoring to prevent excessive browning while ensuring centers are set.
- Simultaneously prepare the glaze by whisking powdered sugar with milk, optionally incorporating the reserved strawberry powder for enhanced flavor complexity.
- After cookies completely cool, apply glaze by either drizzling or dipping, optionally garnishing with crushed freeze-dried strawberry fragments for textural intrigue.
- Allow glazed cookies to set for approximately 15 minutes, permitting the topping to harden and intensify the decorative elements.
Notes
- Enhance strawberry flavor by using high-quality freeze-dried strawberries, ensuring a concentrated and vibrant taste throughout the cookies.
- Keep butter at room temperature but not overly soft to maintain the perfect texture and prevent spreading during baking.
- Chill the dough twice to guarantee precise cookie shapes and prevent excessive spreading, resulting in beautifully defined edges.
- Customize the recipe by substituting gluten-free flour for a celiac-friendly version or using alternative milk options for different dietary needs.
- Prep Time: 1 hour 5 minutes
- Cook Time: 17 minutes
- Category: Snacks, Desserts
- Method: Baking
- Cuisine: American
Nutrition
- Serving Size: 24
- Calories: 160
- Sugar: 8 g
- Sodium: 40 mg
- Fat: 9 g
- Saturated Fat: 5 g
- Unsaturated Fat: 3 g
- Trans Fat: 0.2 g
- Carbohydrates: 18 g
- Fiber: 1 g
- Protein: 1 g
- Cholesterol: 25 mg
Clara Bennett
Contributing Recipe Developer & Food Writer
Expertise
Baking and Pastry Development, Gluten-Free and Allergy-Friendly Recipe Creation, Culinary Storytelling and Food Journalism, Recipe Testing and Standardization, Southern Comfort Foods and Modern Twists
Education
Sullivan University – National Center for Hospitality Studies
Associate Degree in Culinary Arts
Focus: Baking and Pastry Arts, Recipe Testing, and Culinary Journalism.
Clara specialized in crafting desserts that blend classic Southern comfort with modern techniques, while developing strong writing skills to tell the story behind every dish.
Lane Community College (Certificate Program)
Certificate in Food Writing and Photography
Focus: Culinary storytelling, recipe formatting, food styling, and visual presentation.
Clara’s love of baking started young, powered by homemade pies, biscuits, and stories passed around the family table.
After earning her degree at Sullivan University and a food writing certificate at Lane Community College, she turned her passion into a craft: sharing recipes that are simple, soulful, and always full of heart.
She’s big on bold flavors, flexible ideas, and creating sweets that fit any table (yes, even if you’re gluten-free). When she’s not baking, you’ll find her wandering farmers’ markets, styling food for the next photo shoot, or working on her ever-growing recipe journal.