
The Most Magical Strawberry Tiramisu Recipe Ever Created
Crafting a delightful strawberry tiramisu brings unexpected magic to your dessert repertoire.
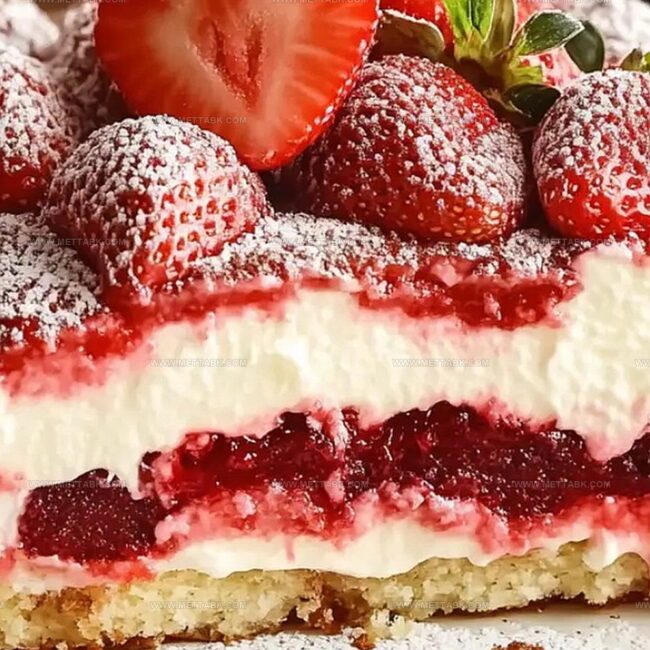
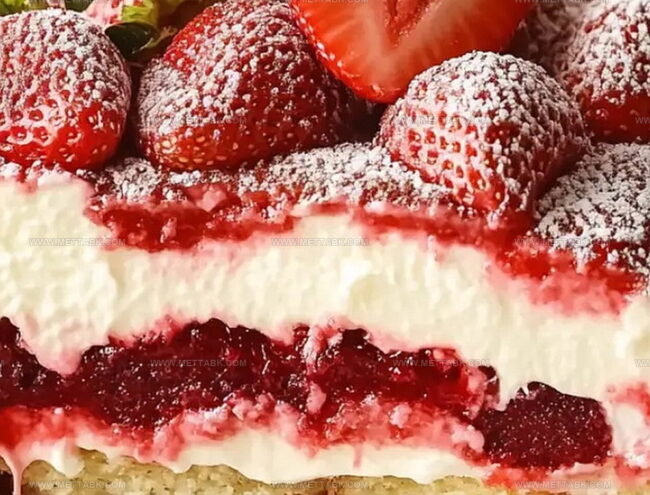
Sweet layers of mascarpone and fresh berries create a playful twist on the classic Italian treat.
Soft ladyfingers absorb delicate strawberry essence, promising pure indulgence.
Creamy textures meld with bright fruit notes in each heavenly bite.
Simple ingredients combine to produce an elegant dessert that feels both sophisticated and comforting.
Weekend gatherings or quiet evenings deserve this stunning sweet surprise.
Strawberry Tiramisu That’s Light and Decadent
Ingredients for Classic Strawberry Tiramisu
For the Liquids:For the Dairy:For the Base and Topping:How to Layer and Chill Strawberry Tiramisu
Step 1: Prepare Strawberry Liquid Mixture
Whisk together strawberry preserves, orange juice, and lemon juice in a medium bowl until perfectly blended. The liquid mixture will create a vibrant, fruity base for soaking ladyfingers.
Step 2: Create Creamy Mascarpone Filling
Beat mascarpone cheese, powdered sugar, and vanilla extract in a large bowl until the mixture becomes silky smooth and irresistibly creamy.
Step 3: Layer First Ladyfinger Base
Quickly dip each ladyfinger into the strawberry liquid, ensuring they absorb flavor without becoming overly saturated.
Carefully arrange the soaked ladyfingers across the bottom of a 9×13-inch serving dish.
Step 4: Add First Mascarpone Layer
Spread a generous layer of mascarpone mixture over the ladyfingers, using a spatula to create an even surface.
Artfully arrange fresh sliced strawberries across the creamy layer.
Step 5: Build Secondary Layer
Repeat the previous layering process:Step 6: Chill and Develop Flavors
Cover the tiramisu and refrigerate overnight.
This resting period allows the flavors to harmonize and intensify.
Step 7: Serve and Enjoy
Remove from refrigerator and serve chilled.
Savor each delightful spoonful of this fruity, creamy dessert.
Tips for Perfect Creamy Texture and Flavor
Variations to Personalize Your Tiramisu
Pairings to Enjoy with Tiramisu
How to Store Strawberry Tiramisu Properly
Store the strawberry tiramisu in an airtight container in the refrigerator for up to 3 days. Cover tightly with plastic wrap to prevent absorption of other food odors.
Wrap the dessert securely in plastic wrap, then aluminum foil. Freeze for up to 2 weeks. Thaw overnight in the refrigerator before serving.
Do not reheat this dessert, as it contains delicate ingredients like mascarpone and fresh strawberries. Serve chilled directly from the refrigerator for best texture and flavor.
Cut and wrap single servings separately in plastic wrap for easy grab-and-go snacks or quick dessert options throughout the week.
FAQs
Ladyfingers are light, sweet sponge cookies used in many desserts. You can substitute with pound cake, sponge cake, or vanilla wafers if needed.
Quickly dip each ladyfinger in the strawberry mixture for just a few seconds. Don’t soak them too long, or they’ll fall apart and lose their texture.
Yes, this tiramisu is perfect for making in advance. In fact, it tastes best when refrigerated overnight, allowing the flavors to blend and the dessert to set properly.
Print
Strawberry Tiramisu Recipe
- Total Time: 8 hours 20 minutes
- Yield: 8 1x
Description
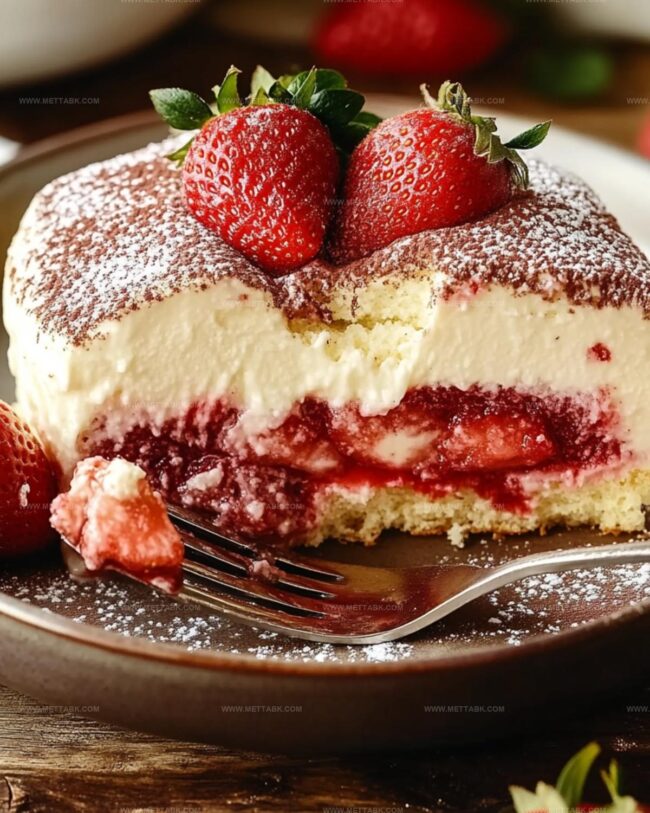
Sweet layers of mascarpone and fresh strawberries meld together in this irresistible Strawberry Tiramisu, creating a delightful Italian-inspired dessert. Creamy, luscious, and perfect for summer gatherings, you’ll fall in love with this fruity twist on the classic tiramisu.
Ingredients
Main Ingredients:
- 34 cups fresh strawberries, sliced
- 38 ladyfingers
- 2 cups mascarpone cheese
Liquid Components:
- 1/2 cup fresh orange juice
- 1/3 cup strawberry preserves
- 1 tablespoon fresh lemon juice
Sweeteners and Flavoring:
- 1 cup powdered sugar
- 1 teaspoon vanilla extract
Instructions
- Blend strawberry preserves, orange juice, and lemon juice in a medium bowl until thoroughly mixed, creating a vibrant soaking liquid.
- Whip mascarpone cheese with powdered sugar and vanilla extract until achieving a silky, luxurious consistency.
- Quickly dunk each ladyfinger into the strawberry mixture for 2-3 seconds, ensuring complete but not waterlogged absorption.
- Create the first foundation layer by carefully positioning soaked ladyfingers across the bottom of a 9×13-inch dish.
- Generously spread a smooth mascarpone cream layer over the ladyfingers, covering completely.
- Artfully arrange fresh sliced strawberries across the mascarpone cream, creating an even distribution.
- Repeat the layering process: dip remaining ladyfingers, place them atop the strawberries, then cover with another mascarpone cream layer.
- Add a final decorative layer of sliced strawberries on top for visual appeal.
- Seal the dish with plastic wrap and refrigerate for minimum 8 hours or overnight to allow flavors to harmonize.
- Remove from refrigerator 15 minutes before serving to soften slightly, then slice and serve chilled for optimal texture and taste.
Notes
- Choose high-quality, ripe strawberries for the most vibrant flavor and best texture in the dessert.
- Soak ladyfingers briefly to prevent them from becoming mushy and maintaining a delicate structure.
- Chill the mascarpone mixture before assembling to help it set faster and create a more stable dessert.
- Substitute ladyfingers with gluten-free alternatives like almond sponge cake for a gluten-sensitive diet.
- Prep Time: 20 minutes
- Cook Time: 8 hours
- Category: Desserts
- Method: Blending
- Cuisine: Italian
Nutrition
- Serving Size: 8
- Calories: 311
- Sugar: 32 g
- Sodium: 60 mg
- Fat: 20 g
- Saturated Fat: 12 g
- Unsaturated Fat: 7 g
- Trans Fat: 0.3 g
- Carbohydrates: 28 g
- Fiber: 2 g
- Protein: 5 g
- Cholesterol: 70 mg
Nate Harper
Founder & Recipe Curator
Expertise
Single-Recipe Development, Farm-to-Table Cooking, Seasonal Menu Planning, Culinary Storytelling, Home Kitchen Innovation
Education
Cascade Culinary Institute – Central Oregon Community College
Certificate in Culinary Arts
Focus: Farm-to-table cuisine, sustainable cooking practices, and seasonal recipe creation.
Nate studied under experienced chefs who emphasized local sourcing, minimal waste, and building recipes from fresh, simple ingredients.
Nate Harper is the founder and creative force behind Make, Take, Bake. Raised in the wild beauty of Oregon’s high desert, Nate grew up surrounded by family gardens, farmers’ markets, and home kitchens that celebrated the seasons.
His early love for simple, honest food evolved into a professional passion when he attended Cascade Culinary Institute, where he sharpened his skills in creating recipes that are sustainable, satisfying, and made for everyday life.
Nate’s goal is to make cooking feel accessible, free of fuss, and full of flavor. He believes a single, thoughtfully built dish can stand alone, and sometimes even steal the show.