The Best Baked Huli Huli Chicken Recipe: Sweet & Tangy Magic
Every home cook dreams of mastering a delectable huli huli chicken recipe that brings island flavors right to your dinner table.
Hawaiian cuisine offers incredible depth with this stunning dish that combines sweet and tangy profiles.
Succulent chicken pieces marinate in a rich blend of traditional ingredients, promising an explosion of taste.
Generations of islanders have perfected this technique, creating a meal that feels like a tropical getaway.
Pineapple juice and soy sauce form the cornerstone of this remarkable recipe’s complex flavor foundation.
Culinary magic happens when simple ingredients transform into something extraordinary through careful preparation and authentic techniques.
Discover how a few strategic steps can transport you to hawaii’s beautiful coastlines with one unforgettable meal.
The Magic Behind Baked Huli Huli Chicken

Key Ingredients for Authentic Huli Huli Chicken
For the Protein:For the Sauce Base:For the Aromatics and Flavor Enhancers:For the Thickening Agents:For the Garnish:Step-by-Step to Baked Huli Huli Perfection

Step 1: Prepare Baking Setup
Warm the oven to 375 degrees Fahrenheit. Spread chicken thighs in a single layer inside a large baking dish.
Step 2: Create Flavorful Sauce
Combine sauce ingredients in a saucepan:Heat the mixture over medium temperature until it reaches a gentle boil.
Step 3: Develop Sauce Consistency
Simmer the sauce for 10 minutes, stirring occasionally.
Watch for slight thickening of the liquid.
Step 4: Enhance Sauce Texture
Whisk together cornstarch and water to create a smooth slurry.
Pour the slurry into the sauce, stirring continuously until the sauce becomes thick and glossy.
Step 5: Coat Chicken
Pour the prepared sauce over the chicken thighs, ensuring each piece is completely covered with the delicious mixture.
Step 6: Bake to Perfection
Slide the baking dish into the preheated oven. Bake for 45-60 minutes, checking that chicken reaches an internal temperature of 165 degrees Fahrenheit.
Midway through cooking, baste the chicken with extra sauce to develop a caramelized exterior.
Step 7: Rest and Serve
Allow the chicken to rest for a few minutes after removing from the oven, which helps retain its juicy texture.
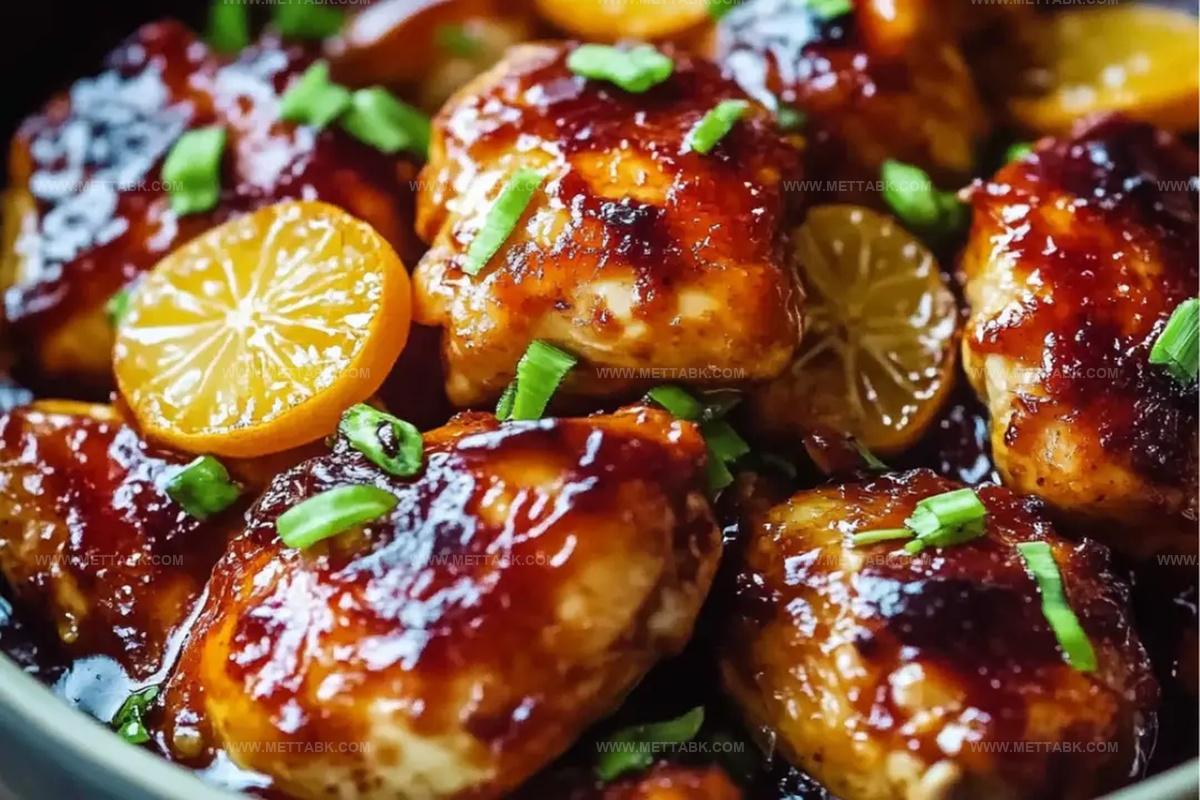
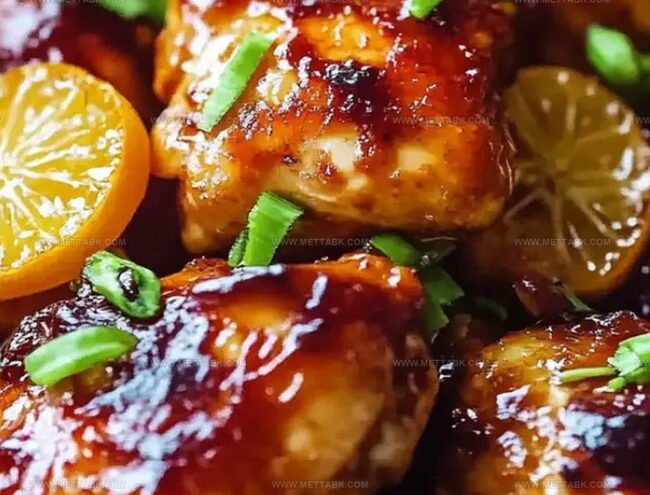
Step 8: Garnish and Finish
Top the chicken with:Tips to Nail Your Huli Huli Chicken
Flavor Variations to Try with Huli Huli
Perfect Sides for Huli Huli Chicken Meals
Savor Hawaiian Flavor Companions:Storing Your Huli Huli Chicken Right
FAQs
Huli huli chicken originates from Hawaii and features a sweet-tangy sauce with pineapple juice, creating a unique caramelized glaze that sets it apart from traditional marinades.
No, this recipe is more sweet and savory. The sauce combines brown sugar, soy sauce, and pineapple juice for a balanced flavor without significant heat.
Yes, but chicken thighs work best because they stay juicier and absorb more sauce. If using breasts, reduce cooking time to prevent drying out.
A large baking dish works perfectly. Ensure chicken pieces are in a single layer for even cooking and sauce caramelization.
Print
The Best Baked Huli Huli Chicken Recipe
- Total Time: 1 hour 10 minutes
- Yield: 6 1x
Description
Hawaiian huli huli chicken delivers a sweet and tangy paradise of flavors straight from island kitchens. Marinade-infused grilled chicken pieces promise a delicious journey through traditional Hawaiian culinary delights you’ll crave again and again.
Ingredients
Meat:
- 3 pounds (1.36 kilograms) chicken thighs, bone-in, skin-on
Liquid Base:
- 1 cup (240 milliliters) pineapple juice
- 1/2 cup (120 milliliters) soy sauce
- 1/4 cup (60 milliliters) chicken broth
- 2 teaspoons (10 milliliters) sesame oil
Seasoning and Thickening Agents:
- 1/2 cup (100 grams) brown sugar, packed
- 1/3 cup (80 milliliters) ketchup
- 2 tablespoons (30 grams) fresh ginger, grated
- 2 garlic cloves, minced
- 1 tablespoon (15 grams) cornstarch
- 1 tablespoon (15 milliliters) water
Garnish (Optional):
- Fresh pineapple slices
- Green onions, sliced
- Sesame seeds
Instructions
- Heat the oven to 375F (190C) and position a large baking dish to accommodate chicken thighs in a single, even layer.
- Combine pineapple juice, soy sauce, brown sugar, ketchup, chicken broth, minced ginger, crushed garlic, and sesame oil in a saucepan over medium heat until it reaches a gentle simmer.
- Allow the sauce to bubble softly for 10 minutes, stirring periodically to prevent scorching and help ingredients meld together.
- Create a cornstarch slurry by whisking cornstarch with water until smooth, then incorporate into the simmering sauce to enhance thickness and glossiness.
- Thoroughly drench chicken thighs with the prepared sauce, ensuring each piece is completely coated for maximum flavor absorption.
- Slide the baking dish into the preheated oven and roast for 45-50 minutes, occasionally basting with additional sauce to promote caramelization.
- Verify chicken is fully cooked by checking the internal temperature reaches 165F (74C), with sauce developing a rich, sticky glaze.
- Remove from oven and allow chicken to rest for 5 minutes, which helps redistribute juices and maintain moisture.
- Garnish with fresh pineapple slices, thinly sliced green onions, and a sprinkle of toasted sesame seeds before serving.
Notes
- Marinate chicken for deeper flavor by letting it sit in the sauce for 2-4 hours before baking.
- Adjust sauce sweetness by balancing pineapple juice and brown sugar for personal taste preferences.
- Use boneless, skinless chicken thighs for quicker cooking and easier eating.
- Swap cornstarch with arrowroot powder for gluten-free version, maintaining same thickening properties.
- Prep Time: 15 minutes
- Cook Time: 55 minutes
- Category: Lunch, Dinner
- Method: Baking
- Cuisine: Hawaiian
Nutrition
- Serving Size: 6
- Calories: 334 kcal
- Sugar: 14 g
- Sodium: 870 mg
- Fat: 20 g
- Saturated Fat: 5 g
- Unsaturated Fat: 13 g
- Trans Fat: 0.1 g
- Carbohydrates: 18 g
- Fiber: 1 g
- Protein: 25 g
- Cholesterol: 110 mg
Nate Harper
Founder & Recipe Curator
Expertise
Single-Recipe Development, Farm-to-Table Cooking, Seasonal Menu Planning, Culinary Storytelling, Home Kitchen Innovation
Education
Cascade Culinary Institute – Central Oregon Community College
Certificate in Culinary Arts
Focus: Farm-to-table cuisine, sustainable cooking practices, and seasonal recipe creation.
Nate studied under experienced chefs who emphasized local sourcing, minimal waste, and building recipes from fresh, simple ingredients.
Nate Harper is the founder and creative force behind Make, Take, Bake. Raised in the wild beauty of Oregon’s high desert, Nate grew up surrounded by family gardens, farmers’ markets, and home kitchens that celebrated the seasons.
His early love for simple, honest food evolved into a professional passion when he attended Cascade Culinary Institute, where he sharpened his skills in creating recipes that are sustainable, satisfying, and made for everyday life.
Nate’s goal is to make cooking feel accessible, free of fuss, and full of flavor. He believes a single, thoughtfully built dish can stand alone, and sometimes even steal the show.