The Ultimate Magnolia Bakery Banana Pudding From Scratch Recipe
Creamy, dreamy magnolia bakery banana pudding has captured dessert lovers’ hearts with its irresistible charm.
Sweet layers of comfort await your spoon in this iconic treat.
New york’s beloved bakery inspired countless home cooks to recreate this classic dessert.
Vanilla-soaked cookies mingle with ripe bananas, creating a symphony of textures and flavors.
Homemade pudding forms the rich, silky foundation that sets this recipe apart from store-bought versions.
Each spoonful promises a nostalgic journey through childhood memories and comforting indulgence.
Whip up this magical recipe and watch faces light up with pure joy.
What Makes Magnolia Bakery Banana Pudding Great
Ingredients for Magnolia Bakery Banana Pudding
For the Base:For the Sweeteners:For the Flavor and Texture Enhancers:How to Prepare Magnolia Bakery Banana Pudding
Step 1: Whisk Pudding Base
Create a smooth pudding foundation by combining cornstarch, sugar, and salt in a small bowl. Whip eggs until they become light and airy.
Gradually blend the cornstarch mixture into the eggs, ensuring a silky consistency. Warm milk with sugar in a saucepan, then gently stream the hot liquid into the egg mixture while whisking constantly to prevent clumping.
Step 2: Cook and Chill Pudding
Transfer the mixture back to the saucepan, add vanilla, and cook over medium-high heat. Continuously whisk the pudding until it thickens and becomes creamy (about 6-7 minutes).
Pour into a bowl, cover the surface directly with plastic wrap, and refrigerate for 3 hours to set completely.
Step 3: Prepare Fluffy Whipped Cream
In a chilled bowl, whip together:Beat at high speed until the mixture becomes light and billowy (approximately 5 minutes).
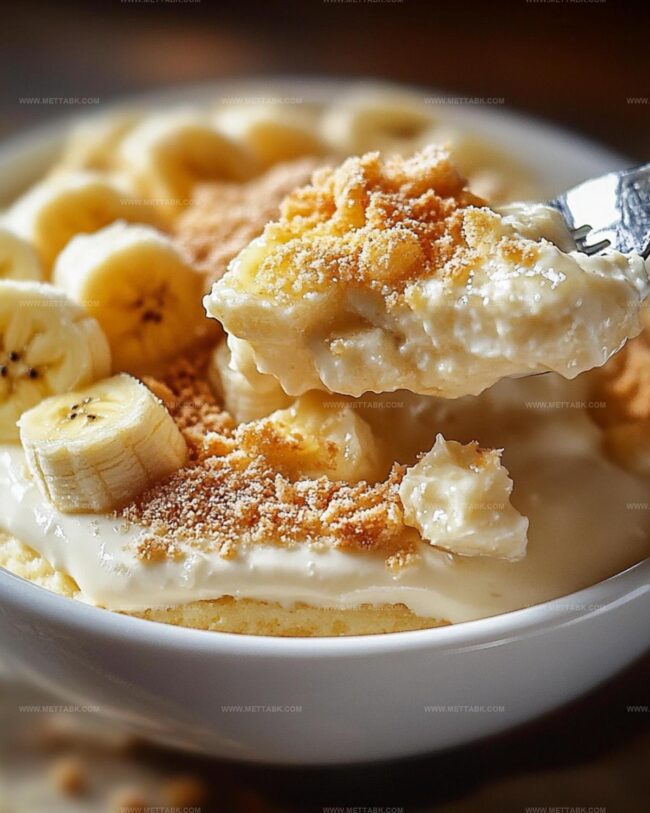
Gently fold the whipped cream into the chilled pudding, creating a cloud-like texture.
Step 4: Prepare Wafer Layers
Crush Nilla wafers using a rolling pin inside a sealed plastic bag.
Break them into varied sizes for textural interest.
Step 5: Build Delicious Layers
Begin constructing the dessert by:Finish with a final pudding layer and decorative wafer garnish.
Step 6: Chill and Serve
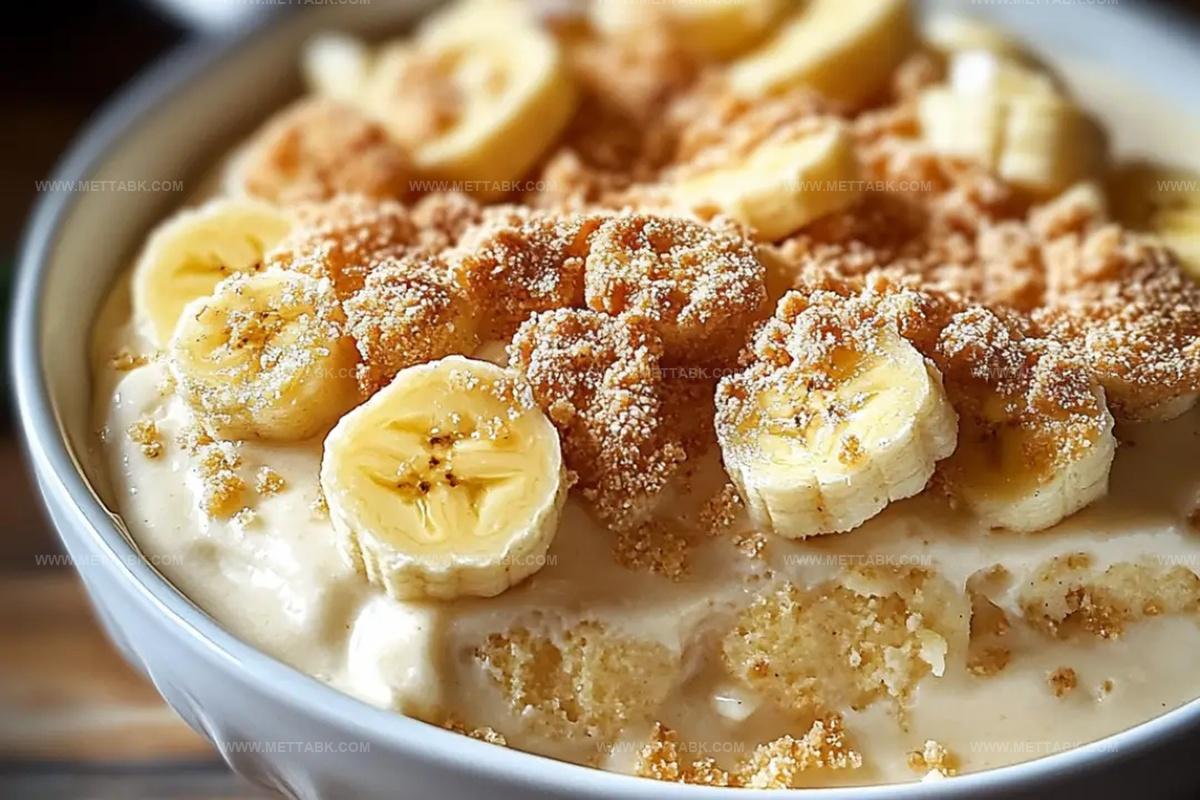
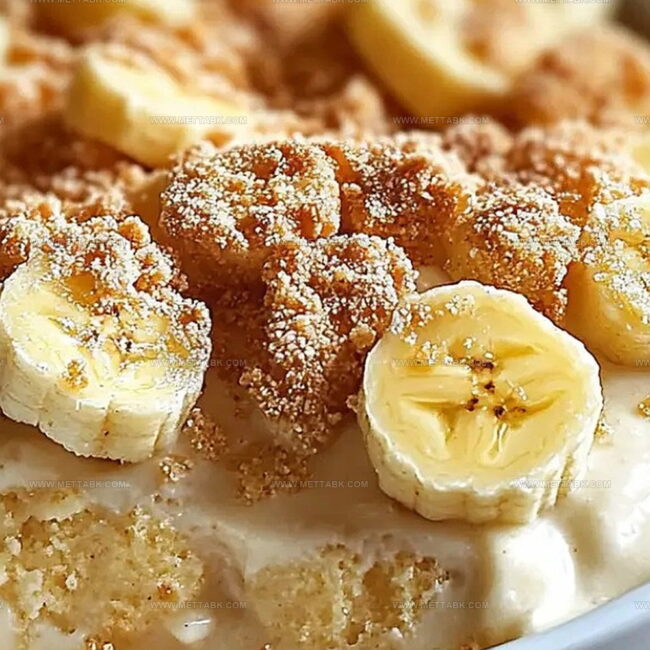
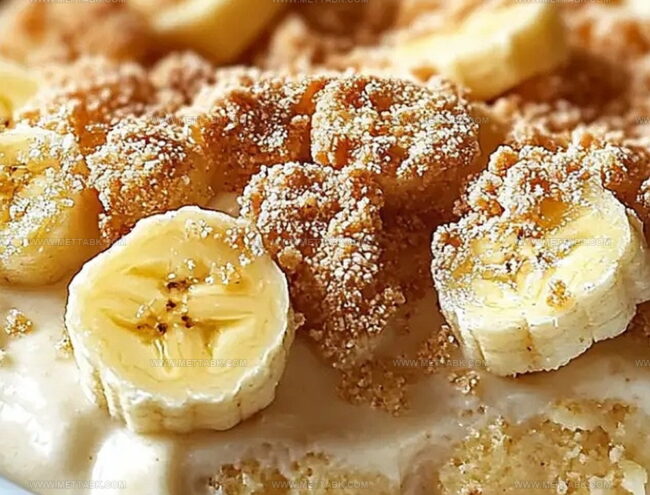
Cover the dessert and refrigerate for at least 4 hours to allow flavors to meld. Serve chilled, garnishing with extra banana slices and wafer crumbs for a stunning presentation.
Tips for Magnolia Bakery Banana Pudding
Different Versions of Magnolia Bakery Banana Pudding
Pairing Suggestions for Magnolia Bakery Banana Pudding
Storing Magnolia Bakery Banana Pudding
Store the banana pudding in an airtight container in the refrigerator for up to 3-4 days. Cover tightly with plastic wrap to prevent absorption of other food odors and maintain freshness.
Do not freeze the entire dessert, as bananas and wafers will become mushy. If absolutely necessary, freeze only the pudding base for up to 2 months in a freezer-safe container.
Place sliced bananas in a layer of pudding to minimize oxidation and prevent quick browning when storing in the refrigerator.
Remove the pudding from the refrigerator 10-15 minutes before serving to allow it to soften slightly and enhance its creamy texture.
FAQs
No, it’s relatively simple. The steps are straightforward, and most home cooks can easily follow the detailed instructions. The recipe requires basic cooking skills like whisking, simmering, and layering.
The secret is in the homemade custard base and whipped cream. By carefully cooking the egg and milk mixture and folding in whipped cream, you create an incredibly smooth and rich texture.
Definitely! While Nilla Wafers are traditional, you can substitute with graham crackers, shortbread cookies, or any similar crisp cookie that complements the banana flavor.
Print
The Magnolia Bakery Banana Pudding (From Scratch) Recipe
- Total Time: 32 minutes
- Yield: 6 1x
Description
Magnolia Bakery’s banana pudding delivers pure comfort with creamy layers of sweetness and nostalgic charm. Silky vanilla custard, ripe bananas, and vanilla wafers create a delightful dessert sure to impress when you serve this classic New York treat.
Ingredients
Main Ingredients:
- 4 large ripe bananas
- 4 cups mini Nilla wafers
- 2 cups whole milk
- 2 large eggs
Pudding Ingredients:
- 2 tablespoons cornstarch
- 2 teaspoons cornstarch
- 8 tablespoons granulated sugar
- 1 tablespoon vanilla extract
- 1 pinch salt
Cream Ingredients:
- 2 cups heavy cream, cold
- 1 tablespoon sweetened condensed milk
Instructions
- Craft the silky pudding base by whisking cornstarch, sugar, and salt into a smooth mixture. Vigorously beat eggs until they transform into a fluffy, light texture.
- Heat milk and remaining sugar in a saucepan until it reaches a gentle simmer at medium-high temperature, approximately 5 minutes. Carefully stream the hot liquid into the egg mixture, stirring continuously to prevent curdling.
- Return the combined liquid to the saucepan, incorporate vanilla, and cook while whisking constantly. Continue until the mixture thickens substantially, around 6-7 minutes. Transfer to a bowl and refrigerate for 3 hours, covering the surface with plastic wrap.
- Prepare the creamy whipped component by beating cold heavy cream and sweetened condensed milk on high speed until it develops a luxurious, airy consistency, roughly 5 minutes.
- Gently integrate the whipped cream into the chilled pudding, creating a harmonious blend. Refrigerate until assembly time.
- Crush Nilla wafers using a rolling pin inside a sealed plastic bag, creating a mixture of fine and coarse crumbs.
- Begin layering by spreading a thin pudding base in your serving dish. Arrange whole wafers and sprinkle crushed wafers.
- Add a pudding layer, then strategically place sliced bananas across the surface.
- Repeat the layering process, alternating between pudding, whole wafers, crushed wafers, and banana slices.
- Complete the dessert with a final pudding layer, decorating with additional wafers for visual appeal.
- Seal with plastic wrap and refrigerate for a minimum of 4 hours to allow flavors to meld and texture to set.
- Serve chilled, portioning into individual dishes and garnishing with extra banana slices and wafer fragments.
Notes
- Prevent Banana Browning by tossing sliced bananas in a little lemon juice to maintain their fresh, creamy white appearance and stop oxidation.
- Make Ahead Friendly by preparing pudding and components up to 2 days in advance, which helps develop richer flavors and saves time before serving.
- Dairy-Free Alternative can be created by substituting whole milk with coconut milk and using dairy-free whipped cream for a delicious vegan version.
- Temperature Matters when chilling pudding and assembling layers, ensuring each component is properly cooled to maintain perfect texture and prevent separation.
- Prep Time: 20 minutes
- Cook Time: 12 minutes
- Category: Desserts
- Method: Simmering
- Cuisine: American
Nutrition
- Serving Size: 6
- Calories: 380 kcal
- Sugar: 38 g
- Sodium: 150 mg
- Fat: 18 g
- Saturated Fat: 11 g
- Unsaturated Fat: 5 g
- Trans Fat: 0.2 g
- Carbohydrates: 52 g
- Fiber: 2 g
- Protein: 5 g
- Cholesterol: 110 mg
Nate Harper
Founder & Recipe Curator
Expertise
Single-Recipe Development, Farm-to-Table Cooking, Seasonal Menu Planning, Culinary Storytelling, Home Kitchen Innovation
Education
Cascade Culinary Institute – Central Oregon Community College
Certificate in Culinary Arts
Focus: Farm-to-table cuisine, sustainable cooking practices, and seasonal recipe creation.
Nate studied under experienced chefs who emphasized local sourcing, minimal waste, and building recipes from fresh, simple ingredients.
Nate Harper is the founder and creative force behind Make, Take, Bake. Raised in the wild beauty of Oregon’s high desert, Nate grew up surrounded by family gardens, farmers’ markets, and home kitchens that celebrated the seasons.
His early love for simple, honest food evolved into a professional passion when he attended Cascade Culinary Institute, where he sharpened his skills in creating recipes that are sustainable, satisfying, and made for everyday life.
Nate’s goal is to make cooking feel accessible, free of fuss, and full of flavor. He believes a single, thoughtfully built dish can stand alone, and sometimes even steal the show.