The Ultimate No-Bake Chocolate Pudding Pie Recipe
Have you ever craved a decadent no-bake chocolate pudding pie that melts in your mouth?
Creamy chocolate waves sweep through a silky smooth filling, promising pure indulgence.
Minimal effort creates maximum satisfaction with this dreamy dessert.
Rich chocolate goodness beckons without requiring complicated kitchen skills.
Cool and refreshing textures combine in a simple yet spectacular treat.
Chilled perfection awaits you with minimal prep and maximum flavor.
Grab a spoon and let this irresistible pie become your new favorite sweet escape.
Ultimate No-Bake Chocolate Pudding Pie Awaits
Key Ingredients for No-Bake Chocolate Pie
For the Crust:For the Filling:For the Topping and Garnish:Making the No-Bake Chocolate Pudding Pie
Step 1: Create Cookie Crust Base
Grab a medium mixing bowl and combine crushed cookies with melted butter. Mix thoroughly until the crumbs feel perfectly moistened and clump together.
Press this buttery mixture firmly into the bottom and sides of a pie dish, creating an even layer. Pop the crust into the refrigerator for 10-15 minutes to help it firm up.
Step 2: Whip Up Silky Chocolate Filling
Grab a large mixing bowl and whisk together:Stir vigorously until the mixture transforms into a thick, luscious pudding. Gently fold in whipped topping to create an ultra-smooth, creamy texture that will make taste buds dance.
Step 3: Pour And Smooth Pudding Layer
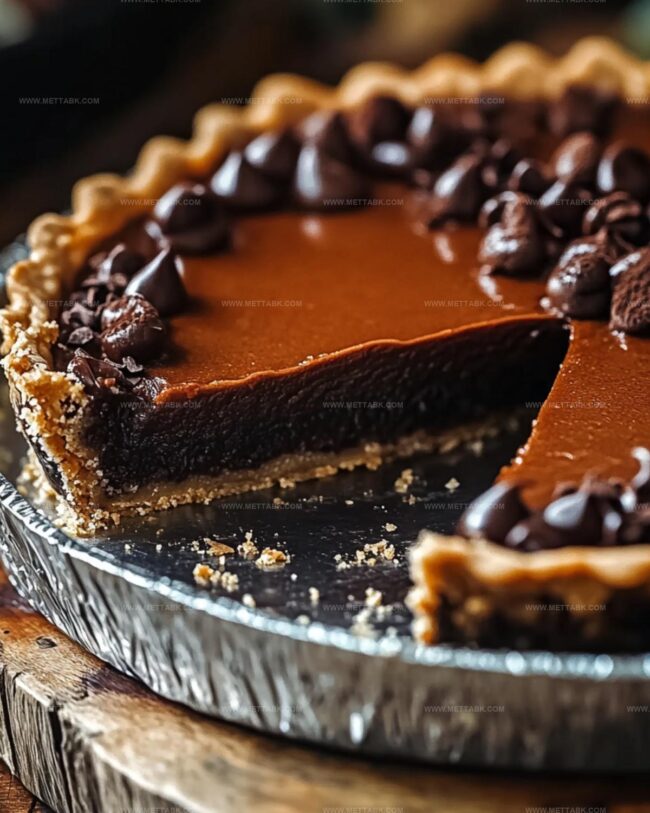
Transfer the glossy chocolate pudding into the chilled cookie crust. Use a spatula to spread the filling evenly, ensuring a perfect, glossy surface that looks professionally crafted.
Step 4: Crown With Fluffy Topping
Generously spread whipped topping across the chocolate pudding layer. Use a spatula to create elegant swirls or a smooth surface, depending on your artistic mood.
Step 5: Chill And Embellish
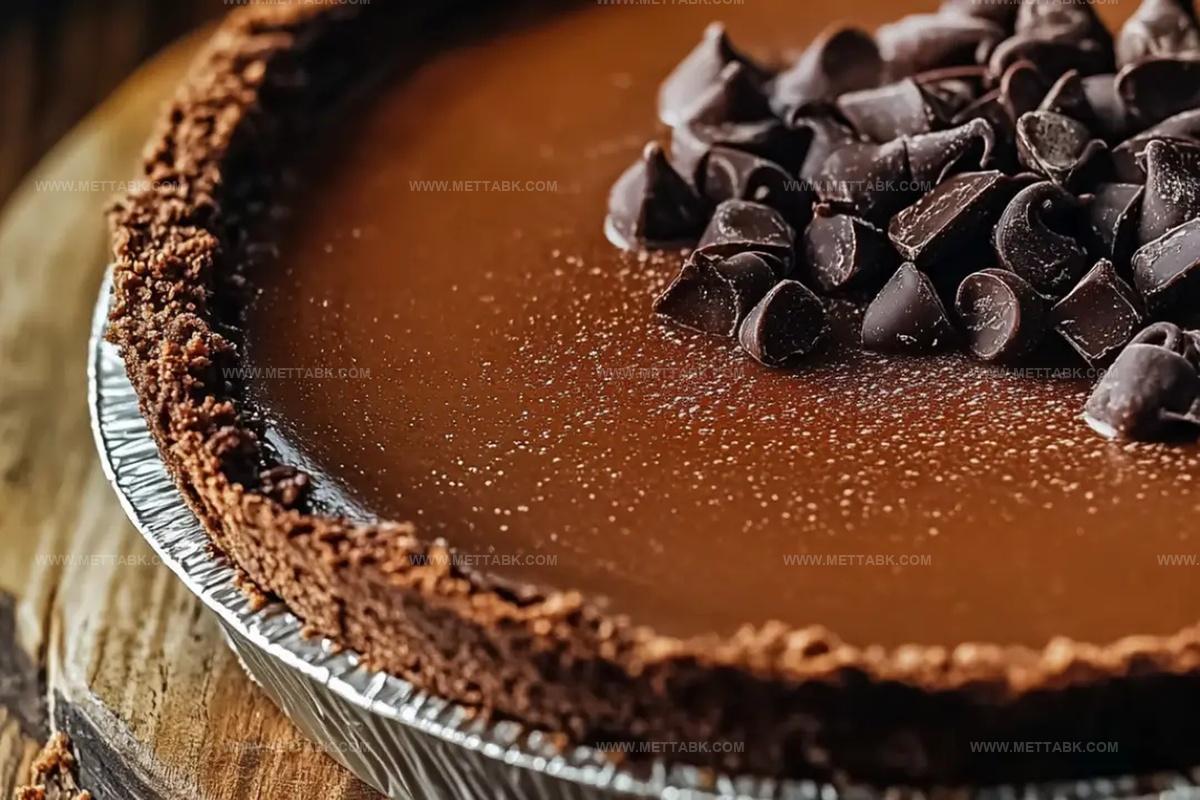
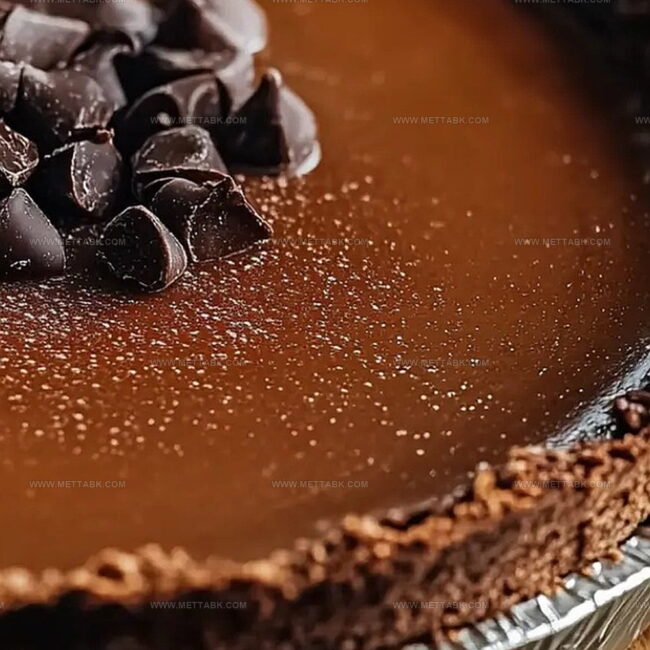
Refrigerate the pie for a minimum of 4 hours, allowing it to set completely and develop rich, deep flavors. Before serving, sprinkle with:Step 6: Slice And Indulge
Cut into beautiful wedges and savor every luxurious bite of this no-bake chocolate paradise.
Tips to Perfect Your No-Bake Chocolate Pie
Tasty Twists on No-Bake Chocolate Pie

Pairing Ideas to Enjoy with Chocolate Pie
Storing No-Bake Chocolate Pudding Pie Safely
Transfer leftover pie to an airtight container or cover tightly with plastic wrap. Keep chilled for up to 3-4 days to maintain freshness and prevent flavor absorption from other foods.
Wrap the entire pie or individual slices in plastic wrap, then aluminum foil. Freeze for maximum 2 months. Thaw overnight in the refrigerator before serving to preserve texture and taste.
Never leave the pie at room temperature for more than 2 hours, as dairy ingredients can spoil quickly and create potential food safety risks.
This no-bake pie is best enjoyed cold. Avoid microwaving, which can make the whipped topping and pudding lose their smooth consistency. Let it sit at room temperature for 10-15 minutes before serving for optimal flavor.
FAQs
Yes, you can easily substitute homemade whipped cream. Just ensure it’s well-whipped and stable to maintain the pie’s structure.
Yes, instant pudding mix is crucial as it helps the filling set quickly without baking. Regular pudding mix won’t provide the same consistency.
The pie will stay fresh for 3-4 days when stored in an airtight container in the refrigerator. Cover it with plastic wrap to prevent drying out.
Absolutely! Use gluten-free chocolate sandwich cookies for the crust and ensure your pudding mix is gluten-free to create a delicious gluten-free version.
Print
The Ultimate No-Bake Chocolate Pudding Pie Recipe
- Total Time: 4 hours 15 minutes
- Yield: 8 1x
Description
Chocolate lovers rejoice with this ultimate no-bake chocolate pudding pie that delivers pure indulgence in every silky slice. Creamy chocolate filling nestled in a crumbly graham cracker crust promises a dessert experience you’ll savor from first bite to last crumb.
Ingredients
Main Ingredients:
- 2 boxes (3.9 ounces/110 grams each) instant chocolate pudding mix
- 3 cups (720 milliliters) cold milk
- 2 cups (240 grams) chocolate sandwich cookies
- 1/2 cup (115 grams) unsalted butter, melted
Whipped Topping and Garnish:
- 2 cups (480 milliliters) whipped topping (e.g., Cool Whip), thawed
- Chocolate shavings or curls (optional)
- Mini chocolate chips or sprinkles (optional)
Preparation Components:
- None
Instructions
- Craft a crumbly foundation by blending cookie fragments with melted butter until uniformly coated and compact.
- Transfer the mixture into a 9-inch pie dish, pressing firmly across bottom and sides to create a uniform crust layer.
- Chill the prepared crust in refrigerator for 10-15 minutes to solidify its structure.
- Whisk instant pudding mix and cold milk vigorously for 2-3 minutes until mixture transforms into a thick, creamy consistency.
- Incorporate half cup of whipped topping, folding gently to enhance pudding’s silky texture and volume.
- Transfer pudding mixture into chilled crust, utilizing a spatula to distribute evenly and eliminate air pockets.
- Layer remaining whipped topping across pudding surface, creating smooth finish or decorative swirls using gentle spatula movements.
- Refrigerate pie for minimum 4 hours, allowing complete setting and flavor melding at 40°F.
- Prior to serving, embellish with chocolate shavings, miniature chocolate chips, or festive sprinkles for visual appeal.
- Slice into elegant wedges and serve chilled for maximum enjoyment.
Notes
- Choose chocolate cookie varieties like Oreos or chocolate graham crackers for a richer crust base that enhances chocolate flavor.
- Ensure milk is cold when mixing pudding mix to help it set quickly and achieve a smoother, more consistent texture.
- For a lighter version, substitute low-fat milk and sugar-free pudding mix to reduce overall calorie content without compromising taste.
- Consider dairy-free alternatives by using almond or oat milk and coconut whipped topping for individuals with lactose intolerance or vegan dietary preferences.
- Prep Time: 15 minutes
- Cook Time: 4 hours
- Category: Desserts
- Method: Refrigerating
- Cuisine: American
Nutrition
- Serving Size: 8
- Calories: 305 kcal
- Sugar: 27 g
- Sodium: 180 mg
- Fat: 18 g
- Saturated Fat: 11 g
- Unsaturated Fat: 6 g
- Trans Fat: 0.2 g
- Carbohydrates: 35 g
- Fiber: 1.5 g
- Protein: 4 g
- Cholesterol: 30 mg
Nate Harper
Founder & Recipe Curator
Expertise
Single-Recipe Development, Farm-to-Table Cooking, Seasonal Menu Planning, Culinary Storytelling, Home Kitchen Innovation
Education
Cascade Culinary Institute – Central Oregon Community College
Certificate in Culinary Arts
Focus: Farm-to-table cuisine, sustainable cooking practices, and seasonal recipe creation.
Nate studied under experienced chefs who emphasized local sourcing, minimal waste, and building recipes from fresh, simple ingredients.
Nate Harper is the founder and creative force behind Make, Take, Bake. Raised in the wild beauty of Oregon’s high desert, Nate grew up surrounded by family gardens, farmers’ markets, and home kitchens that celebrated the seasons.
His early love for simple, honest food evolved into a professional passion when he attended Cascade Culinary Institute, where he sharpened his skills in creating recipes that are sustainable, satisfying, and made for everyday life.
Nate’s goal is to make cooking feel accessible, free of fuss, and full of flavor. He believes a single, thoughtfully built dish can stand alone, and sometimes even steal the show.