
Heavenly Homemade Lemon Cheesecake Ice Cream Recipe
Creamy summer nights find their perfect companion in this homemade lemon cheesecake ice cream that promises pure bliss.
Citrus zest dances through each silky smooth bite, creating an unexpected dessert symphony.
Tangy cream cheese whispers decadent notes against bright lemon undertones.
Sweet memories of childhood treats mingle with sophisticated culinary craft.
Soft peaks of frozen magic await you, ready to transport taste buds toward cool, luxurious comfort.
Chilled perfection beckons with every spoonful, promising a delightful escape from ordinary desserts.
Summer’s most delectable secret is about to unfold right in your kitchen.
Ultimate Lemon Cheesecake Ice Cream to Try
Ingredients for Zesty Lemon Cheesecake Ice Cream
For the Base:For the Flavor:For the Enhancers:How to Make Lemon Cheesecake Ice Cream Easily
Step 1: Blend Creamy Lemon Cheesecake Base
In a spacious mixing bowl, whisk together your delightful ingredients to create a smooth, velvety mixture. Combine:Blend thoroughly until the mixture becomes silky and uniform in texture, ensuring no lumps remain.
Step 2: Churn into Dreamy Frozen Delight
Pour the luscious mixture into your ice cream maker. Churn according to the machine’s guidance, typically 25-30 minutes, until the mixture transforms into a luxurious soft-serve consistency with a beautiful, creamy texture.
Step 3: Settle and Solidify
Carefully transfer the churned ice cream into a freezer-safe container. Use a spatula to smooth the surface, creating an even layer.
Place in the freezer for a minimum of 4 hours, allowing the ice cream to firm up and develop its rich, decadent texture.
Step 4: Scoop and Savor
Remove the ice cream from the freezer a few minutes before serving to allow slight softening.
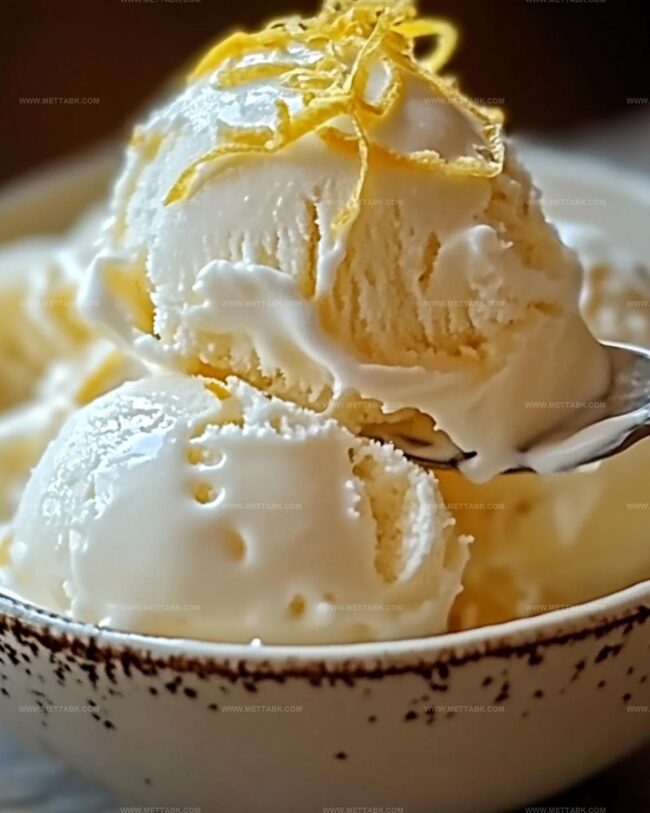
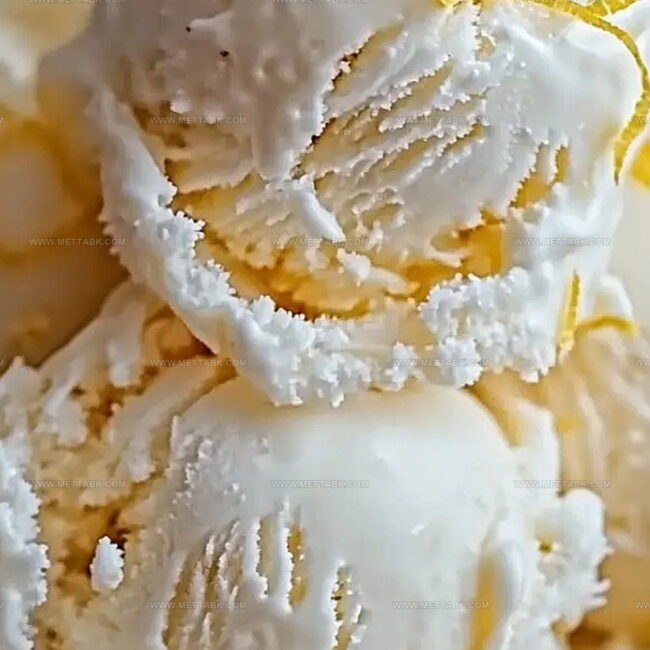
Scoop into bowls, garnish with optional lemon zest or fresh mint, and enjoy your homemade lemon cheesecake ice cream.
Tips for Creamy Lemon Cheesecake Ice Cream
Variations to Refresh Lemon Cheesecake Ice Cream
Pairings to Enhance Lemon Cheesecake Ice Cream
Storing Lemon Cheesecake Ice Cream Safely
Store leftover lemon cheesecake ice cream in a sealed container with a tight-fitting lid to prevent freezer burn and absorbing other flavors. Press plastic wrap directly onto the surface to minimize ice crystal formation.
Keep the ice cream in the freezer for up to 2 weeks. Place the container in the back of the freezer where temperature remains most consistent.
Remove the ice cream from the freezer and let it sit at room temperature for 5-10 minutes before scooping. This softens the texture and makes it easier to serve.
If the ice cream becomes too hard, briefly whip it with a hand mixer or spatula to break down ice crystals and restore its smooth, creamy consistency before serving.
FAQs
Yes, you can still make the ice cream by using the no-churn method. Pour the mixture into a freezer-safe container and stir every hour for 4-5 hours to break up ice crystals, creating a creamy texture.
Add an extra tablespoon of lemon zest or a few drops of lemon extract to intensify the citrusy taste. You can also include a small amount of limoncello liqueur for a more vibrant lemon profile.
Unfortunately, this recipe contains dairy products like heavy cream and cream cheese. For a lactose-free version, you’ll need to substitute with non-dairy alternatives like coconut cream and vegan cream cheese.
Print
Ultimate Homemade Lemon Cheesecake Ice Cream Recipe
- Total Time: 4 hours 15 minutes
- Yield: 6 1x
Description
Creamy ultimate homemade lemon cheesecake ice cream blends tangy citrus with rich cheesecake notes, creating a luxurious summer dessert. Cool refreshment meets sophisticated flavor, tempting you to savor each delightful spoonful.
Ingredients
Primary Ingredients:
- 8 ounces (226 grams) cream cheese, softened
- 2 cups (480 milliliters) heavy cream
- 1 cup (240 milliliters) whole milk
- 3/4 cup (150 grams) granulated sugar
Flavor Enhancers:
- 1/4 cup (60 milliliters) fresh lemon juice
- 2 tablespoons lemon zest
Finishing Ingredient:
- 1 teaspoon vanilla extract
Instructions
- In a spacious mixing vessel, thoroughly blend heavy cream, milk, sugar, vanilla extract, softened cream cheese, lemon juice, and lemon zest until achieving a velvety, uniform consistency without any lumps.
- Position the liquid mixture into an ice cream churning device, processing for approximately 25-30 minutes at medium speed until the texture resembles soft-serve and displays a light, airy quality.
- Carefully transfer the freshly churned mixture into a freezer-compatible container, using a spatula to create an even surface and eliminate potential air pockets.
- Securely cover the container and place in the freezer, allowing the ice cream to solidify for a minimum of 4 hours or ideally overnight, which will enhance the rich, creamy texture.
- Before serving, remove the ice cream from the freezer and let it rest at room temperature for 5-7 minutes to soften slightly, ensuring easier scooping and optimal flavor release.
Notes
- Soften cream cheese at room temperature for smooth, lump-free blending to ensure a silky texture.
- Adjust lemon intensity by adding more zest for a bolder citrus flavor or reducing it for a milder taste.
- Experiment with graham cracker crumbs sprinkled on top or mixed into the base for a classic cheesecake-inspired crunch.
- For a lighter version, substitute half-and-half for heavy cream and use low-fat cream cheese without compromising the rich, creamy consistency.
- Prep Time: 15 minutes
- Cook Time: 4 hours
- Category: Desserts
- Method: Blending
- Cuisine: American
Nutrition
- Serving Size: 6
- Calories: 400 kcal
- Sugar: 35 g
- Sodium: 120 mg
- Fat: 34 g
- Saturated Fat: 22 g
- Unsaturated Fat: 10 g
- Trans Fat: 1 g
- Carbohydrates: 30 g
- Fiber: 0.5 g
- Protein: 6 g
- Cholesterol: 95 mg
Nate Harper
Founder & Recipe Curator
Expertise
Single-Recipe Development, Farm-to-Table Cooking, Seasonal Menu Planning, Culinary Storytelling, Home Kitchen Innovation
Education
Cascade Culinary Institute – Central Oregon Community College
Certificate in Culinary Arts
Focus: Farm-to-table cuisine, sustainable cooking practices, and seasonal recipe creation.
Nate studied under experienced chefs who emphasized local sourcing, minimal waste, and building recipes from fresh, simple ingredients.
Nate Harper is the founder and creative force behind Make, Take, Bake. Raised in the wild beauty of Oregon’s high desert, Nate grew up surrounded by family gardens, farmers’ markets, and home kitchens that celebrated the seasons.
His early love for simple, honest food evolved into a professional passion when he attended Cascade Culinary Institute, where he sharpened his skills in creating recipes that are sustainable, satisfying, and made for everyday life.
Nate’s goal is to make cooking feel accessible, free of fuss, and full of flavor. He believes a single, thoughtfully built dish can stand alone, and sometimes even steal the show.