
Earthy Wild Forest Classic Dirt Pudding Cake Recipe
Wild flavors dance through this classic dirt pudding cake that brings childhood memories rushing back to the table.
Layers of chocolatey goodness promise a delightful journey into nostalgia.
Crumbled cookies create a whimsical landscape mimicking earthy terrain.
Creamy pudding nestles between soft cake layers, creating delectable textures.
Kids and adults alike will fall in love with this playful dessert.
Chocolate enthusiasts understand the magic of simple ingredients combined with imagination.
You cannot resist diving into this irresistible treat that connects generations through sweet memories.
Wild Forest Classic Dirt Pudding Cake Fun
Ingredients for Wild Forest Dirt Pudding Cake
For the Cake Base:For the Pudding Layer:For the Dirt and Decorations:How to Make Dirt Pudding Cake

Step 1: Prepare the Chocolate Cake Base
Heat the oven to 350F (175C) and grease a 9×13-inch baking dish. Follow the box instructions to make the chocolate cake.
Allow the cake to cool down completely at room temperature.
Step 2: Create the Creamy Pudding Layer
Grab a large mixing bowl and whisk the chocolate pudding mix with cold milk for two minutes until smooth.
Gently fold in Cool Whip until the mixture becomes silky and consistent.
Step 3: Build the Delicious Dirt Landscape
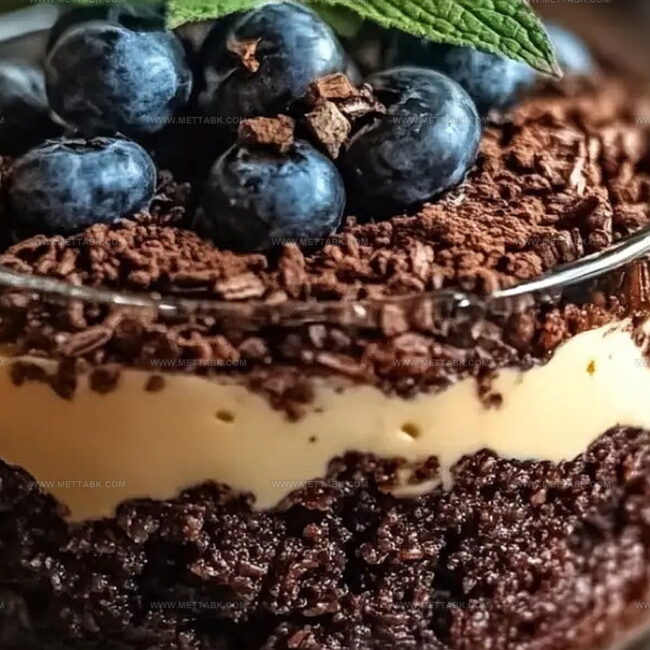
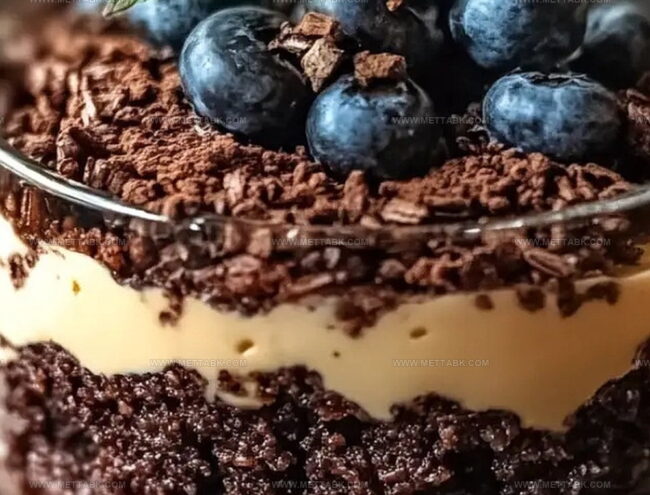
Crumble the chocolate cake into small pieces inside a deep serving dish or trifle bowl.
Pour half of the pudding mixture over the cake crumbles and spread it evenly. Sprinkle a generous layer of crushed Oreo cookies to create the “dirt” texture.
Repeat the layers, making sure to finish with a top layer of crushed Oreos.
Step 4: Design the Wild Forest Scene
Craft Edible Moss:Mix the coconut with green food coloring to create a moss-like topping.
Populate the Forest:Step 5: Chill and Serve the Forest Treat
Refrigerate the dirt pudding cake for at least one hour to set. Serve with a spoon or a mini garden trowel for a playful dining experience.
Tips for Wild Forest Dirt Pudding Cake
Variations to Try on Dirt Pudding Cake
Pairing Ideas for Dirt Pudding Cake
Pair Forest Dirt Cake with Complementary Flavors
How to Store Wild Forest Classic Dirt Pudding Cake
Store the dirt pudding cake in an airtight container in the refrigerator for up to 3-4 days. Cover tightly with plastic wrap or lid to prevent absorbing other food odors.
Wrap individual portions or the entire cake in plastic wrap, then place in a freezer-safe container. Freeze for up to 2 months. Avoid adding fresh decorative elements before freezing.
Remove from freezer and let the dirt pudding cake defrost in the refrigerator overnight. Gently refresh the top layer with fresh Oreo crumbs and decorative elements before serving.
Best served cold, but if desired, let it sit at room temperature for 10-15 minutes to soften. Do not microwave, as this will destroy the layered texture and creamy consistency.
FAQs
The combination of instant chocolate pudding mix and Cool Whip creates a smooth, rich texture that blends perfectly with the cake crumbles.
Yes, you can prepare the dirt cake up to 24 hours in advance and keep it refrigerated, which actually helps the flavors meld together even better.
Mix shredded coconut with a few drops of green food coloring, stirring until the color is evenly distributed and looks like forest ground covering.
Kids can help crumble the cake, sprinkle Oreo “dirt”, place gummy worms, and add decorative elements like candy rocks and chocolate mushrooms.
Print
Wild Forest Classic Dirt Pudding Cake Recipe
- Total Time: 1 hour 5 minutes
- Yield: 12 1x
Description
Woodland whispers dance through this Wild Forest Classic Dirt Pudding Cake, where chocolate crumbles and earthy textures blend like a secret forest floor. Dessert explorers will discover rich layers of nostalgia and playful indulgence in each delightful spoonful.
Ingredients
Main Ingredients:
- 1 (15.25 ounces / 432 grams) box chocolate cake mix
- 2 (3.9 ounces / 110 grams) boxes instant chocolate pudding mix
- 3 cups cold milk
Dairy and Creamy Components:
- 1 (8 ounces / 226 grams) container Cool Whip, thawed
- 1/2 cup chocolate chips, melted
Texture and Decoration Ingredients:
- 1 (14 ounces / 397 grams) package Oreo cookies, crushed
- Gummy worms
- Chocolate mushrooms or marshmallow mushrooms
- Candy rocks or chocolate pebbles
- Pretzel sticks
- Shredded coconut
- Green food coloring
- Edible flowers or fresh mint leaves
Instructions
- Prepare the Chocolate Cake Foundation
Mix and bake chocolate cake mix in a 9×13-inch pan at 350F (175C), ensuring even distribution. Allow cake to cool completely at room temperature.
- Craft Creamy Pudding Layer
Vigorously whisk chocolate pudding mix with cold milk for precisely 2 minutes until smooth. Gently incorporate Cool Whip, creating a luxurious, velvety texture.
- Construct Layered Terrain
Delicately crumble cooled chocolate cake into a deep serving vessel. Generously spread half the pudding mixture across cake fragments. Sprinkle a substantial layer of crushed Oreos to simulate earthy ground.
- Build Woodland Landscape
Repeat pudding and cake crumb layers, finishing with a thick Oreo “dirt” topping. Transform shredded coconut into verdant moss by tinting with green food coloring.
- Design Whimsical Forest Details
Strategically place gummy worms throughout the terrain. Nestle chocolate or marshmallow mushrooms to create fungi clusters. Insert pretzel sticks as fallen tree branches. Scatter chocolate pebbles and candy rocks for geological authenticity.
- Enhance Magical Wilderness
Garnish with delicate mint leaves or edible flowers, adding a touch of enchantment to the woodland scene.
- Chill and Serve
Refrigerate the forest-inspired dessert for minimum 1 hour. Serve chilled, using a playful garden trowel for an immersive dining experience.
Notes
- Customize cake mix by using gluten-free or vegan alternatives for dietary restrictions.
- Experiment with different pudding flavors like vanilla or butterscotch for unique variations.
- Reduce sugar content by using sugar-free pudding mix and low-fat whipped topping.
- Enhance texture by adding chopped nuts or chocolate chips between cake and pudding layers.
- Prep Time: 30 minutes
- Cook Time: 35 minutes
- Category: Desserts
- Method: Baking
- Cuisine: American
Nutrition
- Serving Size: 12
- Calories: 304 kcal
- Sugar: 29 g
- Sodium: 280 mg
- Fat: 14 g
- Saturated Fat: 8 g
- Unsaturated Fat: 5 g
- Trans Fat: 0.2 g
- Carbohydrates: 42 g
- Fiber: 2 g
- Protein: 4 g
- Cholesterol: 30 mg
Nate Harper
Founder & Recipe Curator
Expertise
Single-Recipe Development, Farm-to-Table Cooking, Seasonal Menu Planning, Culinary Storytelling, Home Kitchen Innovation
Education
Cascade Culinary Institute – Central Oregon Community College
Certificate in Culinary Arts
Focus: Farm-to-table cuisine, sustainable cooking practices, and seasonal recipe creation.
Nate studied under experienced chefs who emphasized local sourcing, minimal waste, and building recipes from fresh, simple ingredients.
Nate Harper is the founder and creative force behind Make, Take, Bake. Raised in the wild beauty of Oregon’s high desert, Nate grew up surrounded by family gardens, farmers’ markets, and home kitchens that celebrated the seasons.
His early love for simple, honest food evolved into a professional passion when he attended Cascade Culinary Institute, where he sharpened his skills in creating recipes that are sustainable, satisfying, and made for everyday life.
Nate’s goal is to make cooking feel accessible, free of fuss, and full of flavor. He believes a single, thoughtfully built dish can stand alone, and sometimes even steal the show.