Magical Winter Wonderland Chocolate Chip Christmas Cookies Recipe
Baking these magical winter wonderland chocolate chip Christmas cookies transports you straight to a cozy kitchen filled with nostalgic aromas.
Sweet memories of childhood drift through the air like gentle snowflakes.
Warm spices and rich chocolate create an irresistible combination that beckons everyone closer.
Our simple recipe promises delightful moments of pure comfort and joy.
Soft, chewy textures mingle with crisp edges, making each bite a celebration of seasonal cheer.
Festive ingredients dance together, promising a treat that will spark smiles and create lasting memories.
You’ll want to share these delectable cookies with everyone around your holiday table.
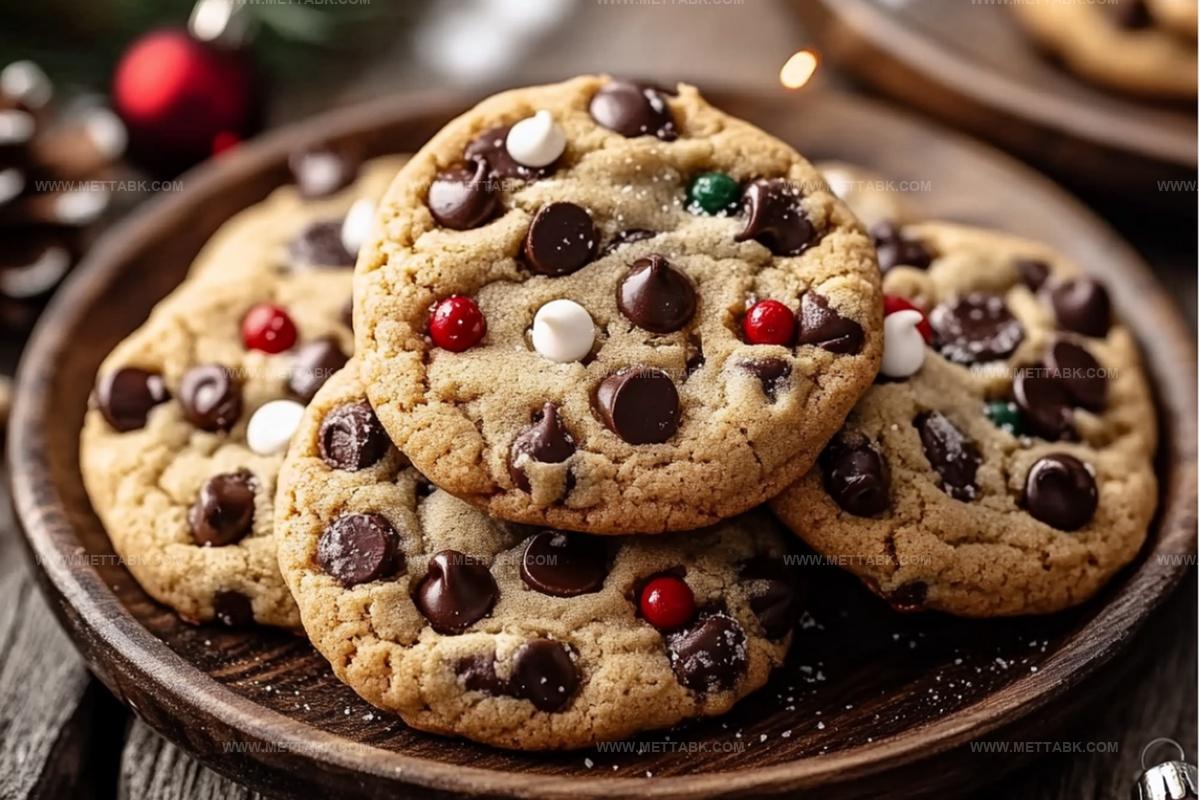
Winter Wonderland Chocolate Chip Christmas Cookies

Celebrate Holiday Cheer: Bake Festive Christmas Cookies that Spread Joy
Ingredients for Winter Wonderland Chocolate Chip Cookies
Main Ingredients:Chocolate Components:Flavor Enhancers and Binding Agents:Decorative Element:How to Bake Winter Wonderland Christmas Cookies

Step 1: Prepare Baking Station
Grab a baking sheet and line it with parchment paper. Set your oven to preheat at 350°F (175°C) so it’s ready for cookie magic.
Step 2: Create Creamy Base
In a spacious mixing bowl, blend together:Whip these ingredients until they transform into a fluffy, cloud-like mixture that looks smooth and dreamy.
Step 3: Introduce Liquid Elements
Crack eggs into the creamy base one at a time, mixing thoroughly after each addition.
Pour in vanilla extract and stir until everything looks beautifully combined.
Step 4: Combine Dry Components
In a separate bowl, whisk together:Gradually introduce these dry ingredients to the wet mixture, stirring gently until just incorporated.
Step 5: Sprinkle Festive Additions
Fold into the dough:Mix delicately to distribute these winter-inspired goodies evenly.
Step 6: Shape Cookie Drops
Scoop rounded tablespoons of dough onto the prepared baking sheet.
Space them generously to allow room for spreading during baking.
Step 7: Add Snowy Decorations
Sprinkle snowflake-shaped decorations on top of each cookie dough mound for a magical winter touch.
Step 8: Bake to Perfection
Slide the baking sheet into the preheated oven. Bake for 10-12 minutes until edges turn golden brown.
Watch carefully to maintain a soft, chewy center.
Step 9: Cool and Enjoy
Let cookies rest on the baking sheet for 5 minutes.
Transfer to a wire rack and allow them to cool completely. Prepare to indulge in these festive winter treats!
Tips for Soft Chocolate Chip Cookies
Variations on Winter Wonderland Cookies
Pairing Suggestions for Christmas Cookies
Create a rich, creamy hot chocolate with marshmallows and a sprinkle of crushed candy cane to echo the cookie’s peppermint notes.
Serve a chilled glass of traditional eggnog alongside the cookies, its smooth texture and nutmeg flavor complementing the chocolate and mint.
Brew a warming chai or cinnamon tea that highlights the cookie’s festive warmth and provides a cozy contrast to the sweet treat.
Prepare a homemade peppermint mocha coffee that amplifies the cookie’s mint chocolate flavor profile and adds a luxurious holiday touch.
Storage Tips for Winter Wonderland Cookies
FAQs
Yes, but reduce the added salt in the recipe to prevent the cookies from becoming too salty.
Chill the dough for 30 minutes before baking, and ensure your butter isn’t too soft when mixing.
No, they’re optional. You can skip them or substitute with crushed peppermint candies for a similar festive crunch.
Absolutely! You can prepare the dough and refrigerate it for up to 3 days before baking, or freeze it for up to a month.
Print
Winter Wonderland Chocolate Chip Christmas Cookies Recipe
- Total Time: 32 minutes
- Yield: 36 1x
Description
Festive winter wonderland chocolate chip christmas cookies bring holiday magic to your kitchen with rich chocolate and seasonal cheer. Sweet memories and delightful moments await when you bake these irresistible treats that sparkle with winter joy.
Ingredients
Main Ingredients:
- 3 cups all-purpose flour
- 2 cups chocolate chips
- 1 cup unsalted butter, softened
- 1 cup granulated sugar
- 1 cup packed brown sugar
Binding and Leavening Ingredients:
- 2 large eggs
- 2 teaspoons vanilla extract
- 1 teaspoon baking soda
- 1/2 teaspoon baking powder
- 1/4 teaspoon salt
Decorative and Flavor Ingredients:
- 1 cup crushed candy canes
- 1/2 cup white chocolate chips
- Snowflake sprinkles
Instructions
- Prepare the baking environment by heating the oven to 350°F and lining a baking sheet with parchment paper, creating a pristine surface for cookie creation.
- In a spacious mixing bowl, whip the softened butter with granulated and brown sugars until the mixture transforms into a billowy, pale landscape.
- Introduce eggs one at a time, thoroughly blending each into the sugar-butter mixture, then infuse with vanilla extract for aromatic depth.
- Separately combine flour, baking soda, baking powder, and salt, forming a delicate dry foundation. Gradually integrate this powdery mixture into the wet ingredients, stirring until just harmonized.
- Gently fold chocolate chips, crushed candy canes, and white chocolate chips into the dough, distributing winter-inspired elements throughout.
- Sculpt rounded tablespoon-sized dough mounds onto the prepared baking sheet, spacing them to allow graceful spreading during baking.
- Sprinkle snowflake decorations atop each cookie, transforming them into edible winter landscapes.
- Slide the baking sheet into the preheated oven, allowing cookies to bake for 10-12 minutes until edges acquire a golden, crisp embrace while maintaining a tender center.
- Let cookies rest on the baking sheet for 5 minutes, then transfer to a wire rack for complete cooling, solidifying their delicate winter charm.
Notes
- Crush candy canes finely to ensure even distribution and prevent large, hard chunks in the cookie dough.
- Use room temperature butter and eggs for smoother mixing and better cookie texture, helping ingredients blend seamlessly.
- Chill the dough for 30 minutes before baking to prevent excessive spreading and create thicker, more defined cookies.
- For gluten-free variation, swap all-purpose flour with a 1:1 gluten-free baking blend, maintaining the same measurement and texture.
- Prep Time: 20 minutes
- Cook Time: 12 minutes
- Category: Snacks, Desserts
- Method: Baking
- Cuisine: American
Nutrition
- Serving Size: 36
- Calories: 210 kcal
- Sugar: 18 g
- Sodium: 90 mg
- Fat: 11 g
- Saturated Fat: 6 g
- Unsaturated Fat: 4 g
- Trans Fat: 0.3 g
- Carbohydrates: 28 g
- Fiber: 1 g
- Protein: 2 g
- Cholesterol: 25 mg
Clara Bennett
Contributing Recipe Developer & Food Writer
Expertise
Baking and Pastry Development, Gluten-Free and Allergy-Friendly Recipe Creation, Culinary Storytelling and Food Journalism, Recipe Testing and Standardization, Southern Comfort Foods and Modern Twists
Education
Sullivan University – National Center for Hospitality Studies
Associate Degree in Culinary Arts
Focus: Baking and Pastry Arts, Recipe Testing, and Culinary Journalism.
Clara specialized in crafting desserts that blend classic Southern comfort with modern techniques, while developing strong writing skills to tell the story behind every dish.
Lane Community College (Certificate Program)
Certificate in Food Writing and Photography
Focus: Culinary storytelling, recipe formatting, food styling, and visual presentation.
Clara’s love of baking started young, powered by homemade pies, biscuits, and stories passed around the family table.
After earning her degree at Sullivan University and a food writing certificate at Lane Community College, she turned her passion into a craft: sharing recipes that are simple, soulful, and always full of heart.
She’s big on bold flavors, flexible ideas, and creating sweets that fit any table (yes, even if you’re gluten-free). When she’s not baking, you’ll find her wandering farmers’ markets, styling food for the next photo shoot, or working on her ever-growing recipe journal.