
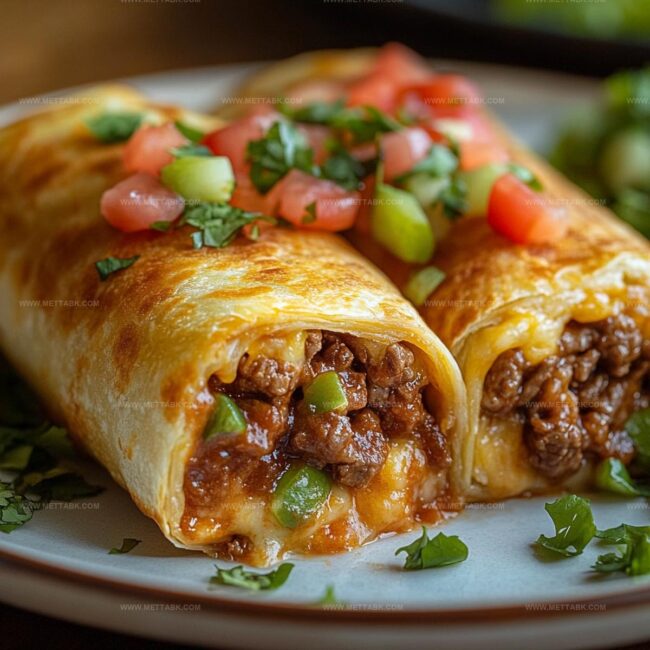
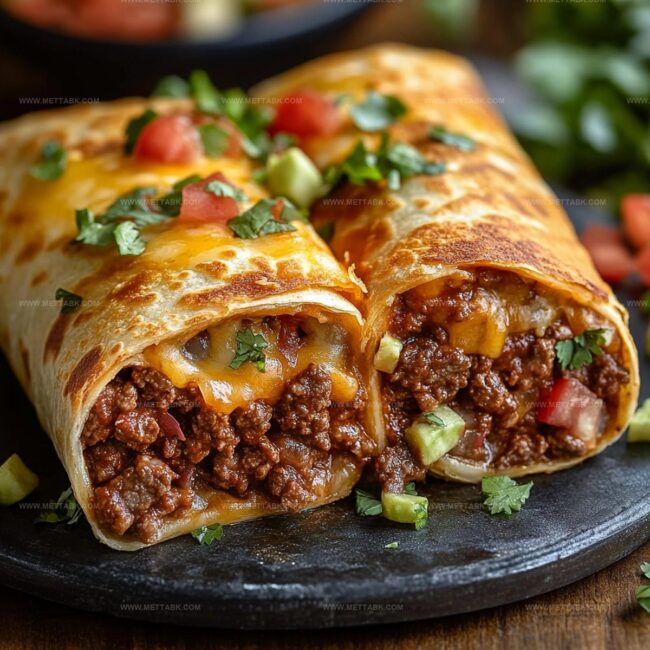
The Zesty Beef and Cheese Chimichangas Recipe You’ll Adore
Crispy, golden beef and cheese chimichangas dance with Mexican-inspired flavors that will make your taste buds jump for joy.
Southwest spices mingle inside these crunchy parcels of deliciousness.
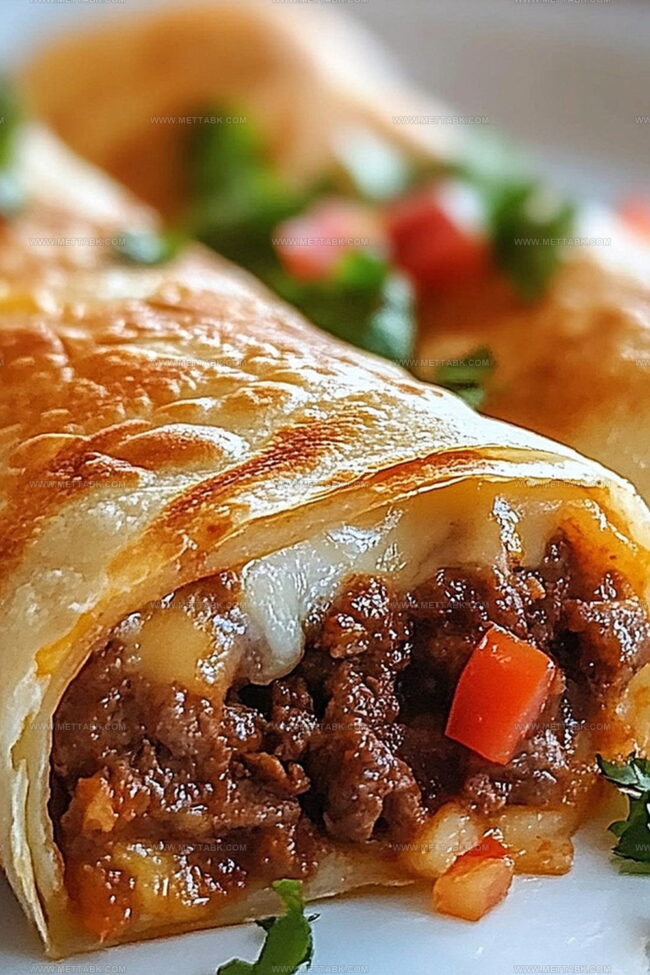
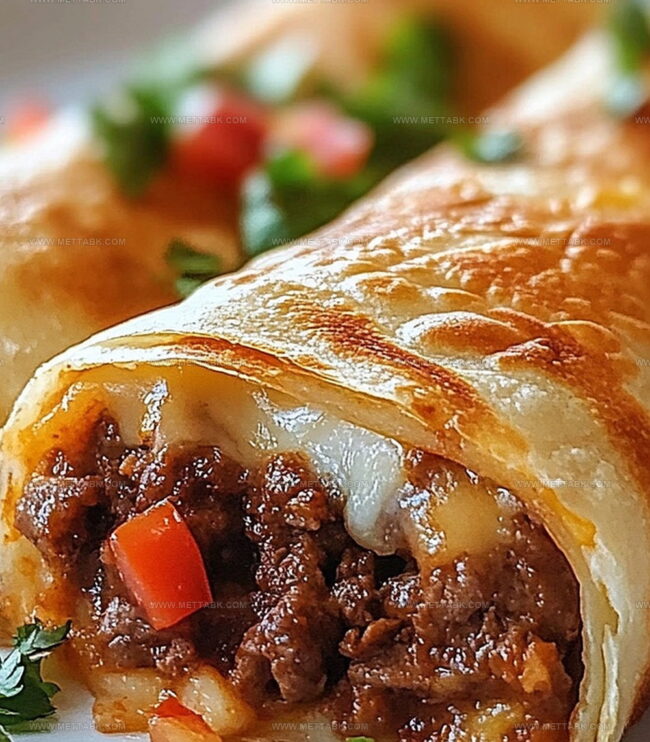
Melted cheese oozes between seasoned meat layers, creating a mouthwatering experience.
Our simple recipe brings restaurant-quality magic straight to your kitchen.
Friends and family will beg you to make these again and again.
Packed with bold ingredients and easy preparation, these chimichangas promise a quick and satisfying meal.
Beef and Cheese Chimichangas That Satisfy Deeply
Ingredients for Hearty Beef and Cheese Chimichangas
Protein Base:Cheese and Dairy:Spices and Seasonings:Wrappers and Cooking Essentials:Steps to Make Crispy Beef and Cheese Chimichangas
Step 1: Brown Ground Beef
Heat a skillet on medium heat. Crumble the ground beef into the pan and cook until the meat turns completely brown and loses its pink color.
Break up the beef with a wooden spoon to ensure even cooking.
Step 2: Infuse Flavor
Sprinkle in these seasonings:Stir the spices thoroughly into the beef, allowing the flavors to blend completely.
Add shredded cheese and mix until the cheese melts and creates a rich, creamy texture.
Step 3: Wrap Delicious Filling
Lay out soft tortillas on a clean surface.
Spoon the beef and cheese mixture into the center of each tortilla. Fold the sides inward, then roll tightly from the bottom to create a neat, secure package.
Step 4: Create Crispy Golden Exterior
Pour vegetable oil into a deep skillet, heating to medium-high temperature. Carefully place the rolled chimichangas seam-side down into the hot oil.
Fry until the exterior turns a beautiful golden brown, rotating to ensure even crispiness. This should take about 3-4 minutes per side.
Step 5: Prepare for Serving
Remove chimichangas from the oil and place on paper towels to drain excess oil. The towels will help absorb any extra grease, keeping the dish crisp and appetizing.
Plate the chimichangas and serve immediately with a dollop of cool sour cream on the side.
Tips to Nail Perfect Beef and Cheese Chimichangas
Flavorful Twists on Beef and Cheese Chimichangas
Pairings That Go Well with Beef and Cheese Chimichangas
Storage Tips for Beef and Cheese Chimichangas
FAQs
You can swap ground beef for shredded chicken, pulled pork, or ground turkey for variety.
No, a regular skillet with enough oil works perfectly for frying.
Secure each chimichanga with toothpicks before frying to keep them tightly rolled.
Yes, you can prepare and refrigerate them uncooked, then fry just before serving for best crispiness.
Print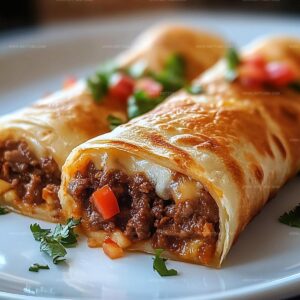
Beef And Cheese Chimichangas Recipe
- Total Time: 30 minutes
- Yield: 4 1x
Description
Mexican cuisine shines through these beef and cheese chimichangas, delivering crispy golden perfection with savory filling. Crisp tortillas encase spicy ground beef and melted cheese, promising a satisfying meal that brings zest to your dining experience.
Ingredients
- 1 lb (454 g) lean ground beef
- 2 cups (480 ml) shredded cheddar and Monterey Jack cheese
- 2 cups (480 ml) cooking oil (for frying)
- 4 large flour tortillas
- 1 tsp (5 ml) chili powder
- 1 tsp (5 ml) cumin
- 1 tsp (5 ml) garlic powder
- sour cream (for serving)
Instructions
- Warm a skillet over medium heat and thoroughly cook ground beef until completely browned and no pink remains, approximately 5-7 minutes.
- Season the meat with cumin, chili powder, garlic powder, and salt, creating a robust flavor profile. Gently incorporate cheese, stirring until fully melted and smoothly integrated with the meat mixture.
- Take each tortilla and carefully distribute the seasoned meat filling, ensuring even placement. Fold and roll the tortilla tightly, tucking in edges to prevent filling from escaping during cooking.
- Pour oil into a deep skillet, heating to medium-high temperature. Carefully position chimichangas seam-side down, allowing them to crisp and transform into a golden-brown exterior, approximately 3-4 minutes per side.
- Remove chimichangas from hot oil and place on paper towels to absorb excess grease, helping maintain a crisp texture. Plate immediately while hot, accompanying with a dollop of cool sour cream for contrasting temperature and flavor.
Notes
- Customize spice levels by adjusting chili powder and adding jalapeños for extra kick without overwhelming heat.
- Use lean ground beef or swap with ground turkey for a healthier protein option that maintains delicious flavor profile.
- Prevent tortilla tearing by warming them slightly before filling to increase flexibility and reduce cracking during rolling.
- brush chimichangas with olive oil and cook at 400°F for 20-25 minutes until crispy golden brown.
- Prep Time: 15 minutes
- Cook Time: 15 minutes
- Category: Lunch, Dinner, Appetizer, Snacks
- Method: Frying
- Cuisine: Mexican
Nutrition
- Serving Size: 4
- Calories: 850
- Sugar: 2 g
- Sodium: 600 mg
- Fat: 60 g
- Saturated Fat: 25 g
- Unsaturated Fat: 30 g
- Trans Fat: 1.5 g
- Carbohydrates: 35 g
- Fiber: 2 g
- Protein: 40 g
- Cholesterol: 100 mg
Clara Bennett
Contributing Recipe Developer & Food Writer
Expertise
Baking and Pastry Development, Gluten-Free and Allergy-Friendly Recipe Creation, Culinary Storytelling and Food Journalism, Recipe Testing and Standardization, Southern Comfort Foods and Modern Twists
Education
Sullivan University – National Center for Hospitality Studies
Associate Degree in Culinary Arts
Focus: Baking and Pastry Arts, Recipe Testing, and Culinary Journalism.
Clara specialized in crafting desserts that blend classic Southern comfort with modern techniques, while developing strong writing skills to tell the story behind every dish.
Lane Community College (Certificate Program)
Certificate in Food Writing and Photography
Focus: Culinary storytelling, recipe formatting, food styling, and visual presentation.
Clara’s love of baking started young, powered by homemade pies, biscuits, and stories passed around the family table.
After earning her degree at Sullivan University and a food writing certificate at Lane Community College, she turned her passion into a craft: sharing recipes that are simple, soulful, and always full of heart.
She’s big on bold flavors, flexible ideas, and creating sweets that fit any table (yes, even if you’re gluten-free). When she’s not baking, you’ll find her wandering farmers’ markets, styling food for the next photo shoot, or working on her ever-growing recipe journal.