
Homemade Brown Gravy Without Drippings Recipe – Rich & Savory
When crafting a delectable brown gravy without drippings, home cooks can unlock a world of savory possibilities.
Kitchen magic happens with simple pantry ingredients and clever techniques.
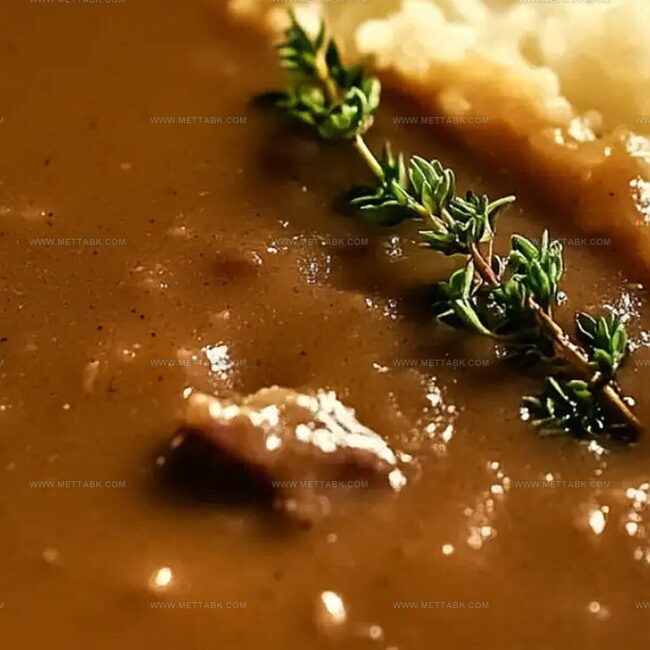
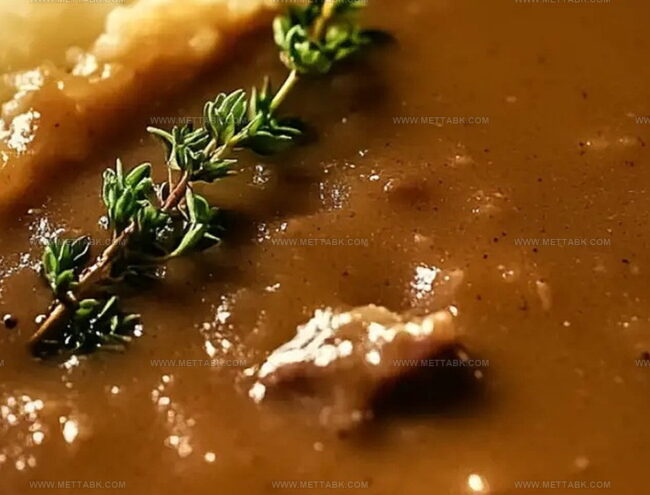
Beef broth provides a rich, deep foundation for this classic sauce.
Whisking flour and butter creates a smooth roux that develops incredible depth of flavor.
Salt, pepper, and optional herbs can customize the gravy to match your culinary vision.
Worcestershire sauce adds a subtle umami kick that elevates the entire dish.
You’ll love how quickly this recipe comes together, making it perfect for weeknight dinners or special occasions.
Grab a whisk and let’s transform your meal with this incredible gravy.
Rich Brown Gravy Without Drippings Recipe
Ingredients for Brown Gravy Without Drippings
For the Base:For the Seasonings:For the Liquid:For the Finishing Touch:How to Make Smooth Brown Gravy Without Drippings
Step 1: Prepare the Butter Base
Heat a large saucepan over medium flame and melt the butter until it becomes smooth and golden. Watch carefully to prevent burning, letting the butter develop a light, rich aroma.
Step 2: Create Cornstarch Roux
Sprinkle cornstarch into the melted butter, stirring continuously. Toast the cornstarch until it transforms into a light golden-brown color, releasing a nutty fragrance that signals it’s perfectly prepared.
Step 3: Introduce Flavor Boosters
Add these flavor-enhancing ingredients:Stir the mixture thoroughly, ensuring all ingredients blend seamlessly and create a harmonious base.
Step 4: Whisk and Develop Texture
Grab a whisk and blend the ingredients with vigorous, consistent motion.
This technique prevents lumps and helps the cornstarch integrate smoothly with the beef stock.
Step 5: Simmer and Thicken
Continue whisking the gravy for 5-7 minutes over medium heat.
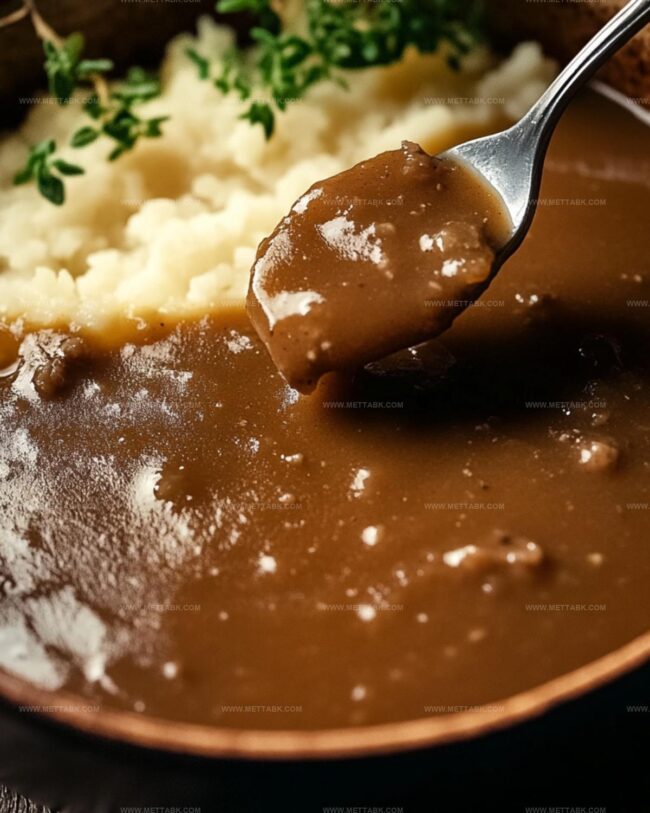
Watch as the liquid gradually transforms into a rich, velvety consistency. The gravy will naturally thicken and develop deeper color.
Step 6: Final Seasoning
Sprinkle black pepper to taste, giving the gravy a final burst of flavor. Stir one last time and serve the gravy warm, ready to complement your favorite dishes.
Tips for Perfect Brown Gravy Every Time
Variations of Brown Gravy Without Drippings
Pairings That Go Well with Brown Gravy
Proper Storage for Brown Gravy Without Drippings
Transfer leftover gravy to an airtight container and store in the refrigerator for up to 4 days. Cool completely before sealing to prevent bacterial growth.
Pour cooled gravy into freezer-safe containers or freezer bags, leaving some space for expansion. Freeze for up to 3 months. Label with date and contents.
Place gravy in a microwave-safe dish. Heat in 30-second intervals, stirring between each interval to ensure even warming. Stop when gravy reaches desired temperature.
Warm gravy in a saucepan over low heat. Stir frequently to prevent scorching. Add a splash of beef stock if gravy seems too thick, whisking until smooth and heated through.
FAQs
Yes, you can substitute beef stock with vegetable stock, but the flavor will be less rich and meaty.
Continuously whisk the mixture and add stock gradually while stirring to ensure a smooth, lump-free consistency.
Simply add more beef stock, a little at a time, and whisk until you reach the desired thickness.
Cornstarch is crucial for thickening the gravy and creating a smooth texture. Without it, your gravy will be thin and watery.
Print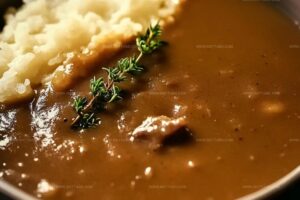
Brown Gravy Without Drippings Recipe
- Total Time: 15 minutes
- Yield: 8 1x
Description
Savory brown gravy without drippings brings comfort to your dinner table with rich, velvety goodness. Pantry staples blend seamlessly to create a classic sauce you’ll love alongside roasted meats and mashed potatoes.
Ingredients
Main Protein Base:
- 4 cups (960 ml) beef stock
Thickening Agents:
- 1/4 cup (56 grams) butter
- 1/4 cup (30 grams) cornstarch
Seasoning Blend:
- 2 tablespoons Worcestershire sauce
- 1 teaspoon onion powder
- 1 teaspoon garlic powder
- 1/4 teaspoon black pepper
Instructions
- Place a large saucepan on medium heat and gently melt butter until it becomes smooth and slightly foamy.
- Sprinkle cornstarch into the melted butter, stirring continuously to create a golden-hued roux with a nutty aroma.
- Pour beef stock into the pan, integrating it gradually while incorporating Worcestershire sauce, onion powder, and garlic powder.
- Whisk the mixture vigorously to eliminate any potential lumps, ensuring a silky smooth consistency.
- Maintain steady whisking for 5-7 minutes, observing the gravy gradually thickening and developing a rich, glossy texture.
- Adjust seasoning by adding freshly ground black pepper, tasting and fine-tuning to personal preference.
- Remove from heat and transfer to a serving vessel, ready to complement roasted meats or other savory dishes.
Notes
- Carefully melt butter at medium heat to prevent burning and achieve a rich, nutty flavor base for the gravy.
- Lightly brown cornstarch before adding liquid to enhance depth of flavor and eliminate raw starch taste.
- Use warm beef stock to prevent lumps and ensure smooth gravy consistency when mixing with cornstarch.
- Swap butter with plant-based margarine and use vegetable stock for a vegetarian-friendly version of the gravy.
- Prep Time: 5 minutes
- Cook Time: 10 minutes
- Category: Dinner, Lunch, Appetizer
- Method: Sautéing
- Cuisine: American
Nutrition
- Serving Size: 8
- Calories: 55 kcal
- Sugar: 0 g
- Sodium: 320 mg
- Fat: 3.4 g
- Saturated Fat: 2.1 g
- Unsaturated Fat: 1.3 g
- Trans Fat: 0 g
- Carbohydrates: 4.6 g
- Fiber: 0 g
- Protein: 0.5 g
- Cholesterol: 10 mg
Nate Harper
Founder & Recipe Curator
Expertise
Single-Recipe Development, Farm-to-Table Cooking, Seasonal Menu Planning, Culinary Storytelling, Home Kitchen Innovation
Education
Cascade Culinary Institute – Central Oregon Community College
Certificate in Culinary Arts
Focus: Farm-to-table cuisine, sustainable cooking practices, and seasonal recipe creation.
Nate studied under experienced chefs who emphasized local sourcing, minimal waste, and building recipes from fresh, simple ingredients.
Nate Harper is the founder and creative force behind Make, Take, Bake. Raised in the wild beauty of Oregon’s high desert, Nate grew up surrounded by family gardens, farmers’ markets, and home kitchens that celebrated the seasons.
His early love for simple, honest food evolved into a professional passion when he attended Cascade Culinary Institute, where he sharpened his skills in creating recipes that are sustainable, satisfying, and made for everyday life.
Nate’s goal is to make cooking feel accessible, free of fuss, and full of flavor. He believes a single, thoughtfully built dish can stand alone, and sometimes even steal the show.