The Best Gooey Butter Tarts Recipe for Sweet Treat Lovers
Sweet, gooey butter tarts have been a cherished Canadian delicacy for generations.
Maple-loving bakers across the country treasure this nostalgic treat.
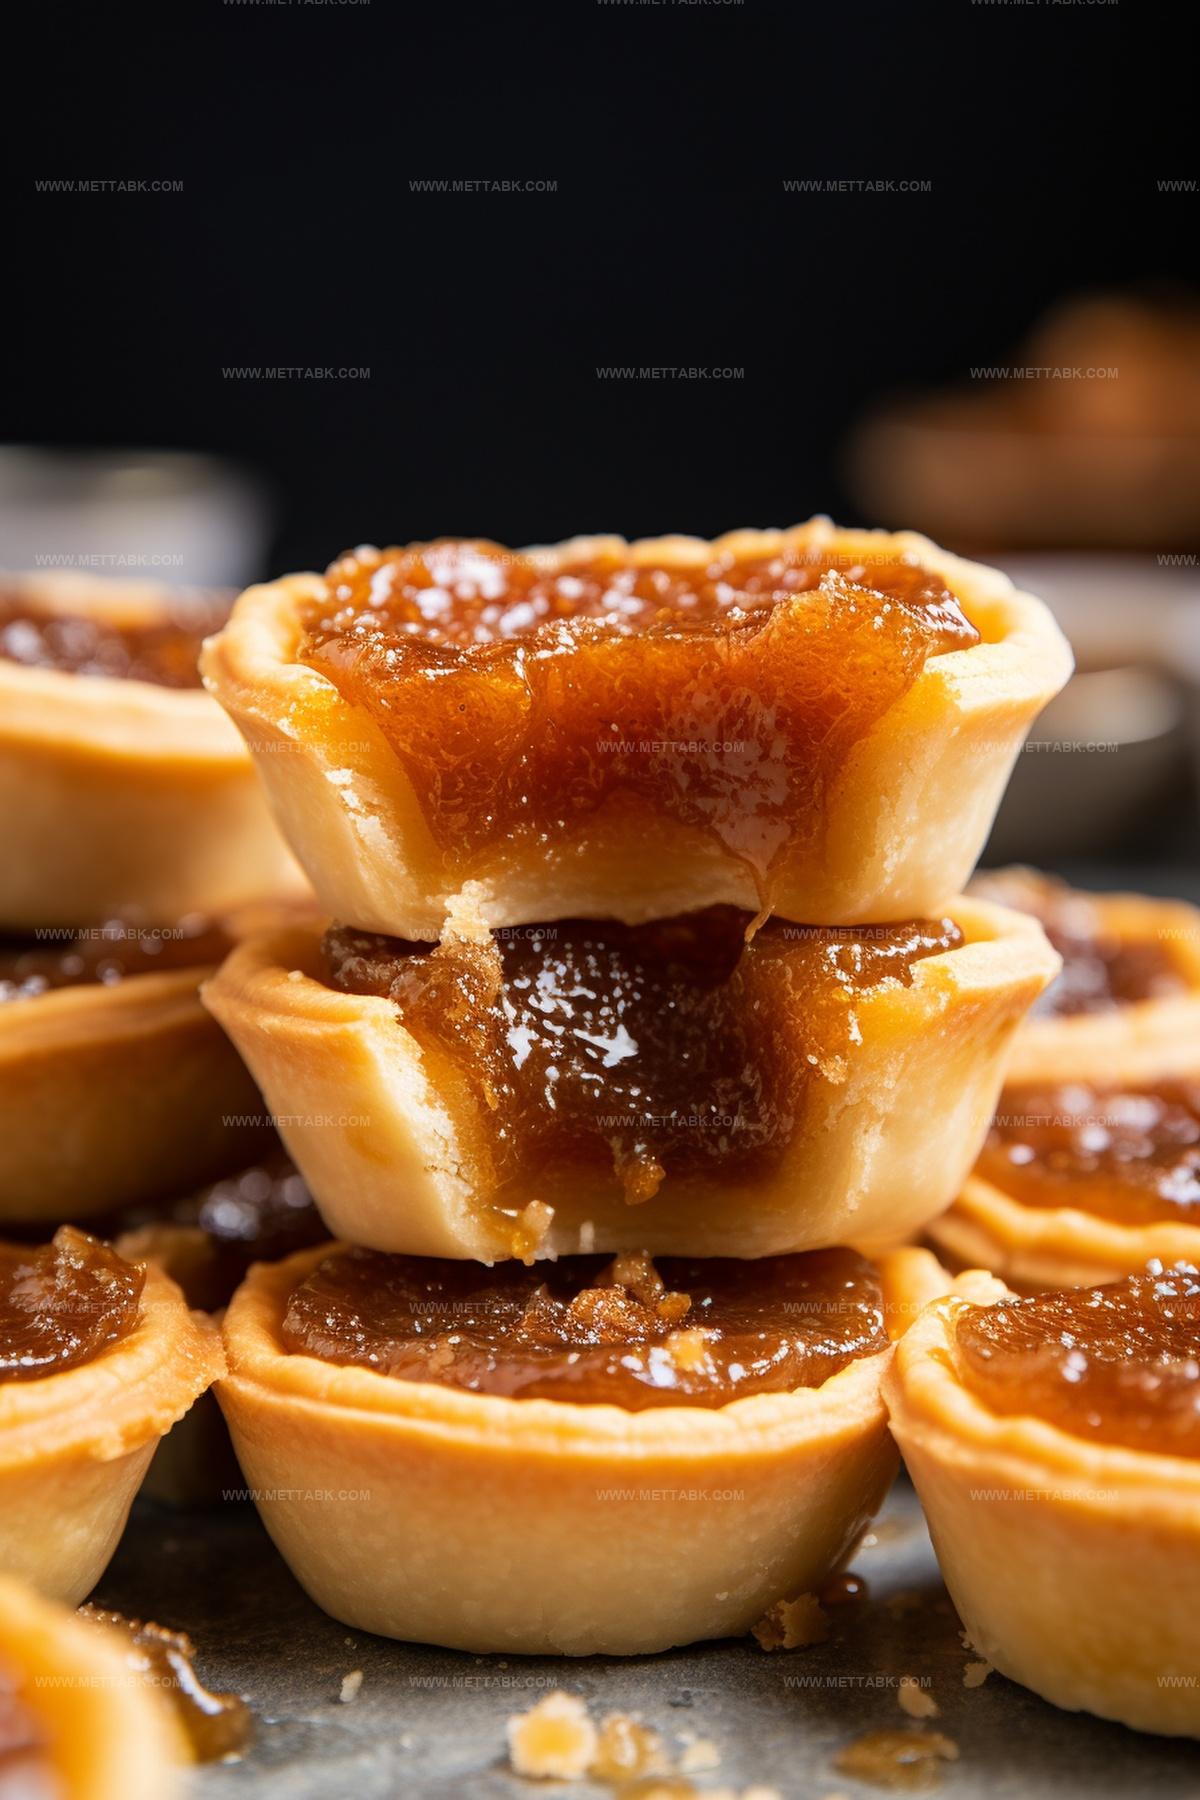
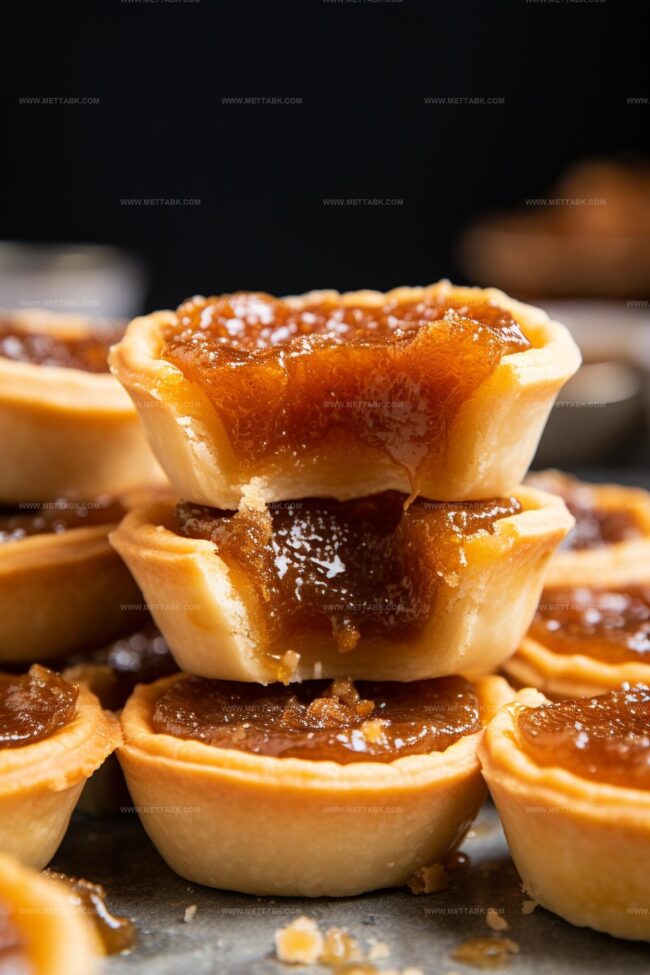
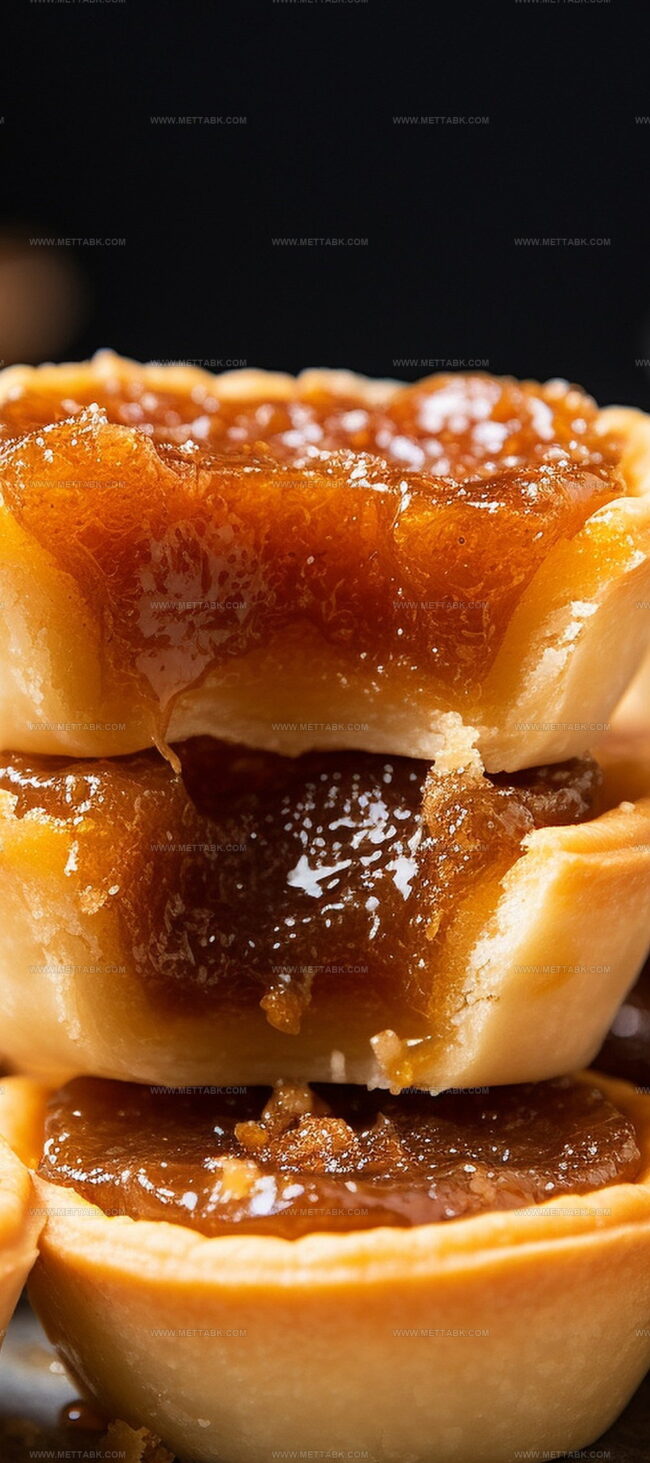
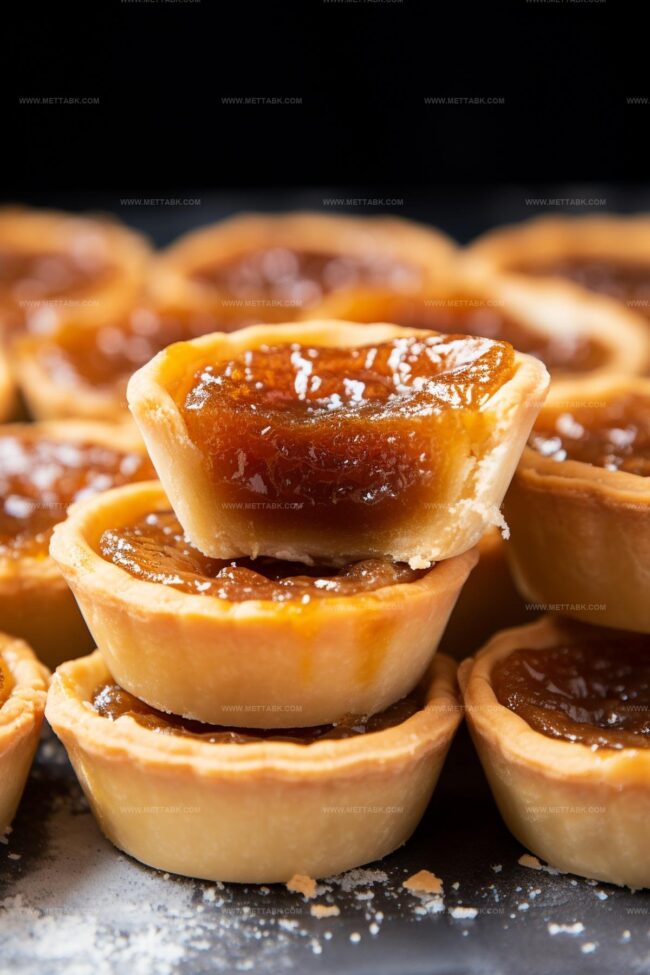
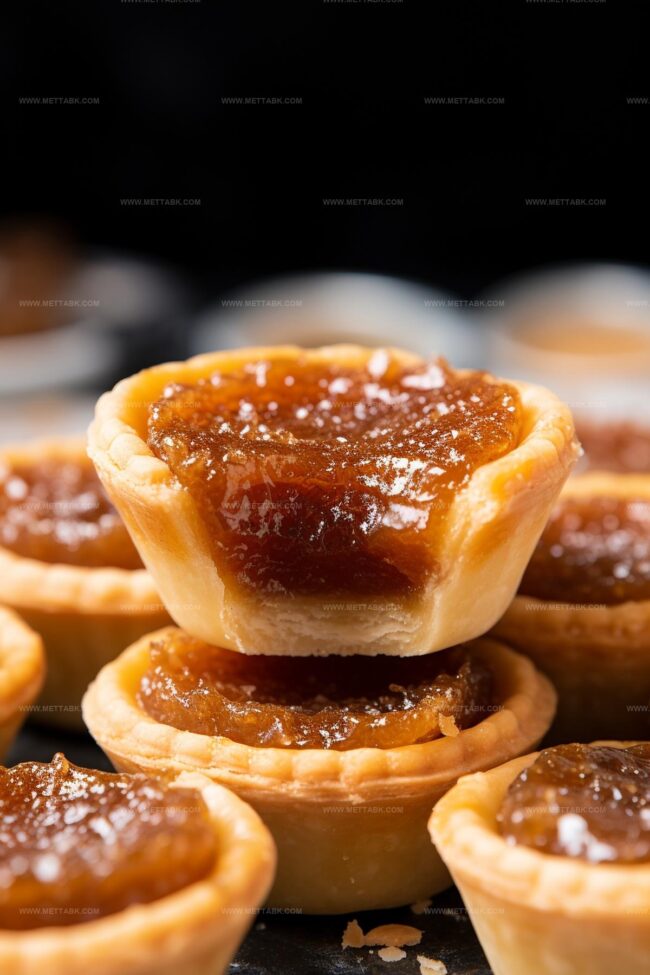
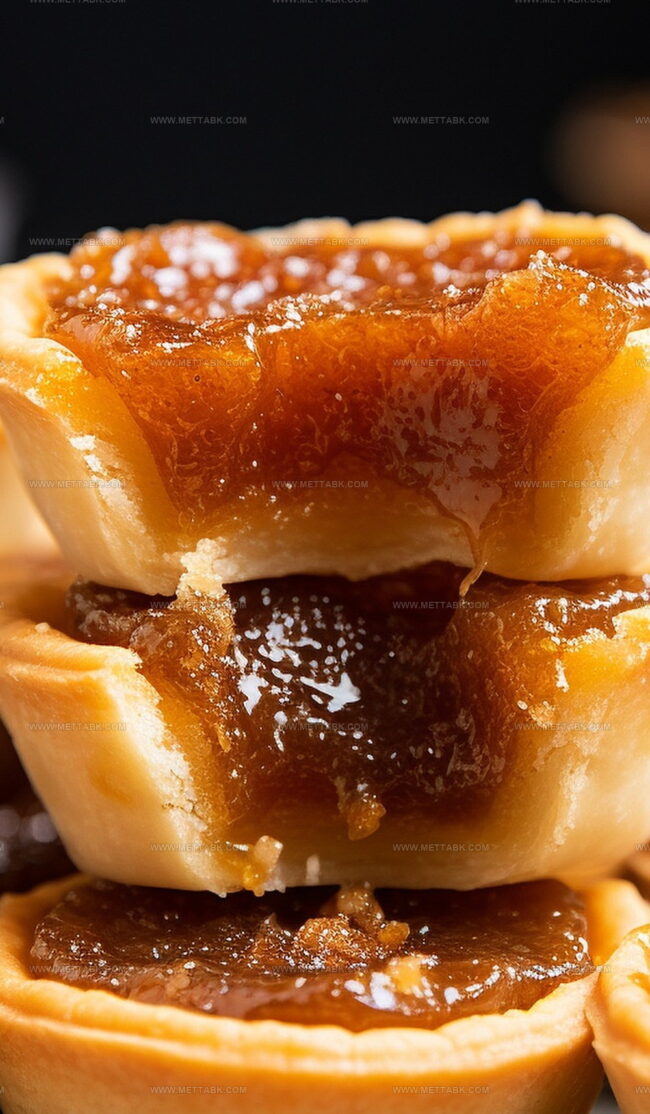
Crisp pastry shells cradle a rich, caramelized filling that melts in your mouth.
Generations of home cooks have perfected this classic dessert with love and patience.
Provincial variations add unique twists to the basic recipe, making each batch special.
Crisp edges and a gooey center create a magical contrast you won’t be able to resist.
Follow along to create these irresistible tarts that will make your taste buds dance with delight.
Butter Tarts That Melt in Your Mouth
Ingredients for Classic Butter Tarts
How to Bake Butter Tarts
Step 1: Craft the Pastry Dough
Grab a large mixing bowl and toss in flour, sugar, and salt. Crumble cold butter into the mixture using your fingertips or a pastry cutter until it looks like tiny pebbles.
For a quicker method, pulse ingredients in a food processor until crumbly.
Step 2: Bind the Dough
Slowly add cold water to the mixture, gently kneading until the dough comes together in a smooth ball.
If the dough feels dry, sprinkle in a bit more ice water.
Step 3: Chill the Dough
Shape the dough into a thick disk and wrap it snugly in plastic wrap.
Tuck it into the refrigerator for at least an hour – or up to a week if you’re planning ahead.
Step 4: Roll Out the Pastry
Spread a piece of wax paper and roll out the chilled dough to an even thickness.
Step 5: Cut Pastry Rounds
Use a cookie cutter or a wide-rimmed cup to cut perfect circles about 3.5-4 inches wide.
Step 6: Prepare Tart Shells
Gently press the pastry rounds into a muffin pan, making sure they cover the bottom and sides completely.
Patch any holes by pinching the pastry together. Pop the pan in the freezer for 10-15 minutes to firm up.
Step 7: Preheat the Oven
Warm up the oven to 350°F (175°C).
Step 8: Mix the Filling
In a bowl, whisk together:Step 9: Fill the Tart Shells
Pour the filling evenly into the prepared pastry shells.
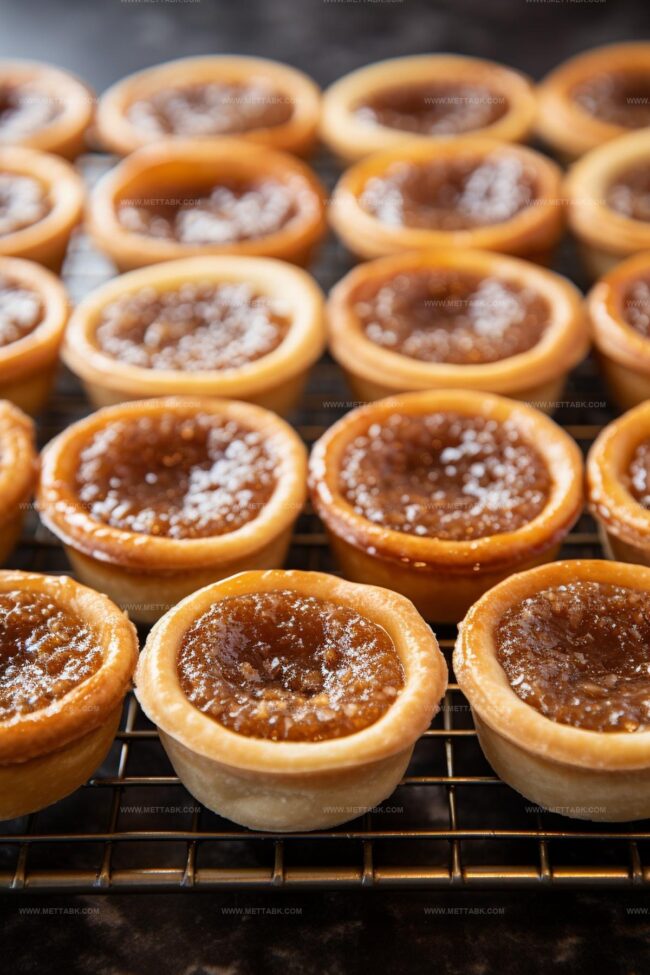
Step 10: Bake to Golden Perfection
Slide the muffin pan into the oven and bake for 20-25 minutes. Look for a golden-brown crust and slightly puffed filling.
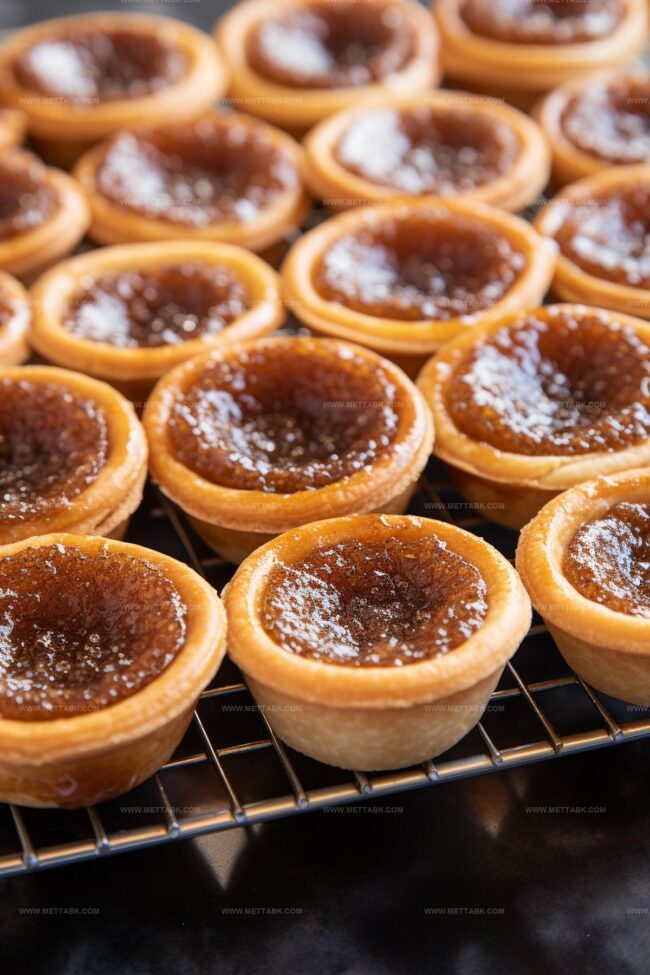
Step 11: Cool and Set
Let the tarts rest in the pan for 10 minutes, then transfer to a wire rack to cool completely.
Step 12: Store and Enjoy
Keep your butter tarts in the refrigerator for several days or freeze for up to 3 months – if they last that long!
Tips to Perfect Butter Tart Texture
Variations on Butter Tarts to Explore
Pairing Suggestions for Butter Tarts

Storage Tips for Butter Tarts
FAQs
Butter tarts are a classic Canadian dessert originating from Ontario, deeply rooted in Canadian culinary heritage and beloved across the country as a quintessential sweet treat.
Vinegar helps prevent the sugar from crystallizing and adds a subtle tangy flavor that balances the sweetness of the tart filling, creating a more complex taste profile.
Yes, you can prepare the pastry dough up to a week in advance and store it wrapped in plastic in the refrigerator, which actually helps the gluten relax and makes the crust more tender.
Print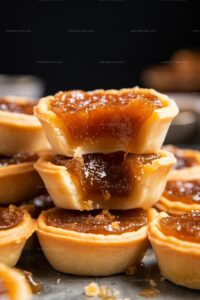
Butter Tarts Recipe
- Total Time: 1 hour 55 minutes
- Yield: 12 1x
Description
Iconic Canadian butter tarts showcase rich, flaky pastry filled with sweet, gooey caramel-like filling. Maple-loving bakers delight in this classic dessert that embodies Canadian culinary heritage. You’ll savor each delectable bite of pure comfort.
Ingredients
- 2 eggs
- 1 cup brown sugar (190 grams)
- 1/2 cup golden corn syrup
- 1/4 cup salted butter, melted
- 1 teaspoon vanilla extract
- 1 teaspoon white vinegar (optional)
- 1/2 cup raisins or pecans (optional)
- 1 3/4 cups all-purpose flour (227 grams)
- 1/2 cup cold unsalted butter, cubed (112 grams)
- 1/3 cup cold water
- 1 teaspoon granulated sugar
- 1/2 teaspoon salt
Instructions
- Craft the pastry base by blending flour, sugar, and salt in a mixing bowl. Integrate cold butter until the mixture resembles coarse crumbs, using a pastry cutter or food processor.
- Introduce cold water gradually, working the dough until it forms a compact ball. Add additional ice water if the dough appears dry or crumbly.
- Transform the dough into a thick disk, encase in plastic wrap, and chill for at least 1 hour to enhance texture and flavor.
- On a floured surface, roll the pastry to an even thickness, approximately 1/8 inch thin.
- Cut circular dough rounds using a cookie cutter or small bowl, creating 3.5-4 inch diameter shapes.
- Gently press dough rounds into a 12-cup muffin pan, ensuring complete coverage of bottom and sides. Repair any tears by pinching pastry together.
- Freeze the prepared tart shells for 10-15 minutes to maintain structural integrity.
- Heat the oven to 350°F (175°C), preparing for baking.
- Whisk brown sugar, corn syrup, melted butter, eggs, vinegar, and vanilla extract in a separate bowl until thoroughly combined.
- Pour the filling evenly into each unbaked tart shell, leaving a small margin at the top.
- Bake for 20-25 minutes until pastry turns golden and filling slightly puffs and sets.
- Remove from oven and let tarts rest in the pan for 10 minutes to stabilize.
- Transfer to a wire rack, allowing complete cooling before serving or storing.
- Refrigerate for several days or freeze up to 3 months for extended preservation.
Notes
- Chill the dough thoroughly to ensure a flaky, tender crust that melts in your mouth.
- Use ice-cold butter and water to create the perfect pastry texture that’s light and crisp.
- Blind bake the tart shells briefly to prevent a soggy bottom and maintain a crisp crust.
- Experiment with different fillings like raisins, nuts, or chocolate chips to customize your butter tarts and add extra flavor and texture.
- Prep Time: 1 hour 30 minutes
- Cook Time: 25 minutes
- Category: Desserts, Snacks
- Method: Baking
- Cuisine: Canadian
Nutrition
- Serving Size: 12
- Calories: 310 kcal
- Sugar: 25 g
- Sodium: 140 mg
- Fat: 16 g
- Saturated Fat: 9 g
- Unsaturated Fat: 6 g
- Trans Fat: 0.5 g
- Carbohydrates: 38 g
- Fiber: 1 g
- Protein: 3 g
- Cholesterol: 55 mg
Clara Bennett
Contributing Recipe Developer & Food Writer
Expertise
Baking and Pastry Development, Gluten-Free and Allergy-Friendly Recipe Creation, Culinary Storytelling and Food Journalism, Recipe Testing and Standardization, Southern Comfort Foods and Modern Twists
Education
Sullivan University – National Center for Hospitality Studies
Associate Degree in Culinary Arts
Focus: Baking and Pastry Arts, Recipe Testing, and Culinary Journalism.
Clara specialized in crafting desserts that blend classic Southern comfort with modern techniques, while developing strong writing skills to tell the story behind every dish.
Lane Community College (Certificate Program)
Certificate in Food Writing and Photography
Focus: Culinary storytelling, recipe formatting, food styling, and visual presentation.
Clara’s love of baking started young, powered by homemade pies, biscuits, and stories passed around the family table.
After earning her degree at Sullivan University and a food writing certificate at Lane Community College, she turned her passion into a craft: sharing recipes that are simple, soulful, and always full of heart.
She’s big on bold flavors, flexible ideas, and creating sweets that fit any table (yes, even if you’re gluten-free). When she’s not baking, you’ll find her wandering farmers’ markets, styling food for the next photo shoot, or working on her ever-growing recipe journal.