
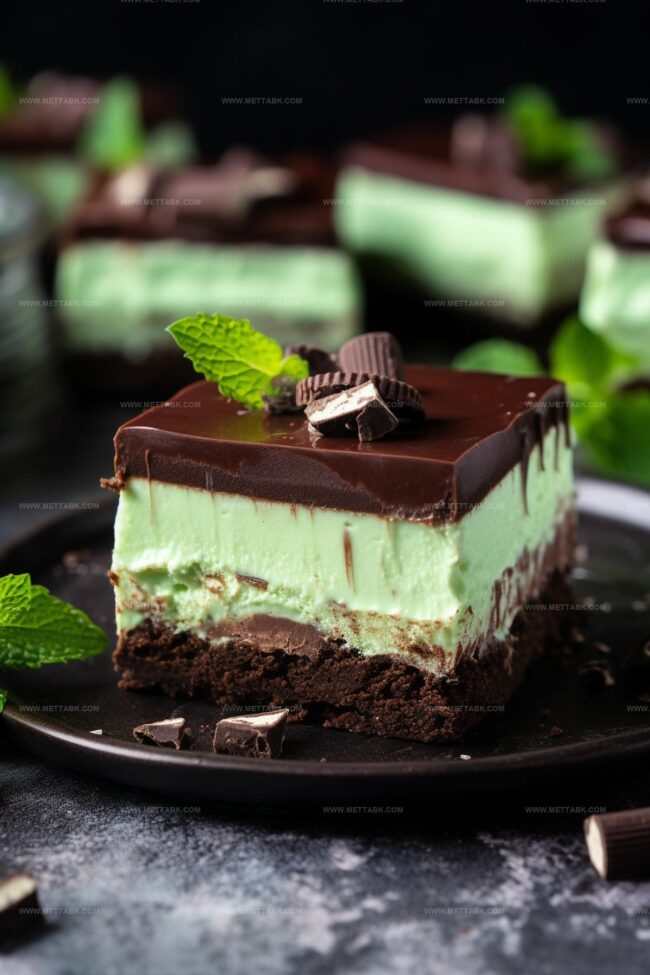
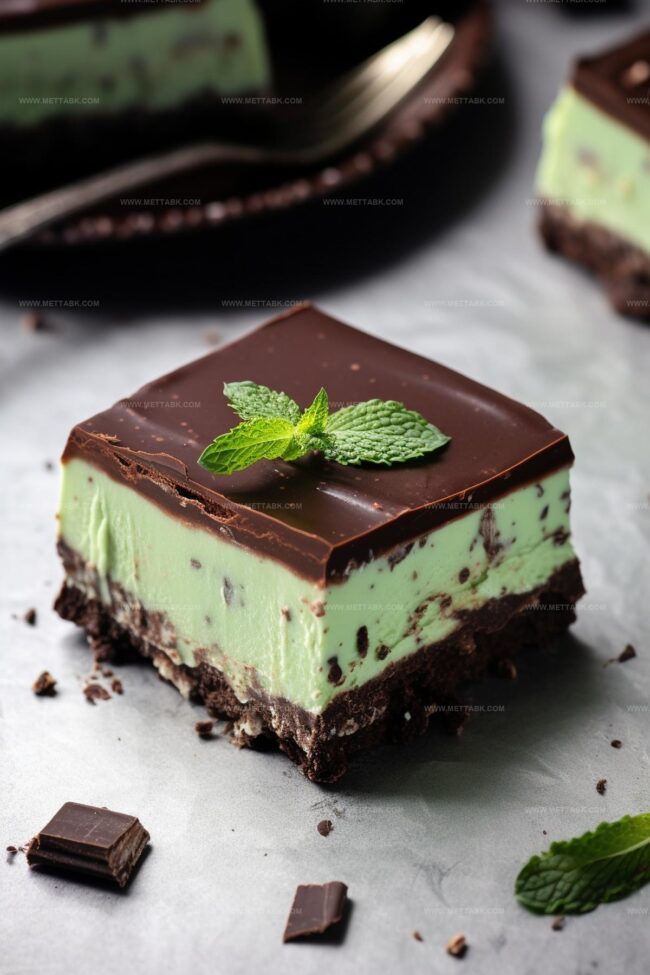
Quick & Sweet: Chocolate Mint Cheesecake Bars Recipe
Sweet cravings for chocolate mint cheesecake bars often strike when least expected.
Decadent layers promise a delightful escape from ordinary desserts.
Creamy textures blend perfectly with cool mint undertones.
Rich chocolate creates a luxurious foundation for each delectable bite.
Homemade treats like these can brighten any afternoon or evening gathering.
Each slice offers a perfect balance of indulgence and comfort.
What Makes Chocolate Mint Cheesecake Bars a Refreshing Treat
Ingredients for Chocolate Mint Cheesecake Bars
Crust:Cheesecake Filling:Chocolate Topping:How to Bake Chocolate Mint Cheesecake Bars
Step 1: Warm Up the Oven
Crank the oven to a cozy 325°F. Grab your 8×8 inch pan and give it a quick spray of non-stick magic.
Line the pan with parchment paper, letting the edges hang over like a comfy blanket for easy lifting later.
Step 2: Crush Those Cookies
Toss Oreo cookies into a food processor and pulverize them into fine sandy crumbs.
Mix in:Press the mixture firmly into the pan, creating a solid cookie foundation. Bake for 8 minutes, then let it chill out and cool down.
Step 3: Whip Up the Creamy Base
Grab your mixing bowl and beat cream cheese until it’s smooth as silk. Blend in sugar and flour until the mixture looks perfectly creamy.
Step 4: Add Flavor Boosters
Stir in these flavor-packed ingredients:Mix on low speed to keep things smooth.
Step 5: Egg Magic
Gently whisk eggs in a separate bowl.
Fold them into the cream cheese mixture, being careful not to overmix. Splash in green food coloring and sprinkle in chopped Andes mints for that minty green pizzazz.
Step 6: Bake to Perfection
Pour the dreamy mixture over the cookie crust. Bake for 25-30 minutes until the center has a subtle wiggle.
Let it cool completely, then park it in the refrigerator for at least 4 hours (overnight is even better).
Step 7: Create Chocolate Ganache
Combine in a heat-proof bowl:Heat heavy cream until it’s just about to boil.
Pour the steamy cream over the chocolate mixture. Let it sit for a few minutes, then stir until silky smooth.
Step 8: Final Chocolate Drizzle
Spread the luscious ganache over the chilled cheesecake. Pop it back in the fridge for 30 minutes to set.
Lift out using the parchment paper edges and slice into irresistible bars. Enjoy your minty chocolate cheesecake heaven!
Pro Tips for Smooth and Cool Chocolate Mint Cheesecake Bars
Flavor Variations on Chocolate Mint Cheesecake Bars
Pairing Suggestions for Chocolate Mint Cheesecake Bars

Storage Tips for Chocolate Mint Cheesecake Bars
FAQs

The mint extract and chopped Andes mints provide a cool, refreshing mint taste throughout the cheesecake bars, creating a delightful chocolate-mint combination.
Yes, you can skip the green food coloring. The bars will taste the same and still look appetizing, just without the vibrant green color.
Look for a slightly jiggly center when you gently shake the pan. The edges should be set, but the middle should have a subtle wobble, indicating it’s done but not overcooked.
While Andes mints are recommended for the best flavor, you can substitute with other mint chocolate chips or similar mint chocolate candies if needed.
Print
Chocolate Mint Cheesecake Bars Recipe
- Total Time: 1 hour 8 minutes
- Yield: 16 1x
Description
Indulgent chocolate mint cheesecake bars blend rich cocoa with cool peppermint in a creamy dessert that delights palates. Chocolate lovers will savor each luxurious bite of this irresistible treat.
Ingredients
- 16 oz cream cheese (room temperature)
- 1½ cups Oreo biscuit crumbs (approximately 20 biscuits)
- 2 large eggs (room temperature)
- ½ cup Andes mints (finely chopped)
- ⅓ cup granulated sugar
- 4 tbsps melted butter (cooled)
- ¼ cup Andes mints (coarsely chopped)
- ½ cup chocolate chips
- ¼ cup sour cream (room temperature)
- ⅓ cup heavy cream
- 1 tbsp granulated sugar
- 2 tbsps flour
- 1 tsp vanilla extract
- 1 tsp peppermint or mint extract
- 6–8 drops green food coloring
- ⅛ tsp salt
- 1 pinch salt
Instructions
- Preheat oven to 325°F. Prepare an 8×8 inch pan by coating with non-stick spray and lining with parchment paper, allowing overhang for easy removal.
- Pulverize Oreo cookies into fine crumbs using a food processor. Blend with sugar and melted butter until thoroughly combined. Press mixture firmly into pan, creating an even crust layer. Bake for 8 minutes, then cool completely.
- Using an electric mixer, whip cream cheese until smooth and creamy. Gradually incorporate sugar and flour, ensuring no lumps remain.
- Gently fold in sour cream, vanilla extract, mint extract, and salt. Mix at low speed until ingredients are uniformly integrated.
- Delicately whisk eggs in a separate bowl. Fold into cream cheese mixture, stirring minimally to prevent potential surface cracking. Introduce green food coloring and finely chopped Andes mints.
- Carefully pour cheesecake mixture over cooled crust. Bake for 25-30 minutes, maintaining a slight jiggle in the center. Allow to cool at room temperature, then refrigerate for 4-6 hours or overnight.
- Create ganache by placing chocolate chips and chopped Andes mints in a heat-proof bowl. Heat heavy cream until it reaches a gentle boil. Pour hot cream over chocolate mixture, letting it sit briefly before stirring until completely smooth.
- Drizzle ganache evenly across chilled cheesecake. Refrigerate for an additional 30 minutes. Remove from pan using parchment paper overhang and slice into elegant bars.
Notes
- Press the Oreo crust firmly and evenly to create a solid base that won’t crumble when cutting the bars.
- Mix eggs gently and avoid overmixing to maintain a smooth, crack-free surface.
- Allow cheesecake to cool gradually at room temperature before refrigerating to prevent structural issues.
- These bars can be prepared a day in advance, making them perfect for parties and gatherings.
- Prep Time: 30 minutes
- Cook Time: 38 minutes
- Category: Desserts, Snacks
- Method: Baking
- Cuisine: American
Nutrition
- Serving Size: 16
- Calories: 225 kcal
- Sugar: 18 g
- Sodium: 120 mg
- Fat: 15 g
- Saturated Fat: 8 g
- Unsaturated Fat: 6 g
- Trans Fat: 0.2 g
- Carbohydrates: 20 g
- Fiber: 1 g
- Protein: 4 g
- Cholesterol: 50 mg
Clara Bennett
Contributing Recipe Developer & Food Writer
Expertise
Baking and Pastry Development, Gluten-Free and Allergy-Friendly Recipe Creation, Culinary Storytelling and Food Journalism, Recipe Testing and Standardization, Southern Comfort Foods and Modern Twists
Education
Sullivan University – National Center for Hospitality Studies
Associate Degree in Culinary Arts
Focus: Baking and Pastry Arts, Recipe Testing, and Culinary Journalism.
Clara specialized in crafting desserts that blend classic Southern comfort with modern techniques, while developing strong writing skills to tell the story behind every dish.
Lane Community College (Certificate Program)
Certificate in Food Writing and Photography
Focus: Culinary storytelling, recipe formatting, food styling, and visual presentation.
Clara’s love of baking started young, powered by homemade pies, biscuits, and stories passed around the family table.
After earning her degree at Sullivan University and a food writing certificate at Lane Community College, she turned her passion into a craft: sharing recipes that are simple, soulful, and always full of heart.
She’s big on bold flavors, flexible ideas, and creating sweets that fit any table (yes, even if you’re gluten-free). When she’s not baking, you’ll find her wandering farmers’ markets, styling food for the next photo shoot, or working on her ever-growing recipe journal.