
The Sweet Magic of Chocolate-Covered Strawberries Recipe
Sweet memories often spark from unexpected kitchen adventures, and these chocolate-covered strawberries blend nostalgia with delightful simplicity.
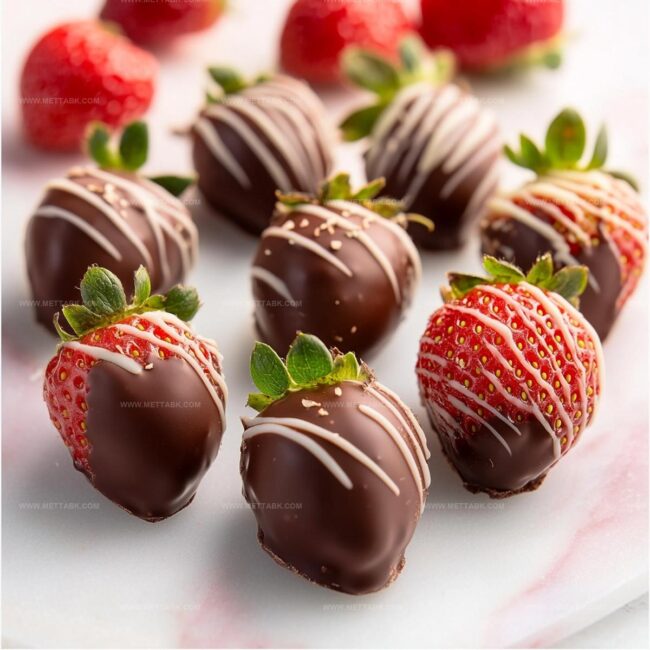
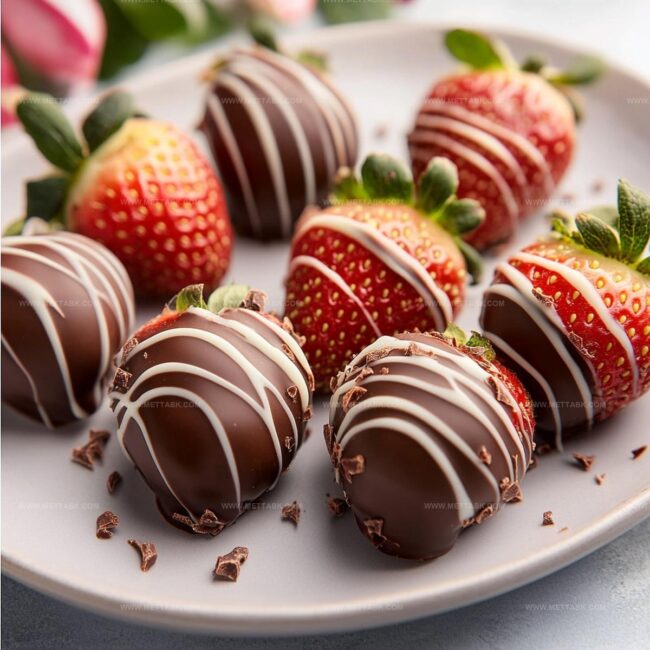
Berries gleam like jewels waiting to be transformed into a stunning dessert.
Melted chocolate creates a luxurious coating that turns ordinary fruit into an elegant treat.
Soft strawberry centers peek through rich, glossy chocolate shells that crack beautifully with each bite.
Passionate home cooks can craft these decadent morsels in mere minutes without complex techniques.
Minimal ingredients and straightforward steps guarantee success for anyone wanting to impress dinner guests or create a romantic surprise.
Chocolate-Covered Strawberries That Melt Hearts Fast

What You Need for Chocolate-Covered Strawberries That Shine
Fresh Produce:Chocolate and Fat:Preparation Surface:How to Make Chocolate-Covered Strawberries Like a Pro
Step 1: Prep Your Workspace
Grab a baking sheet and line it with parchment paper. This will be your staging area for creating delicious chocolate-covered strawberries that’ll make everyone’s mouth water.
Step 2: Melt Chocolate Magnificently
In a microwave-safe bowl, combine:Zap the mixture in short bursts, stirring between each 30-second interval until the chocolate transforms into a silky, glossy pool of deliciousness.
Step 3: Dunk and Swirl Strawberries
Take each plump, ripe strawberry by its leafy green top and gracefully dip it into the melted chocolate.
Twirl gently to ensure complete chocolate coverage, letting any excess chocolate drip back into the bowl for a perfect, smooth coating.
Step 4: Create Chocolate Masterpieces
Carefully place each chocolate-drenched strawberry onto the prepared parchment-lined baking sheet.
Arrange them with care, ensuring they don’t touch each other.
Step 5: Chill and Set
Pop the baking sheet into the refrigerator for 15-30 minutes.
Watch as the chocolate transforms from glossy to matte, creating a beautiful, crisp shell around the juicy strawberries.
Step 6: Serve and Enjoy
Remove the strawberries from the fridge and serve immediately.
These decadent treats can be stored in an airtight container in the refrigerator for up to two days – if they last that long!
Tips to Nail Chocolate-Covered Strawberries Every Time
Fun Twists on Classic Chocolate-Covered Strawberries

Pairings That Pair Perfectly with Chocolate-Covered Strawberries

Keeping Chocolate-Covered Strawberries Fresh and Sweet
FAQs
Select fresh, firm strawberries with bright red color and green stems. Avoid strawberries with bruises or soft spots. Wash and thoroughly dry them before dipping to ensure chocolate adheres properly.
Absolutely! You can use dark, milk, or white chocolate based on your preference. Just ensure you use high-quality chocolate chips that melt smoothly. Each chocolate type will provide a slightly different flavor profile.
Reheat the chocolate in short 15-second intervals in the microwave, stirring between each interval. This will help maintain a smooth, liquid consistency for even coating. Work quickly and keep the chocolate warm.
Print
Chocolate-Covered Strawberries Recipe
- Total Time: 30 minutes
- Yield: 4 1x
Description
Indulgent homemade chocolate-covered strawberries bring romantic dessert magic to romantic celebrations. Sweet berries dipped in silky chocolate create simple elegance that delights guests and satisfies chocolate cravings.
Ingredients
- 8 oz semi-sweet chocolate chips
- 1 pound fresh strawberries (washed and dried)
- 1 tbsp coconut oil (optional)
Instructions
- Arrange a parchment-lined baking sheet to create a staging area for chocolate-drenched strawberries.
- Melt chocolate chips with coconut oil in a microwave-safe bowl, stirring every 30 seconds until smooth and glossy at 50% power.
- Grasp each strawberry by its leafy crown, elegantly submerging into the molten chocolate, allowing excess to cascade back into the bowl.
- Gently transfer chocolate-coated berries onto the prepared parchment sheet, ensuring they do not touch each other.
- Chill in the refrigerator for approximately 20 minutes, or until the chocolate shell becomes firm and develops a pristine matte finish.
- Present immediately for optimal flavor and texture, or preserve in a sealed container within the refrigerator for up to 48 hours.
Notes
- Select ripe, firm strawberries with bright red color and intact green tops for the best flavor and texture.
- Use high-quality chocolate chips or chopped chocolate that melts smoothly, like semi-sweet or dark chocolate for a rich taste.
- Add coconut oil to create a glossy, thin chocolate coating that hardens quickly and prevents chocolate from cracking.
- Gently pat strawberries dry with paper towels before dipping to ensure chocolate adheres perfectly and prevents water spots.
- Prep Time: 10 minutes
- Cook Time: 20 minutes
- Category: Desserts, Snacks
- Method: Melting
- Cuisine: American
Nutrition
- Serving Size: 4
- Calories: 224 kcal
- Sugar: 20 g
- Sodium: 1 mg
- Fat: 12 g
- Saturated Fat: 7 g
- Unsaturated Fat: 4 g
- Trans Fat: 0 g
- Carbohydrates: 27 g
- Fiber: 3 g
- Protein: 2 g
- Cholesterol: 0 mg
Clara Bennett
Contributing Recipe Developer & Food Writer
Expertise
Baking and Pastry Development, Gluten-Free and Allergy-Friendly Recipe Creation, Culinary Storytelling and Food Journalism, Recipe Testing and Standardization, Southern Comfort Foods and Modern Twists
Education
Sullivan University – National Center for Hospitality Studies
Associate Degree in Culinary Arts
Focus: Baking and Pastry Arts, Recipe Testing, and Culinary Journalism.
Clara specialized in crafting desserts that blend classic Southern comfort with modern techniques, while developing strong writing skills to tell the story behind every dish.
Lane Community College (Certificate Program)
Certificate in Food Writing and Photography
Focus: Culinary storytelling, recipe formatting, food styling, and visual presentation.
Clara’s love of baking started young, powered by homemade pies, biscuits, and stories passed around the family table.
After earning her degree at Sullivan University and a food writing certificate at Lane Community College, she turned her passion into a craft: sharing recipes that are simple, soulful, and always full of heart.
She’s big on bold flavors, flexible ideas, and creating sweets that fit any table (yes, even if you’re gluten-free). When she’s not baking, you’ll find her wandering farmers’ markets, styling food for the next photo shoot, or working on her ever-growing recipe journal.