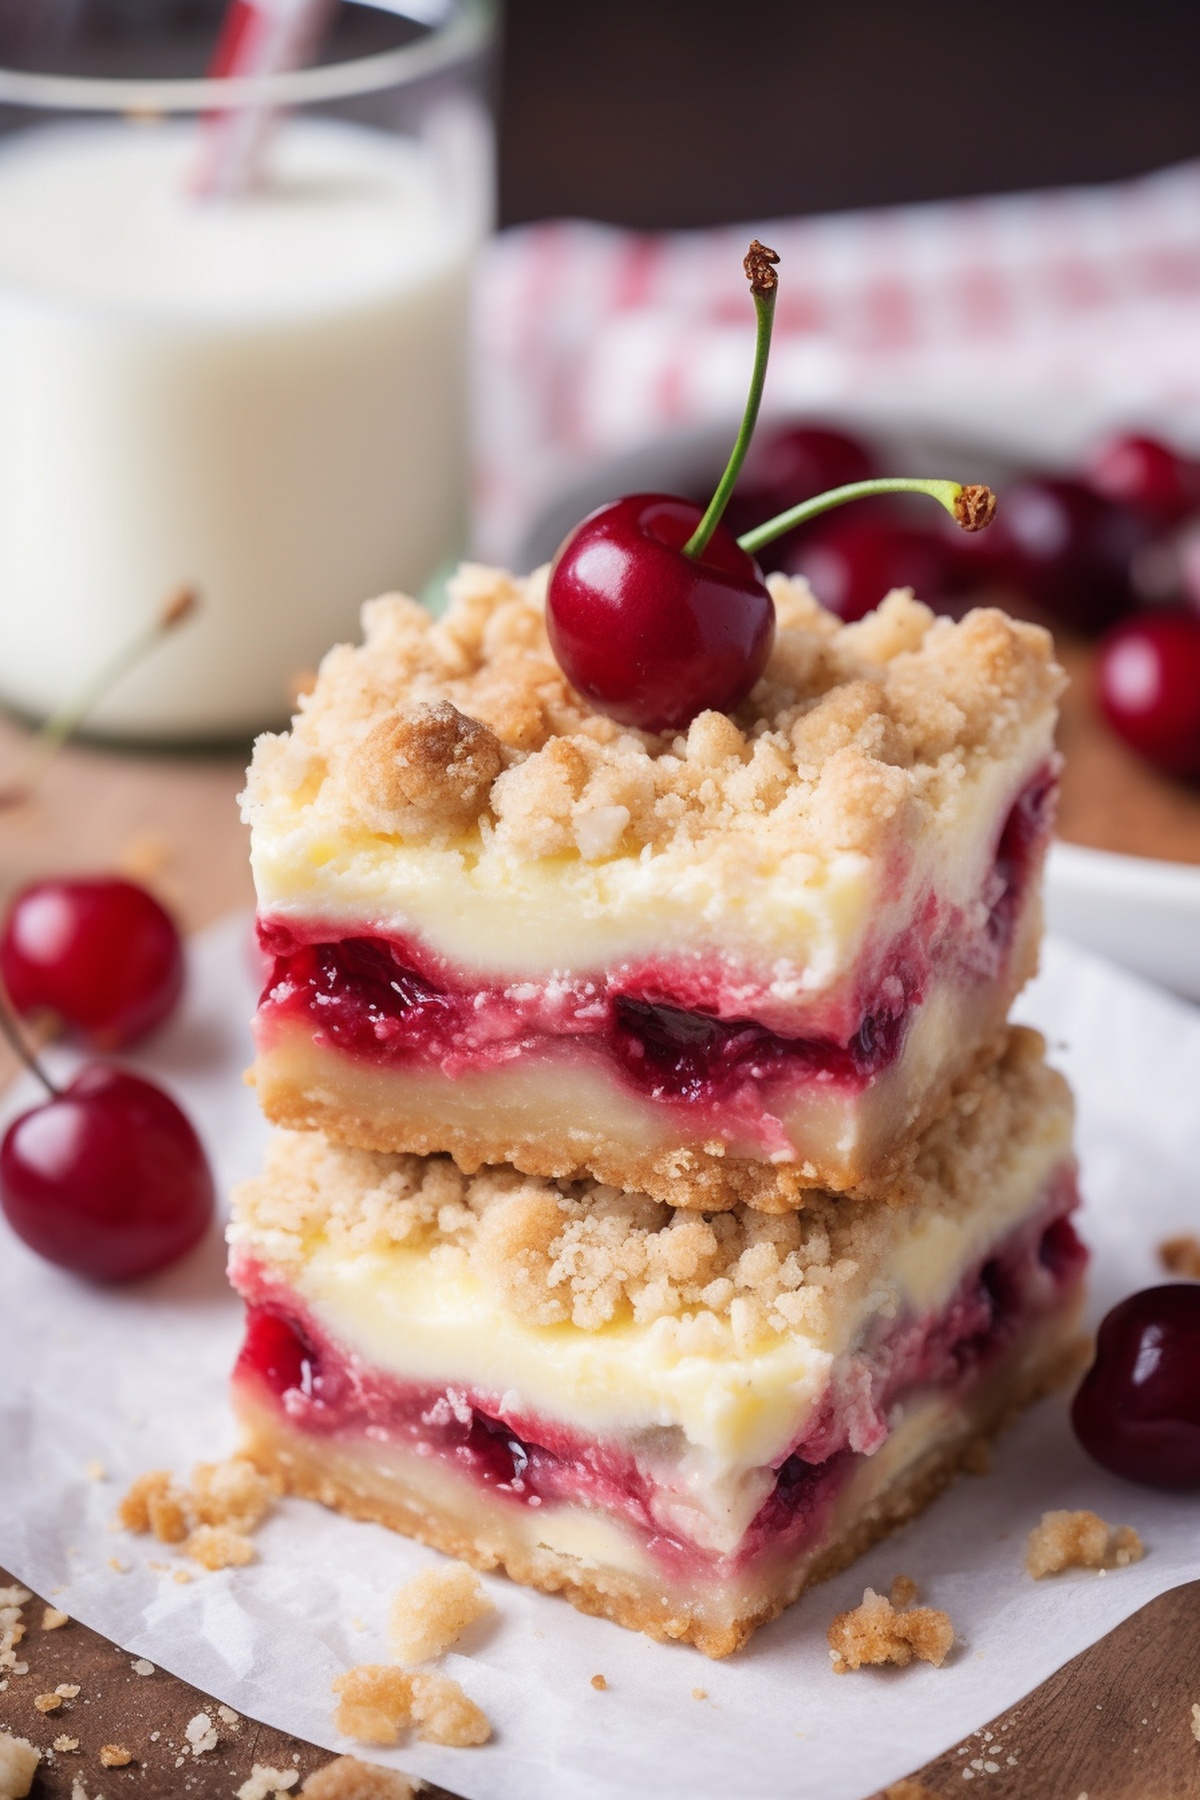
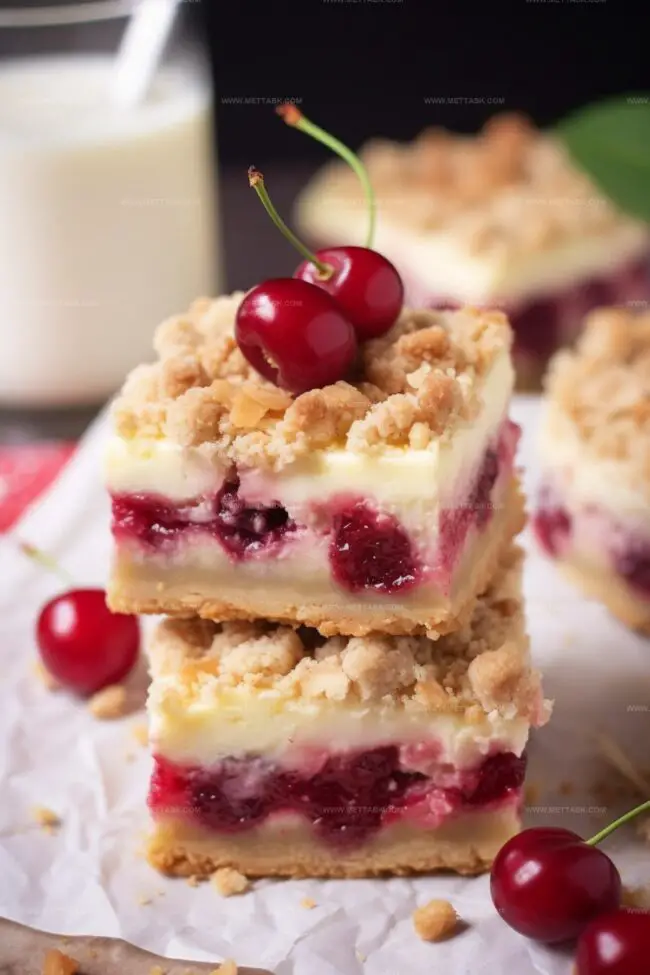
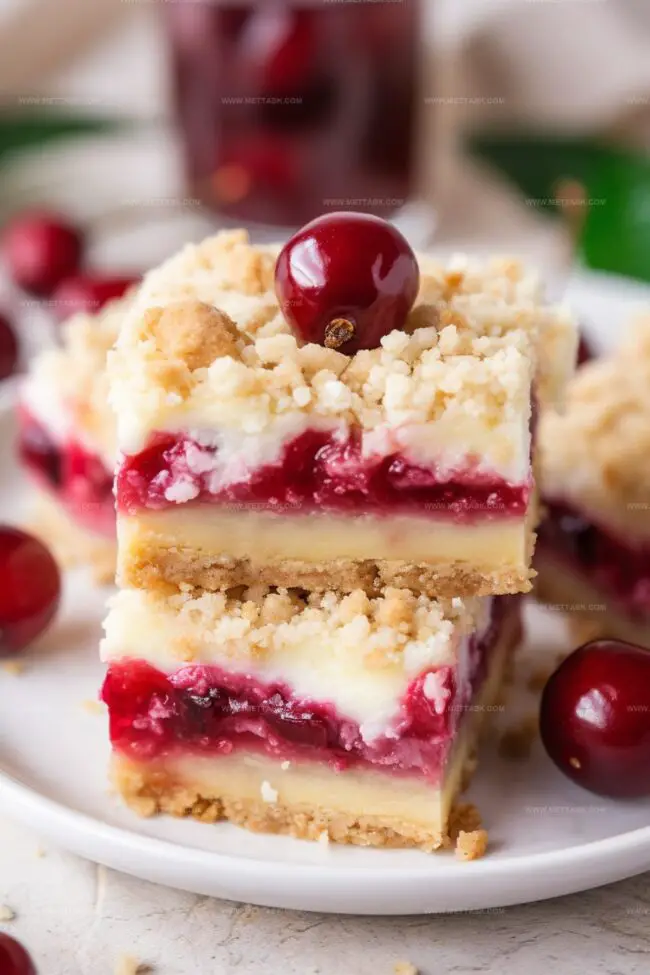
Jolly Christmas Cheesecake Bars Recipe: Sweet Holiday Magic
Sweet holiday magic happens when creamy christmas cheesecake bars melt on your tongue with festive charm.
Memories of cozy winter gatherings dance through each delectable bite.
Relatives always request this special dessert during seasonal celebrations.
Soft cream cheese blends perfectly with hints of cinnamon and vanilla.
Delicate graham cracker crusts provide a warm, comforting foundation for every slice.
Rich textures and smooth flavors promise a delightful treat that sparks joy.
Whip up these irresistible bars and watch smiles spread across eager faces.
Ingredients for Christmas Cheesecake Bars
Base:Cheesecake Layer:Fruit and Topping:How to Make Christmas Cheesecake Bars
Step 1: Prep the Oven and Pan
Crank up the oven to a toasty 350°F. Grab your baking pan and create a foil fortress, making sure every corner is covered.
Give the foil a quick spritz of non-stick spray to ensure easy removal later.
Step 2: Craft the Crumbly Crust
Grab a mixing bowl and combine sugar cookie mix with ice-cold butter.
Get your pastry blender working magic, transforming the ingredients into a delightful crumbly texture. Set aside a handful of this magical mixture for later.
Press the remaining crumbs firmly into the pan, creating a solid foundation. Bake for 10 minutes, then let it cool down – it might look slightly underdone, but that’s totally okay.
Step 3: Whip Up the Creamy Cheesecake Layer
In another bowl, bring together:Blend these ingredients until they become a smooth, dreamy mixture that’ll make your taste buds dance.
Step 4: Build Your Festive Layers
Spread the cream cheese mixture evenly over the cooled crust.
Next, dollop the cherry pie filling across the surface, creating a vibrant red landscape.
Step 5: Create a Crunchy Topping
Combine the reserved crumbly mixture with toasted sliced almonds.
Sprinkle this nutty treasure generously over the cherry layer, adding a delightful crunch.
Step 6: Bake to Perfection
Slide the pan back into the oven.
For an 8×8 pan, bake for 40 minutes. If using a 9×13 pan, give it about 45 minutes.
Look for a golden-brown top that screams “I’m ready!”
Step 7: Chill and Serve
Let the bars cool at room temperature for 30 minutes. Then, pop them in the refrigerator for a few hours to set.
Store your masterpiece covered in the fridge, ready to wow your holiday guests.
Pro Tips for Holiday Cheesecake Bars
Variations on Christmas Cheesecake Bars
Suggested Pairings for Christmas Cheesecake Bars
Storage Guidelines for Christmas Cheesecake Bars
FAQs
Yes, absolutely! Raspberry, blueberry, or strawberry pie fillings work great as substitutes and will create delicious variations of these cheesecake bars.
No special equipment is required. You’ll just need a mixing bowl, baking pan, pastry blender or fork, and standard measuring tools that most home kitchens have.
While the sugar cookie mix provides convenience, you can create a homemade crust using graham cracker crumbs, flour, sugar, and butter if you prefer a completely from-scratch approach.
Festive Christmas Cheesecake Bars


Christmas Cheesecake Bars Recipe
- Total Time: 1 hour 5 minutes
- Yield: 9 1x
Description
Delightful christmas cheesecake bars blend creamy richness with festive spices in a simple dessert. Holiday guests will savor each bite of this elegant, easy-to-serve treat you can prepare ahead of time.
Ingredients
- 8 oz (226 g) cream cheese, softened
- 1 large egg
- 8.5 oz (241 g) sugar cookie mix
- 4 tbsps (56 g) unsalted butter, cold
- 1/4 cup (50 g) granulated sugar
- 1/2 can cherry pie filling
- 1/3 cup (40 g) toasted sliced almonds
- 1 tbsp (8 g) all-purpose flour
- 1/2 tsp vanilla extract
Instructions
- Preheat the oven to 350°F and prepare an 8×8 or 9×13 inch pan by lining it with foil and spraying with non-stick cooking spray.
- Create the crust by blending sugar cookie mix with cold butter until crumbly. Separate ¾ cup of the mixture for later use. Press the remaining mixture into the pan bottom and bake for 10 minutes, then cool. The crust will appear slightly underdone.
- Craft the cheesecake filling by whisking cream cheese, sugar, flour, vanilla extract, and egg until achieving a smooth, creamy consistency.
- Spread the cream cheese mixture evenly over the cooled crust. Carefully distribute cherry pie filling across the surface, ensuring complete coverage.
- Combine the reserved crumbly mixture with toasted sliced almonds in a small bowl. Generously sprinkle this nutty topping over the cherry layer.
- Bake for 40-45 minutes, depending on pan size, until the top turns light golden brown. The timing varies slightly between 8×8 and 9×13 inch pans.
- Allow bars to cool at room temperature for 30 minutes. Refrigerate for several hours to completely chill. Store covered in the refrigerator for optimal freshness.
Notes
- Achieve perfectly even layers by using an offset spatula to spread the cream cheese mixture and cherry filling smoothly across the crust.
- Toast almonds beforehand in a dry skillet for enhanced nutty flavor and extra crunch, which elevates the overall texture of the bars.
- Create gluten-free version by substituting sugar cookie mix with gluten-free cookie mix or graham cracker crumbs and using certified gluten-free flour.
- Customize fruit filling by replacing cherry with seasonal alternatives like raspberry, blueberry, or mixed berry preserves for year-round enjoyment.
- Prep Time: 20 minutes
- Cook Time: 45 minutes
- Category: Desserts
- Method: Baking
- Cuisine: American
Nutrition
- Serving Size: 9
- Calories: 291 kcal
- Sugar: 17 g
- Sodium: 130 mg
- Fat: 18 g
- Saturated Fat: 7 g
- Unsaturated Fat: 9 g
- Trans Fat: 0.2 g
- Carbohydrates: 27 g
- Fiber: 1 g
- Protein: 4 g
- Cholesterol: 48 mg
Clara Bennett
Contributing Recipe Developer & Food Writer
Expertise
Baking and Pastry Development, Gluten-Free and Allergy-Friendly Recipe Creation, Culinary Storytelling and Food Journalism, Recipe Testing and Standardization, Southern Comfort Foods and Modern Twists
Education
Sullivan University – National Center for Hospitality Studies
Associate Degree in Culinary Arts
Focus: Baking and Pastry Arts, Recipe Testing, and Culinary Journalism.
Clara specialized in crafting desserts that blend classic Southern comfort with modern techniques, while developing strong writing skills to tell the story behind every dish.
Lane Community College (Certificate Program)
Certificate in Food Writing and Photography
Focus: Culinary storytelling, recipe formatting, food styling, and visual presentation.
Clara’s love of baking started young, powered by homemade pies, biscuits, and stories passed around the family table.
After earning her degree at Sullivan University and a food writing certificate at Lane Community College, she turned her passion into a craft: sharing recipes that are simple, soulful, and always full of heart.
She’s big on bold flavors, flexible ideas, and creating sweets that fit any table (yes, even if you’re gluten-free). When she’s not baking, you’ll find her wandering farmers’ markets, styling food for the next photo shoot, or working on her ever-growing recipe journal.