
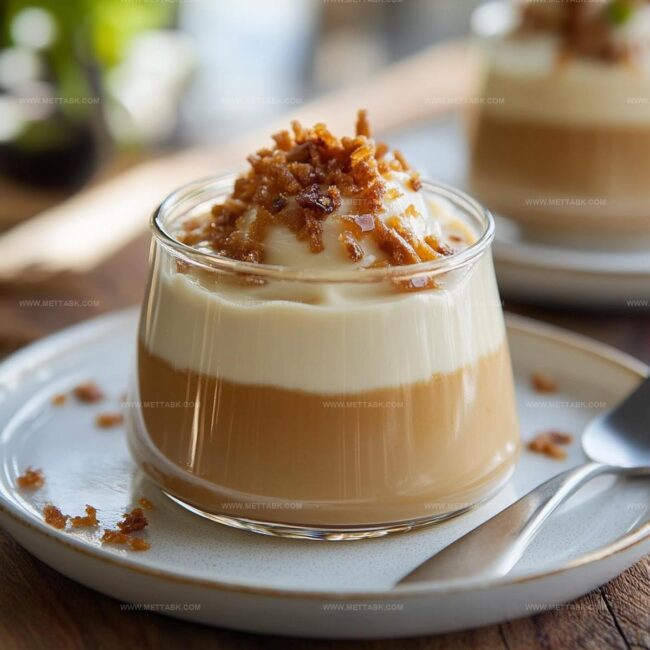
Quick & Dreamy Creamy Homemade Butterscotch Pudding Recipe
Pudding lovers adore this silky homemade butterscotch pudding that melts effortlessly on your tongue with rich, caramel-like smoothness.
Sweet memories dance from childhood kitchens where grandmothers stirred deep copper pots.
Warm brown sugar and cream create magical moments of pure comfort.
Each spoonful promises decadent pleasure wrapped in nostalgic warmth.
Simple ingredients combine into an extraordinary dessert that feels both elegant and familiar.
Professional chefs and home cooks alike marvel at its luxurious texture.
Grab a whisk and let deliciousness begin!
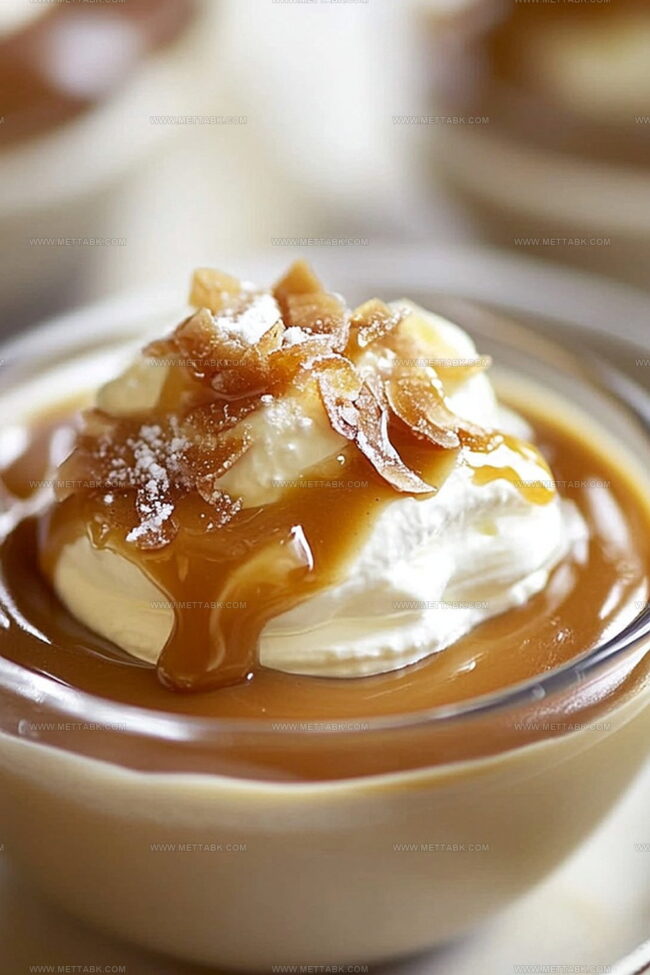
Creamy Homemade Butterscotch Pudding That Comforts Deeply

Ingredients for Rich and Smooth Homemade Butterscotch Pudding
Base Ingredients:Liquid Ingredients:Thickening Agents:How to Make Creamy Homemade Butterscotch Pudding Easily
Step 1: Unleash the Butter and Sugar Magic
Grab a medium saucepan and toss in butter, granulated sugar, and brown sugar. Melt these delightful ingredients over low heat, stirring until they transform into a bubbly, aromatic mixture that’ll make your kitchen smell incredible.
Step 2: Create a Silky Smooth Base
Pour in whole milk and heavy cream, whisking gently to create a luxurious liquid. Watch as the mixture becomes smooth and creamy, with no stubborn lumps in sight.
Step 3: Thicken the Pudding Potion
In a separate bowl, mix:Whisk this magical thickening blend into your warm cream mixture. Stir vigorously to prevent any clumping and ensure a velvety texture.
Step 4: Cook to Creamy Perfection
Bump up the heat to medium and keep stirring constantly. Your pudding will start to thicken like a dream – this should take about 5-7 minutes.
You’re looking for a consistency that coats the back of your spoon.
Step 5: Add the Flavor Finale
Pull the saucepan off the heat and stir in vanilla extract.
This is where the pudding gets its final burst of flavor that’ll make taste buds dance.
Step 6: Chill and Serve
Pour the luscious pudding into serving bowls.
Let it cool down to room temperature, then pop it in the refrigerator. In a few hours, you’ll have a chilled, creamy butterscotch treat that’ll make everyone swoon.
Tips for Perfect Butterscotch Pudding Every Time
Flavorful Variations on Homemade Butterscotch Pudding
Pairings That Complement Homemade Butterscotch Pudding Well
Best Ways to Store Homemade Butterscotch Pudding
FAQs
Cornstarch acts as a thickening agent, helping the pudding achieve its smooth, creamy texture by stabilizing and binding the ingredients together.
Whole milk and heavy cream work best for richness, but you can substitute with 2% milk or half-and-half, though the pudding might be slightly less creamy.
The pudding is ready when it coats the back of a spoon and leaves a clear path when you run your finger through it, which typically happens after 5-7 minutes of constant stirring.
Print
Creamy Homemade Butterscotch Pudding Recipe
- Total Time: 17 minutes
- Yield: 4 1x
Description
Homemade butterscotch pudding reveals rich caramel notes from brown sugar and butter. Silky smooth dessert promises comfort with each spoonful, inviting you to savor classic flavors reminiscent of childhood memories.
Ingredients
- 2 cups whole milk (60 ml)
- 1 cup heavy cream (240 ml)
- 1/2 cup granulated sugar (100 g)
- 1/2 cup packed brown sugar (100 g)
- 4 tbsps unsalted butter (60 g)
- 3 tbsps cornstarch (24 g)
- 1 tsp pure vanilla extract
- Pinch of salt
Instructions
- Assemble all ingredients within arm’s reach to streamline the cooking process.
- Create a rich caramel base by gently melting butter with granulated and brown sugars in a saucepan, stirring until the mixture becomes aromatic and develops a golden hue.
- Slowly incorporate whole milk and heavy cream, whisking continuously to prevent any potential scorching or separation.
- Prepare a smooth cornstarch slurry by blending cornstarch and salt with a small amount of cold milk, ensuring no dry pockets remain.
- Pour the cornstarch mixture into the warm liquid, stirring energetically to prevent lumps from forming.
- Maintain medium heat, constantly stirring the pudding for 5-7 minutes until it thickens to a luxurious, velvety consistency that coats the back of a spoon.
- Remove the saucepan from heat and infuse the pudding with vanilla extract, stirring to distribute the flavor evenly.
- Carefully transfer the pudding into individual serving dishes, allowing it to cool at room temperature.
- Refrigerate for at least 2 hours to achieve a chilled, set pudding with a silky smooth texture.
Notes
- Prep All Ingredients Beforehand to avoid scrambling during cooking and ensure smooth execution.
- Use Wooden Spoon or Silicone Spatula for stirring to prevent scratching delicate saucepan surface and maintain even heat distribution.
- Control Heat Carefully when melting butter and sugar to prevent burning and achieve perfect caramelization without scorching.
- Whisk Continuously while adding milk and cornstarch mixture to guarantee a silky, lump-free pudding texture.
- Prep Time: 10 minutes
- Cook Time: 7 minutes
- Category: Desserts
- Method: Simmering
- Cuisine: American
Nutrition
- Serving Size: 4
- Calories: 410 kcal
- Sugar: 47 g
- Sodium: 70 mg
- Fat: 23 g
- Saturated Fat: 14 g
- Unsaturated Fat: 8 g
- Trans Fat: 1 g
- Carbohydrates: 53 g
- Fiber: 0 g
- Protein: 4 g
- Cholesterol: 95 mg
Clara Bennett
Contributing Recipe Developer & Food Writer
Expertise
Baking and Pastry Development, Gluten-Free and Allergy-Friendly Recipe Creation, Culinary Storytelling and Food Journalism, Recipe Testing and Standardization, Southern Comfort Foods and Modern Twists
Education
Sullivan University – National Center for Hospitality Studies
Associate Degree in Culinary Arts
Focus: Baking and Pastry Arts, Recipe Testing, and Culinary Journalism.
Clara specialized in crafting desserts that blend classic Southern comfort with modern techniques, while developing strong writing skills to tell the story behind every dish.
Lane Community College (Certificate Program)
Certificate in Food Writing and Photography
Focus: Culinary storytelling, recipe formatting, food styling, and visual presentation.
Clara’s love of baking started young, powered by homemade pies, biscuits, and stories passed around the family table.
After earning her degree at Sullivan University and a food writing certificate at Lane Community College, she turned her passion into a craft: sharing recipes that are simple, soulful, and always full of heart.
She’s big on bold flavors, flexible ideas, and creating sweets that fit any table (yes, even if you’re gluten-free). When she’s not baking, you’ll find her wandering farmers’ markets, styling food for the next photo shoot, or working on her ever-growing recipe journal.