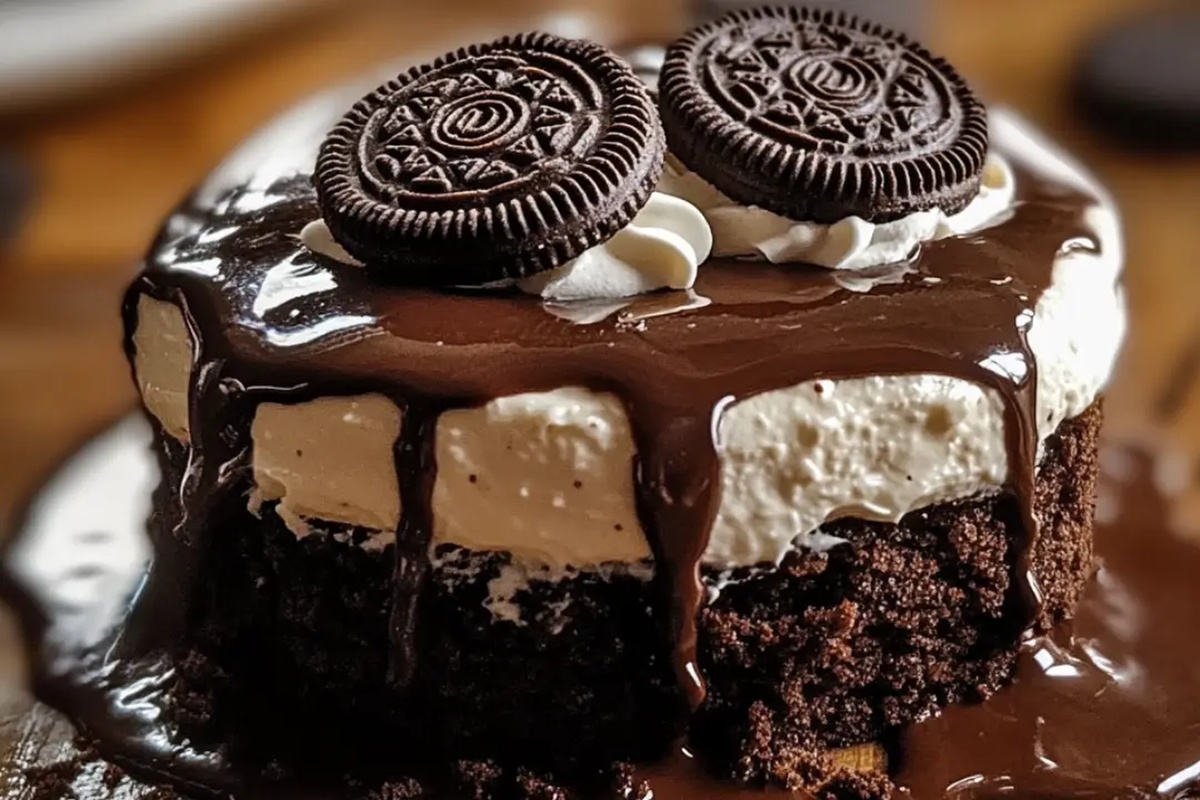
The Best Easy Chocolate Oreo Delight Recipe for Sweet Cravings
Crafting a decadent chocolate oreo delight brings pure joy to any dessert lover’s heart.
Sweet crumbles of classic cookies meld seamlessly with rich chocolate layers.
Creamy textures dance across your palate with each delightful bite.
Each ingredient promises a delectable experience that melts effortlessly.
Chocolate lovers will appreciate the simple yet indulgent combination of familiar flavors.
Minimal effort creates maximum satisfaction in this irresistible treat.
Easy Chocolate Oreo Delight Breakdown
Ingredients for Chocolate Oreo Delight
For the Crust:For the Pudding Layer:For the Topping and Garnish:Preparation Guide for Chocolate Oreo Delight
Step 1: Crush and Press the Delectable Base
Grab a package of Oreo cookies and crush them into fine crumbs using a food processor or rolling pin. Melt some butter and mix it thoroughly with the cookie crumbs until they stick together perfectly.
Press this magical mixture into the bottom of a 9×13-inch baking dish, creating a smooth, even layer that will serve as the foundation of your dessert. Pop the dish into the refrigerator to let the crust firm up while you prepare the next layer.
Step 2: Whip Up the Chocolate Magic
In a large mixing bowl, combine instant chocolate pudding mix with cold milk. Whisk the ingredients vigorously until they transform into a thick, creamy mixture.
Let the pudding sit for a few minutes to achieve the perfect consistency, allowing the flavors to develop and the texture to become luxuriously smooth.
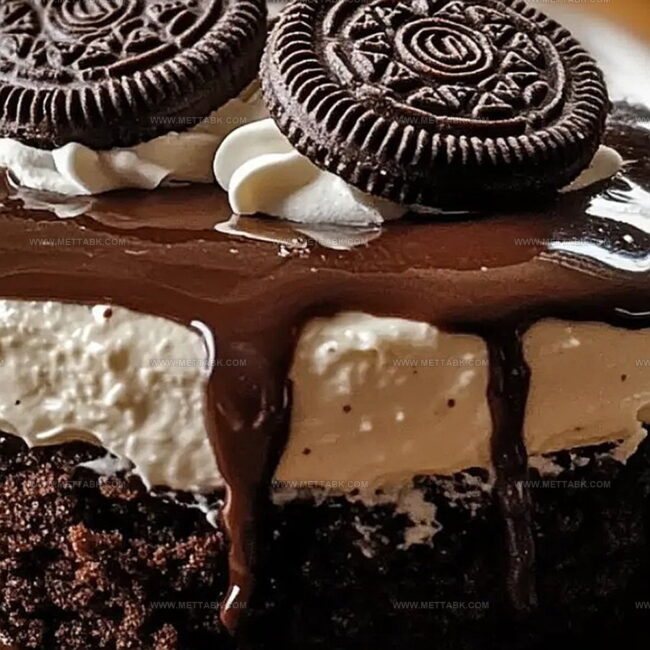
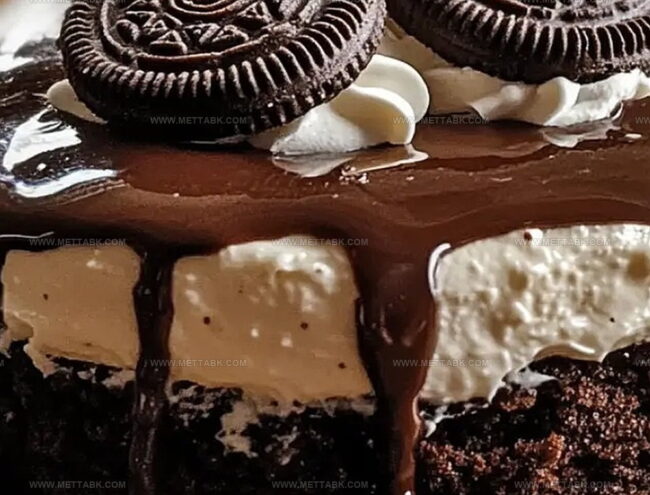
Step 3: Layer the Creamy Goodness
Carefully spread the prepared chocolate pudding over the chilled Oreo crust, ensuring an even distribution.
Next, gently top the pudding with a fluffy layer of whipped topping, creating a cloud-like surface that will make your dessert irresistible.
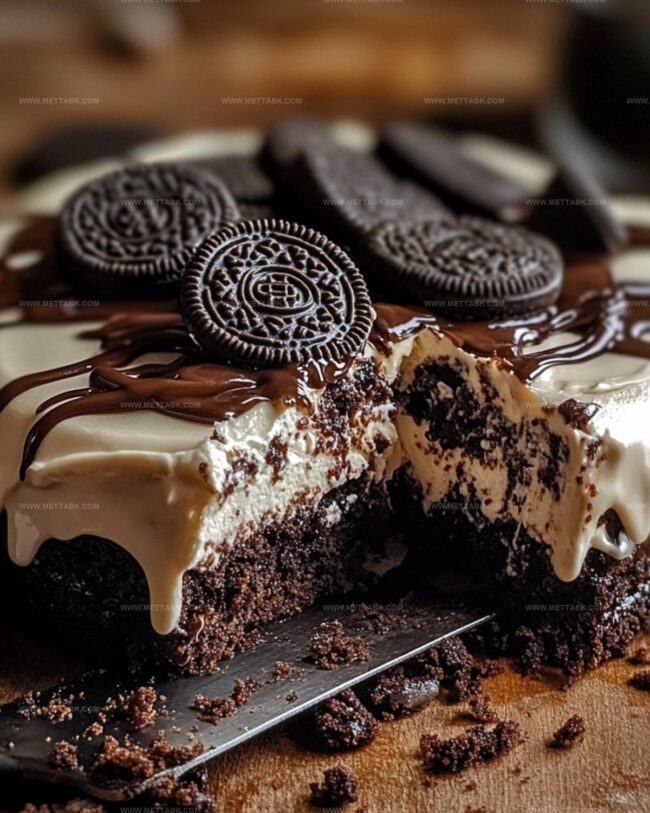
Step 4: Decorate with Delightful Crunch
Sprinkle the remaining crushed Oreo cookies over the whipped topping, creating a beautiful and tempting texture.
For an extra touch of indulgence, drizzle some chocolate syrup or add delicate chocolate shavings to elevate the dessert’s visual appeal and flavor profile.
Step 5: Chill and Savor the Delight
Cover the baking dish and place it in the refrigerator.
Allow the dessert to set and chill for at least two hours, or ideally overnight. This resting time will help the layers meld together, creating a harmonious and mouthwatering treat.
When ready to serve, slice into squares and enjoy the cool, creamy, and crunchy sensation of your Chocolate Oreo Delight.
Pro Tips for Chocolate Oreo Delight
Variations to Try on Chocolate Oreo Delight
Pairing Suggestions for Chocolate Oreo Delight
Pair Creamy Chocolate Delight with Rich Beverages:Storage Tips for Chocolate Oreo Delight
Store the Oreo Delight in an airtight container or cover tightly with plastic wrap in the original baking dish. Keep refrigerated for up to 4 days, ensuring it stays cool and fresh.
Wrap individual portions or the entire dessert in plastic wrap, then place in a freezer-safe container. Freeze for up to 2 months without losing texture or flavor.
Remove from freezer and let the dessert thaw in the refrigerator for 3-4 hours before serving. Avoid thawing at room temperature to prevent soggy layers.
This dessert is best enjoyed cold. Avoid microwaving, as it will cause the whipped topping to melt and layers to separate. Serve directly from the refrigerator for the perfect chilled treat.
FAQs
You can substitute Oreos with other chocolate sandwich cookies like chocolate graham crackers or chocolate wafer cookies for a similar texture and flavor.
Yes, this dessert is perfect for making in advance. You can prepare it a day before serving, and it will actually taste better as the layers set and flavors meld together.
No, traditional Oreo cookies contain wheat, making this dessert not gluten-free. To make a gluten-free version, you’ll need to use gluten-free chocolate sandwich cookies.
Print
Easy Chocolate Oreo Delight Recipe
- Total Time: 2 hours 20 minutes
- Yield: 8 1x
Description
Indulgent chocolate oreo delight brings creamy layers of pure bliss to dessert tables everywhere. Sweet cookie crumbs and rich chocolate mousse create a heavenly treat you won’t be able to resist.
Ingredients
Main Ingredients:
- 24 Oreo cookies
- 3.9 ounces instant chocolate pudding mix
- 2 cups cold milk
- 8 ounces whipped topping
Crust Components:
- 2 cups crushed Oreo cookies
- 6 tablespoons unsalted butter, melted
Garnish and Optional Toppings:
- 1 cup crushed Oreo cookies
- Whipped topping
- Chocolate syrup
- Shaved chocolate
Instructions
- Craft the foundation by pulverizing Oreo cookies and blending with melted butter until uniformly moist and crumbly.
- Transfer the cookie mixture into a 9×13-inch dish, pressing firmly to create a compact, even base layer that reaches all corners.
- Refrigerate the crust for 15 minutes to stabilize while preparing subsequent layers.
- Whisk chocolate pudding mix with cold milk vigorously for precisely 2 minutes until the mixture thickens and transforms into a smooth, creamy consistency.
- Allow pudding to rest and set for 5 minutes, enabling it to develop a rich, dense texture.
- Carefully spread the chocolate pudding across the chilled Oreo crust, ensuring complete and uniform coverage.
- Gently layer whipped topping over the pudding, using a spatula to create a soft, pillowy surface without disturbing the underlying pudding.
- Crumble remaining Oreo cookies and generously scatter across the whipped topping for textural contrast.
- Optional: Enhance visual appeal by drizzling chocolate syrup or sprinkling chocolate shavings over the top.
- Seal the dish with plastic wrap and refrigerate for a minimum of 2 hours, ideally overnight, to allow flavors to meld and layers to set completely.
- When ready to serve, slice into equal squares and enjoy the chilled dessert immediately.
Notes
- Swap regular Oreos with gluten-free versions to make this dessert suitable for those with gluten sensitivities.
- Crush Oreos in a food processor or place them in a sealed bag and crush with a rolling pin for consistent texture.
- Ensure cold milk when preparing pudding to help it set properly and achieve a smooth, creamy consistency.
- Make ahead and refrigerate overnight for deeper flavor integration and firmer layers that are easier to slice.
- Prep Time: 20 minutes
- Cook Time: 2 hours
- Category: Desserts, Snacks
- Method: Chilling
- Cuisine: American
Nutrition
- Serving Size: 8
- Calories: 244 kcal
- Sugar: 22 g
- Sodium: 160 mg
- Fat: 12 g
- Saturated Fat: 7 g
- Unsaturated Fat: 4 g
- Trans Fat: 0.1 g
- Carbohydrates: 31 g
- Fiber: 1.5 g
- Protein: 2 g
- Cholesterol: 15 mg
Nate Harper
Founder & Recipe Curator
Expertise
Single-Recipe Development, Farm-to-Table Cooking, Seasonal Menu Planning, Culinary Storytelling, Home Kitchen Innovation
Education
Cascade Culinary Institute – Central Oregon Community College
Certificate in Culinary Arts
Focus: Farm-to-table cuisine, sustainable cooking practices, and seasonal recipe creation.
Nate studied under experienced chefs who emphasized local sourcing, minimal waste, and building recipes from fresh, simple ingredients.
Nate Harper is the founder and creative force behind Make, Take, Bake. Raised in the wild beauty of Oregon’s high desert, Nate grew up surrounded by family gardens, farmers’ markets, and home kitchens that celebrated the seasons.
His early love for simple, honest food evolved into a professional passion when he attended Cascade Culinary Institute, where he sharpened his skills in creating recipes that are sustainable, satisfying, and made for everyday life.
Nate’s goal is to make cooking feel accessible, free of fuss, and full of flavor. He believes a single, thoughtfully built dish can stand alone, and sometimes even steal the show.