Sweet & Silky Homemade Caramel Recipe: A Dreamy Dessert Delight
Sweet dreams start with a rich and luxurious homemade caramel that melts effortlessly on your tongue.
Whispers of golden warmth drift through kitchens, promising delectable moments of pure indulgence.
Sugar transforms under careful heat, creating liquid amber magic that captivates every sense.
Crafting this treat requires patience and a gentle touch, allowing ingredients to dance together harmoniously.
Precise temperatures unlock deep, complex flavors that commercial versions cannot match.
Professional bakers know caramel’s secret: simplicity creates extraordinary results.
Each spoonful connects you to generations of culinary passion, turning ordinary ingredients into something extraordinary.
Let yourself be seduced by this decadent recipe that promises pure, sweet bliss.
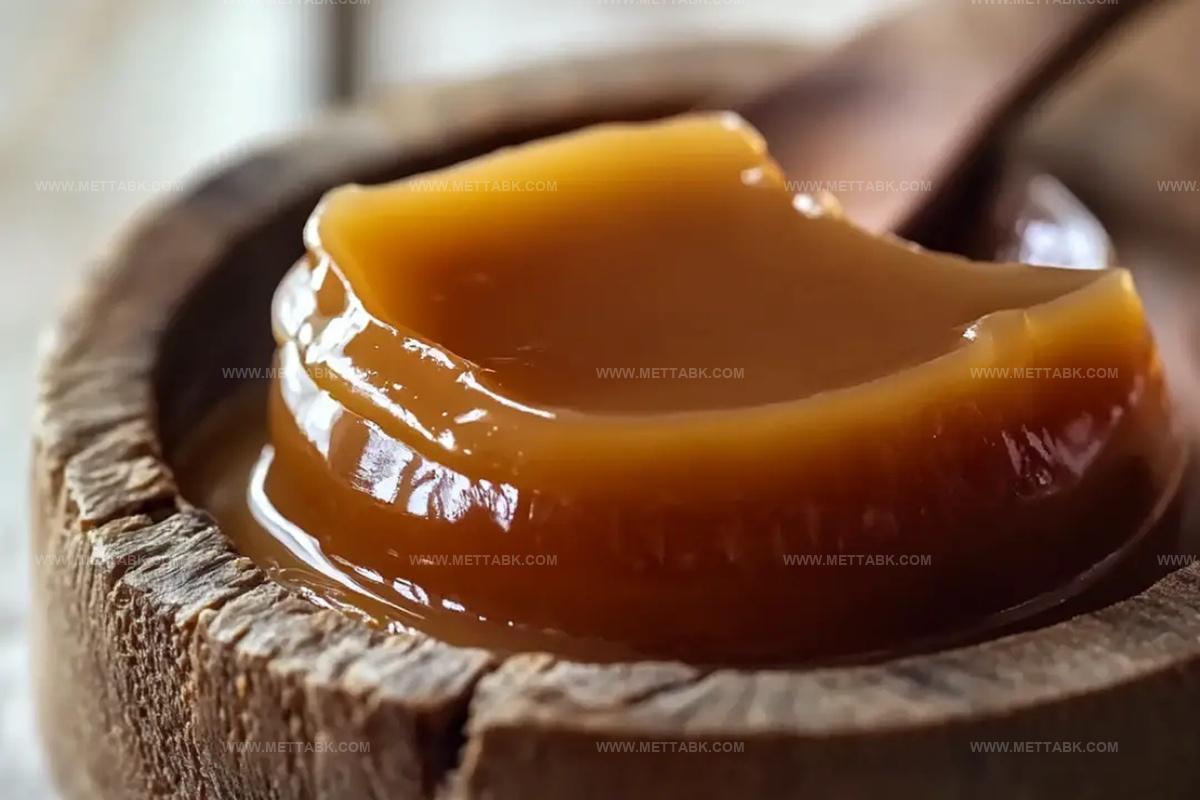
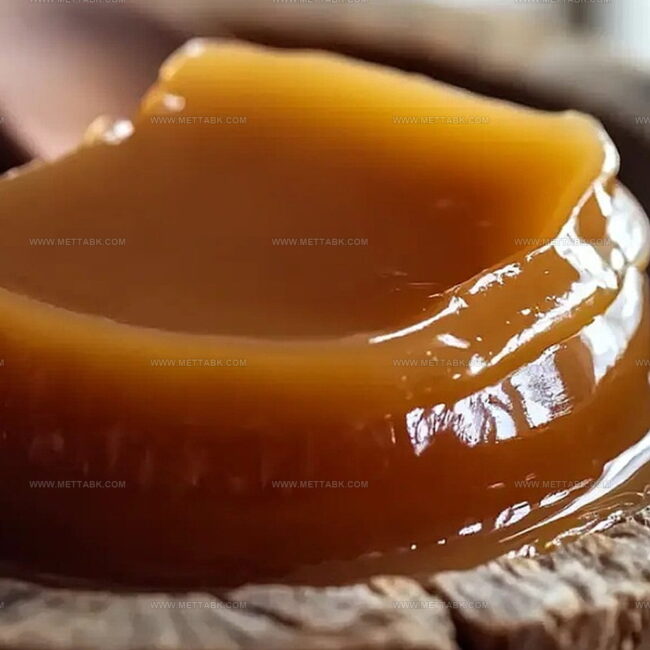
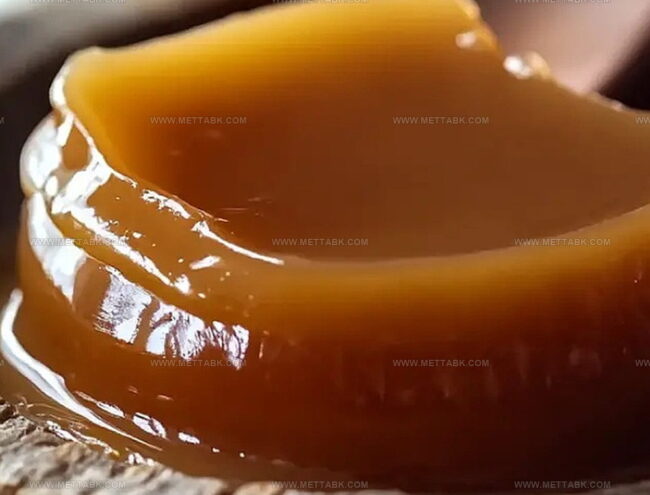
Homemade Caramel That Melts in Your Mouth
Ingredients for Creamy Homemade Caramel
For the Main Ingredient:For the Fat Components:For the Flavor Enhancers:How to Make Smooth and Rich Caramel
Step 1: Melt Sugar Slowly
Place sugar in a medium heavy-bottomed saucepan over medium heat. Use a heat-resistant spatula to stir the sugar consistently.
Watch as the sugar transforms from clumpy crystals to a smooth, amber-colored liquid. This magical transformation typically takes 5-7 minutes, so be patient and keep stirring to prevent burning.
Step 2: Incorporate Creamy Butter
Once the sugar completely melts into a golden liquid, start adding butter pieces one at a time. Continue stirring constantly as the mixture bubbles and transforms.
Keep mixing until the butter blends seamlessly into the caramel, creating a rich and smooth consistency.
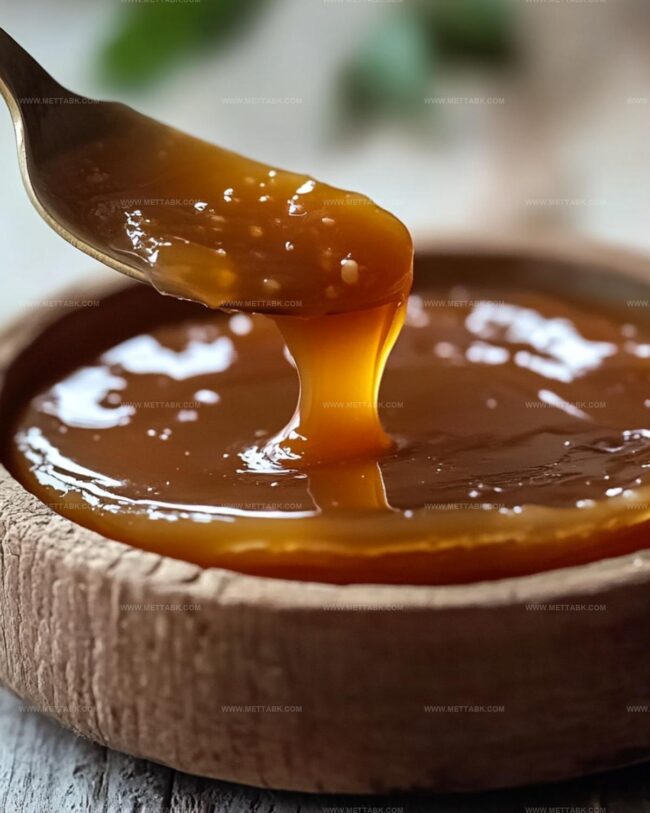
Step 3: Create Silky Caramel Sauce
Remove the pan from heat and carefully pour in heavy cream while stirring continuously.
Expect another round of bubbling as the cream meets the hot caramel. Keep stirring until the mixture becomes perfectly smooth and glossy.
For extra flavor, stir in vanilla extract at this point.
Step 4: Cool and Store Caramel
Allow the caramel to cool for 10-15 minutes at room temperature.
Carefully transfer the luscious sauce into a clean glass jar with a tight-sealing lid. Refrigerate your homemade caramel, which will keep fresh for up to two weeks.
Enjoy drizzling over desserts or using as a decadent dip!
Tips to Nail Perfect Caramel Texture
Variations to Try with Caramel
Pairing Ideas to Enjoy with Caramel
Proper Storage for Homemade Caramel
Transfer cooled caramel to an airtight glass container with a tight-fitting lid, ensuring it’s completely sealed to prevent absorption of other food odors.
Pour caramel into freezer-safe containers, leaving about 1/2 inch of space at the top for expansion, and store for up to 3 months with a dated label.
Warm refrigerated caramel in short 10-15 second microwave intervals, stirring between each interval, or place the container in a warm water bath, stirring until smooth and pourable.
Let frozen or refrigerated caramel sit at room temperature for 15-20 minutes before using, allowing it to soften naturally without additional heating.
FAQs
Sugar naturally clumps when first heated because the sugar crystals are transitioning from solid to liquid. Keep stirring constantly and maintain medium heat, and the clumps will eventually melt into a smooth amber liquid.
A medium heavy-bottomed saucepan is ideal because it distributes heat evenly and prevents burning. Avoid thin or lightweight pans that can create hot spots and cause uneven caramelization.
If you notice dark brown or black spots, immediately remove the pan from heat and stop stirring. A slightly dark caramel can still be usable, but burnt caramel will taste bitter and should be discarded.
Print
Homemade Caramel Recipe
- Total Time: 15 minutes
- Yield: 8 1x
Description
Sweet caramel magic melts hearts with rich, golden goodness that whispers comfort in each spoonful. Silky smooth strands of sugary delight invite you to savor pure culinary bliss.
Ingredients
Main Ingredients:
- 1 cup (200 grams) granulated sugar
- 6 tablespoons (85 grams) unsalted butter, cut into pieces
- 1/2 cup (120 milliliters) heavy cream, at room temperature
Flavor Enhancers:
- 1/2 teaspoon salt (omit if using salted butter)
- 1 teaspoon vanilla extract (optional, for extra flavor)
Instructions
- Heat sugar in a heavy-bottomed saucepan over medium heat, using a heat-resistant spatula to stir continuously. Sugar will initially form clumps before transforming into a golden amber liquid, approximately 5-7 minutes.
- Once sugar completely melts, gradually introduce butter pieces while stirring. The mixture will foam and bubble, continue mixing until butter integrates thoroughly.
- Immediately remove pan from heat source and carefully stream heavy cream into caramel, stirring vigorously. Expect intense bubbling during this process. Maintain constant stirring until mixture becomes silky and uniform.
- Add vanilla extract and blend smoothly into the caramel mixture.
- Allow caramel to cool at room temperature for 10-15 minutes, preventing immediate heat-related condensation when transferred to storage container.
- Transfer cooled caramel to a sealed glass jar, ensuring airtight closure. Refrigerate and consume within 2 weeks for optimal flavor and texture.
Notes
- Prevent burning by using a light-colored heavy-bottomed pan to monitor sugar’s color change precisely.
- Stir sugar gently and consistently to ensure even melting without creating hard sugar clumps.
- Use room temperature butter and cream to minimize aggressive bubbling and potential splattering during incorporation.
- Keep a close eye on the caramel’s color transformation from white to golden amber, as it can quickly turn bitter if overcooked.
- Prep Time: 5 minutes
- Cook Time: 10 minutes
- Category: Desserts, Snacks
- Method: Simmering
- Cuisine: French
Nutrition
- Serving Size: 8
- Calories: 191
- Sugar: 22 g
- Sodium: 35 mg
- Fat: 10 g
- Saturated Fat: 6 g
- Unsaturated Fat: 3 g
- Trans Fat: 0.1 g
- Carbohydrates: 23 g
- Fiber: 0 g
- Protein: 1 g
- Cholesterol: 33 mg
Nate Harper
Founder & Recipe Curator
Expertise
Single-Recipe Development, Farm-to-Table Cooking, Seasonal Menu Planning, Culinary Storytelling, Home Kitchen Innovation
Education
Cascade Culinary Institute – Central Oregon Community College
Certificate in Culinary Arts
Focus: Farm-to-table cuisine, sustainable cooking practices, and seasonal recipe creation.
Nate studied under experienced chefs who emphasized local sourcing, minimal waste, and building recipes from fresh, simple ingredients.
Nate Harper is the founder and creative force behind Make, Take, Bake. Raised in the wild beauty of Oregon’s high desert, Nate grew up surrounded by family gardens, farmers’ markets, and home kitchens that celebrated the seasons.
His early love for simple, honest food evolved into a professional passion when he attended Cascade Culinary Institute, where he sharpened his skills in creating recipes that are sustainable, satisfying, and made for everyday life.
Nate’s goal is to make cooking feel accessible, free of fuss, and full of flavor. He believes a single, thoughtfully built dish can stand alone, and sometimes even steal the show.