
The Sweet Secret: Homemade Cherry Pie Recipe for Joy
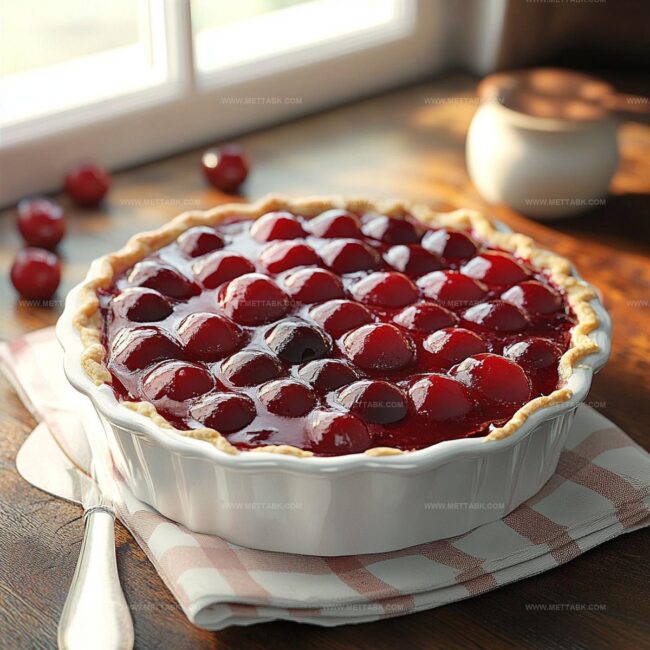
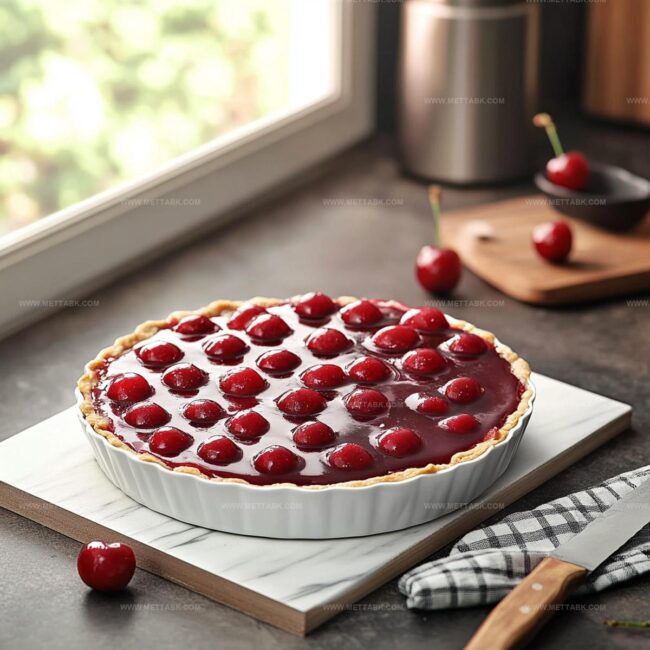
Sweet memories often circle around my favorite homemade cherry pie, a delightful dessert that captures summer’s most vibrant flavors.
Clusters of ripe cherries nestled in a golden, flaky crust create pure magic on any plate.
Passionate bakers know the secret lies in selecting the freshest, most succulent fruit available.
Each slice promises a delectable journey through textures and tastes that dance across your palate.
Grandmothers and professional pastry chefs alike share a deep respect for this classic dessert’s simple yet profound charm.
Crisp pastry and tender, tangy cherries meld together in a symphony of comfort and nostalgia.
Let’s uncover the delicious steps that will help you craft this irresistible pie and impress everyone at your table.
Why Homemade Cherry Pie Feels Like Home
Ingredients for Sweet and Tart Homemade Cherry Pie
Pie Crust:Fruit Filling:Finishing Touches:How to Bake Homemade Cherry Pie to Perfection
Step 1: Prepare Fresh Cherries
Gently wash the cherries under cool running water. Remove the pits using a cherry pitter or a small knife, carefully extracting each seed to keep the fruit intact.
Discard the pits and set the pitted cherries aside.
Step 2: Create Flavorful Cherry Filling
In a mixing bowl, combine the prepared cherries with:Gently stir the ingredients, allowing them to mingle and develop a rich, sweet flavor.
Let the mixture rest for about 15-20 minutes to enhance the taste profile.
Step 3: Shape The Pie Crust
Dust your work surface with a light layer of flour.
Roll out the first portion of pie dough into a circular shape, ensuring it’s large enough to cover the pie dish. Carefully transfer the dough to the dish, pressing it gently into the corners without stretching the pastry.
Step 4: Fill And Top The Pie
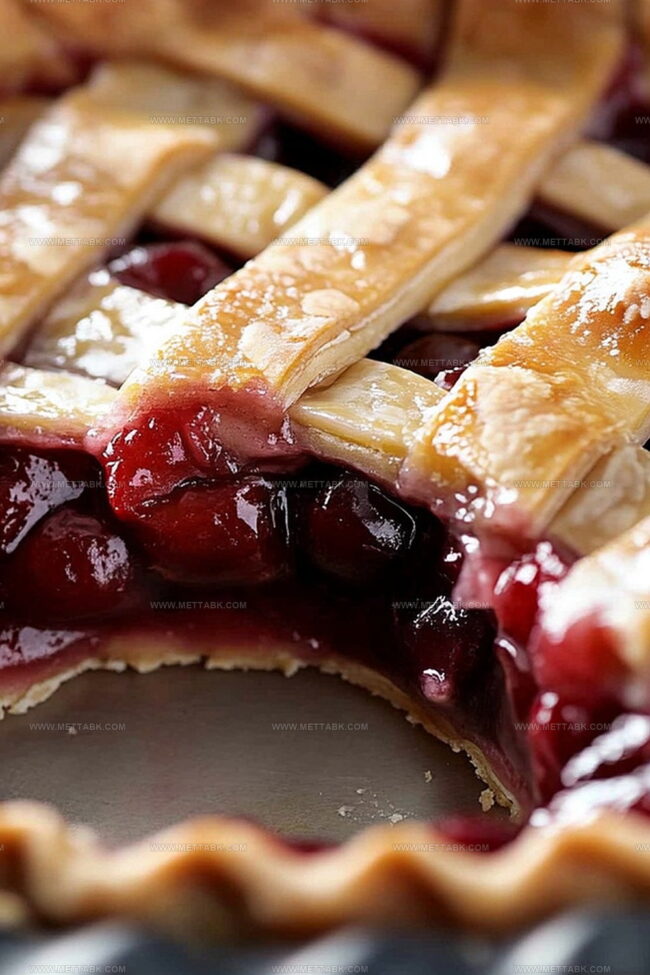
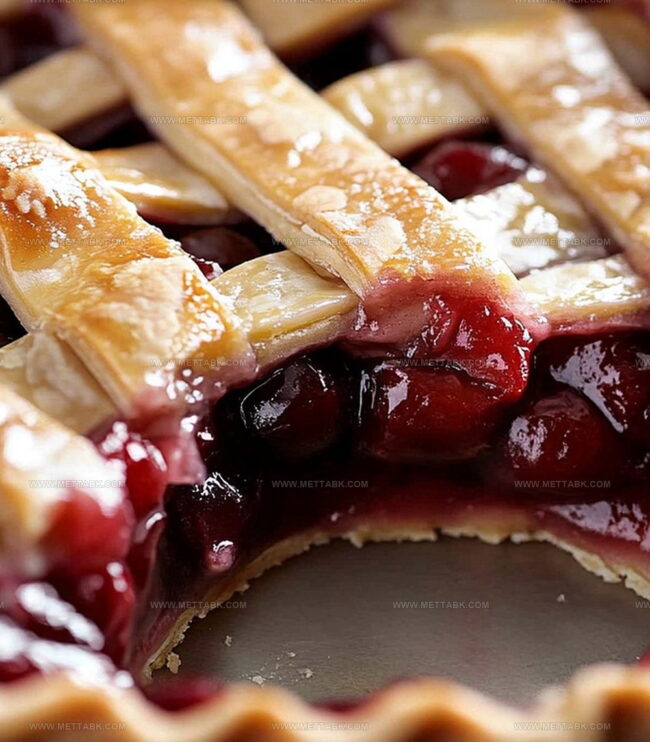
Pour the cherry mixture evenly into the prepared crust. Roll out the second portion of dough and create a decorative top layer.
Options include:Step 5: Bake To Perfection
Preheat the oven to 425°F. Place the pie in the center rack and bake for 45-50 minutes.
Look for a golden-brown crust and bubbling cherry filling as indicators of doneness.
Step 6: Cool And Serve
Remove the pie from the oven and let it cool for at least one hour.
This resting period allows the filling to set and makes slicing easier. Serve warm with a dollop of whipped cream or a scoop of vanilla ice cream for a classic dessert experience.
Tips for Flaky and Juicy Homemade Cherry Pie
Fun Twists on Classic Homemade Cherry Pie
Pairings That Complement Homemade Cherry Pie Well
How to Keep Homemade Cherry Pie Fresh and Flaky
FAQs
Yes, you can use frozen cherries. Thaw and drain them completely before mixing with other ingredients to prevent excess liquid.
Blind bake the bottom crust for 10-15 minutes before adding the filling, or sprinkle a thin layer of breadcrumbs or ground nuts to absorb moisture.
Use a paperclip, chopstick, or the tip of a piping bag to carefully remove the pits. Or gently squeeze each cherry to pop out the pit.
Look for a golden-brown crust and bubbling filling. The filling should be thick and not watery when the pie is done baking.
Print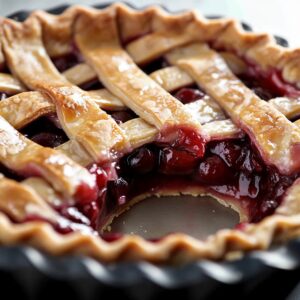
Homemade Cherry Pie Recipe
- Total Time: 1 hour 20 minutes
- Yield: 8 1x
Description
Luscious homemade cherry pie delights dessert enthusiasts with its classic American charm. Flaky pastry and sweet-tart filling create a nostalgic experience you’ll savor with each delectable bite.
Ingredients
- 4 cups fresh cherries (pitted)
- 1 cup sugar
- 2 tbsps cornstarch
- 1 tbsp lemon juice
- 1 tsp vanilla extract
- 1 pie crust (store-bought or homemade)
Instructions
- Meticulously clean and remove pits from fresh cherries, ensuring no stems or debris remain.
- Create a fragrant filling by mixing cherries with granulated sugar, cornstarch, freshly squeezed lemon juice, and aromatic vanilla extract; allow ingredients to harmonize for 15-20 minutes.
- Gently roll out bottom pie dough on a lightly floured surface, carefully transferring to a pie dish without stretching or tearing the delicate pastry.
- Artfully pour the macerated cherry mixture into the prepared bottom crust, distributing evenly.
- Craft a decorative top crust by rolling out remaining dough, either creating elegant lattice strips or a full cover with strategic steam vents.
- Brush top crust with egg wash for a glossy, golden finish and sprinkle with coarse sugar for added texture.
- Position pie in a preheated oven at 425°F, placing a baking sheet underneath to catch potential drips.
- Bake for 45-50 minutes until crust turns a rich golden brown and cherry filling bubbles vigorously.
- Remove from oven and let pie rest for 60-90 minutes, allowing filling to set and flavors to intensify.
- Serve slightly warm, accompanied by a dollop of whipped cream or a scoop of vanilla ice cream.
Notes
- Use ripe, fresh cherries for the most vibrant flavor and best texture in your pie.
- Drain excess liquid from the cherry mixture to prevent a soggy bottom crust, ensuring a crisp and flaky base.
- Create beautiful lattice tops or decorative cutouts to make your pie visually stunning and impress your guests.
- Swap traditional sugar with honey or maple syrup for a more natural sweetness and unique flavor profile.
- Prep Time: 30 minutes
- Cook Time: 50 minutes
- Category: Desserts
- Method: Baking
- Cuisine: American
Nutrition
- Serving Size: 8
- Calories: 250 kcal
- Sugar: 28 g
- Sodium: 150 mg
- Fat: 10 g
- Saturated Fat: 3 g
- Unsaturated Fat: 6 g
- Trans Fat: 0.2 g
- Carbohydrates: 38 g
- Fiber: 2 g
- Protein: 2 g
- Cholesterol: 15 mg
Clara Bennett
Contributing Recipe Developer & Food Writer
Expertise
Baking and Pastry Development, Gluten-Free and Allergy-Friendly Recipe Creation, Culinary Storytelling and Food Journalism, Recipe Testing and Standardization, Southern Comfort Foods and Modern Twists
Education
Sullivan University – National Center for Hospitality Studies
Associate Degree in Culinary Arts
Focus: Baking and Pastry Arts, Recipe Testing, and Culinary Journalism.
Clara specialized in crafting desserts that blend classic Southern comfort with modern techniques, while developing strong writing skills to tell the story behind every dish.
Lane Community College (Certificate Program)
Certificate in Food Writing and Photography
Focus: Culinary storytelling, recipe formatting, food styling, and visual presentation.
Clara’s love of baking started young, powered by homemade pies, biscuits, and stories passed around the family table.
After earning her degree at Sullivan University and a food writing certificate at Lane Community College, she turned her passion into a craft: sharing recipes that are simple, soulful, and always full of heart.
She’s big on bold flavors, flexible ideas, and creating sweets that fit any table (yes, even if you’re gluten-free). When she’s not baking, you’ll find her wandering farmers’ markets, styling food for the next photo shoot, or working on her ever-growing recipe journal.