Irresistibly Fresh Homemade Pizza Recipe for Family Night
Crafting a delectable homemade pizza sparks pure culinary joy in every kitchen adventure.
Crispy crusts and melted cheese beckon passionate food enthusiasts toward delicious creativity.
Nothing beats the satisfaction of designing personal flavor combinations from scratch.
Ingredients become your artistic palette, waiting to dance across a perfectly stretched canvas.
Fresh toppings promise mouth-watering experiences that commercial pizzerias simply cannot match.
Aromas will drift through your home, inviting hungry souls to gather around the table.
Let’s roll up our sleeves and transform simple ingredients into an unforgettable meal that celebrates comfort and connection.
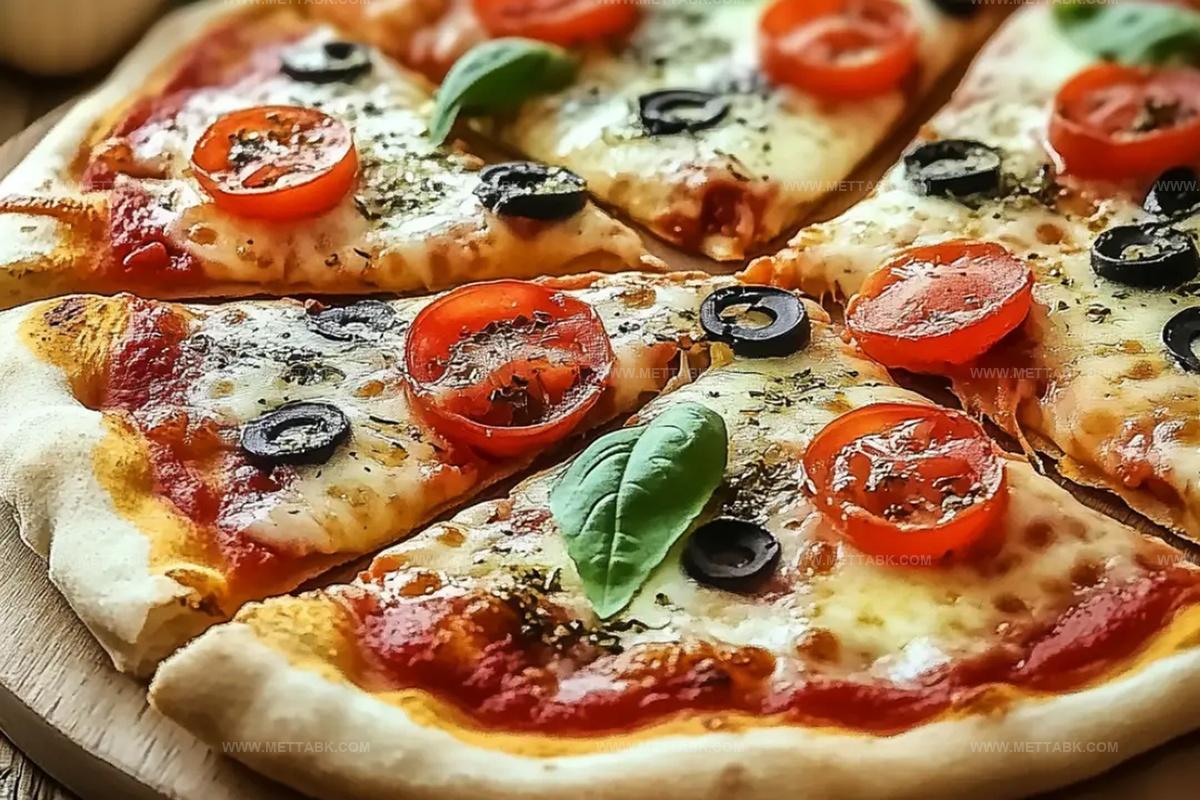
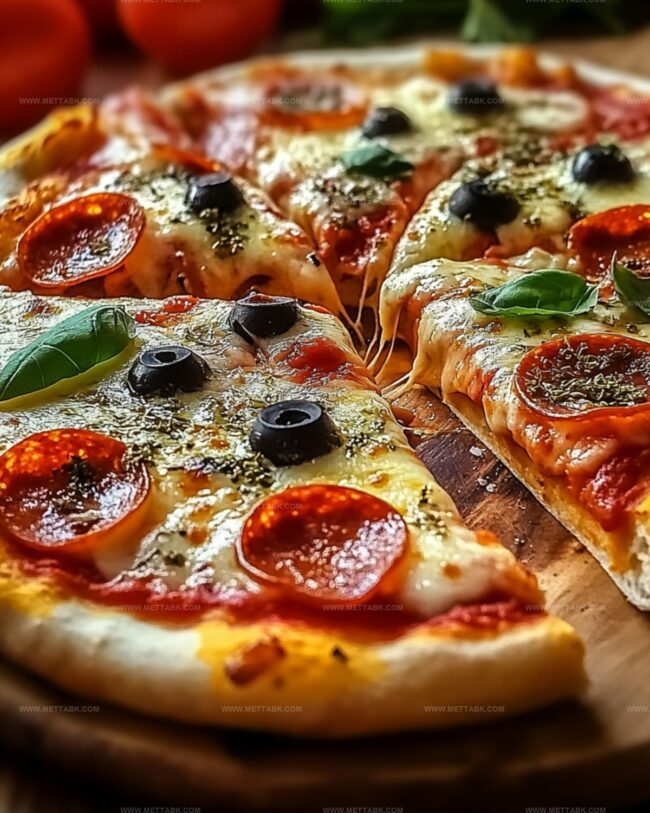
Homemade Pizza with Your Favorite Toppings

Ingredients for Classic Homemade Pizza
For the Dough Base:For the Topping Sauce:For the Cheese and Additional Toppings:Step-by-Step Homemade Pizza Preparation
Step 1: Activate Yeast Mixture
In a spacious mixing bowl, combine warm water, sugar, and yeast. Allow the mixture to rest and become frothy, which takes about 5 minutes.
This magical process awakens the yeast and prepares it for creating a spectacular pizza dough.
Step 2: Create Pizza Dough Base
Add the following ingredients to the activated yeast:Blend the ingredients until a cohesive dough forms.
The mixture should start transforming into a workable, soft texture.
Step 3: Knead Dough to Perfection
Transfer the dough to a lightly floured surface.
Spend about 10 minutes massaging and stretching the dough. Work it until the texture becomes smooth and elastic.
This process develops the gluten and ensures a delightful pizza crust.
Step 4: Let Dough Rise
Place the kneaded dough in a generously greased bowl.
Cover with a clean kitchen towel and position in a warm, draft-free location. Allow the dough to expand and double in size, which typically takes around 1 hour.
Step 5: Prepare Oven for Baking
Heat the oven to 475F (245C). If you have a pizza stone, insert it into the oven during preheating to create a crispy crust foundation.
Step 6: Shape Pizza Crust
Gently deflate the risen dough and roll it out on a floured surface. Stretch the dough to your preferred thickness and shape.
Step 7: Transfer Dough
Carefully move the rolled-out dough onto a baking sheet or pizza peel. Ensure the surface is lightly dusted with flour to prevent sticking.
Step 8: Add Delicious Toppings
Spread a layer of pizza sauce across the dough surface. Then add:Step 9: Bake to Golden Perfection
Slide the pizza into the preheated oven.
Bake for 10-12 minutes until the crust turns golden brown and the cheese becomes bubbly and slightly caramelized.
Step 10: Serve and Savor
Remove the pizza from the oven and let it rest for a few minutes.
Slice into wedges and enjoy your homemade culinary masterpiece!
Tips to Get the Perfect Crust and Toppings
Variations to Make Your Pizza Unique
Pairing Ideas for Homemade Pizza Night
Storing Homemade Pizza for Later

Wrap leftover pizza slices in aluminum foil or store in an airtight container. Keep in the refrigerator for 3-4 days. Ensure proper sealing to maintain freshness and prevent moisture.
Place individual pizza slices on a baking sheet, freeze until solid, then transfer to a freezer-safe bag. Store up to 2 months. Label the bag with the date for easy tracking.
Preheat oven to 375F. Place pizza slices on a baking sheet, cover loosely with foil. Warm for 10-12 minutes until cheese melts and crust crisps. Prevents sogginess and maintains original texture.
Use a non-stick skillet with a lid. Heat on medium-low for 3-4 minutes.
FAQs
The yeast is active when it becomes foamy and bubbly after 5 minutes in warm water with sugar. If no foam forms, the yeast might be expired or the water was too hot or cold.
Yes, you can prepare the pizza dough a day in advance. After kneading, cover and refrigerate. Let it come to room temperature and rise before rolling out.
Kneading develops gluten, which gives the pizza crust its stretchy texture and helps it rise properly. Proper kneading creates a smooth, elastic dough that will bake into a crispy crust.
Print
Homemade Pizza Recipe
- Total Time: 1 hour 27 minutes
- Yield: 4 1x
Description
Savor the ultimate homemade pizza delight that brings Italian culinary magic straight to your kitchen. Crispy crust, melted cheese, and fresh toppings combine for a mouthwatering experience you’ll crave again and again.
Ingredients
Main Ingredients:
- 2 1/2 cups (591 ml) all-purpose flour
- 2 cups (473 ml) shredded mozzarella cheese
- 1 cup (237 ml) warm water
Dough Ingredients:
- 2 1/4 teaspoons active dry yeast
- 2 tablespoons (30 ml) olive oil
- 1 teaspoon sugar
- 1 teaspoon salt
Sauce and Toppings:
- 1/2 cup (118 ml) pizza sauce
- Pepperoni (optional)
- Mushrooms (optional)
- Bell peppers (optional)
- Onions (optional)
- Sausage (optional)
Instructions
- Activate the yeast by dissolving it with sugar in warm water, allowing the mixture to become frothy and bubbly for approximately 5 minutes.
- Incorporate flour, salt, and oil into the yeast mixture, blending until a cohesive dough forms.
- Transfer the dough onto a lightly floured surface and methodically knead for 10 minutes, developing a smooth and elastic texture.
- Nestle the dough in a greased bowl, drape with a clean cloth, and position in a draft-free zone to rise until volume doubles, roughly 1 hour.
- Heat the oven to 475F, positioning a pizza stone if available to ensure optimal crispy crust development.
- Deflate the risen dough and roll it out carefully to achieve desired thickness on a generously floured workspace.
- Delicately transfer the stretched dough onto a prepared baking sheet or pizza peel.
- Distribute pizza sauce evenly across the dough’s surface, creating a uniform base layer.
- Generously scatter mozzarella cheese over the sauce, then artfully arrange selected toppings.
- Slide the pizza into the preheated oven and bake for 10-12 minutes until the crust turns golden and cheese becomes melted and slightly caramelized.
- Allow the pizza to rest for a few minutes, then slice and serve while warm for maximum flavor and texture enjoyment.
Notes
- Activate the yeast properly by ensuring water temperature is warm (not hot), which helps it bloom without killing the microorganisms.
- Knead dough thoroughly to develop gluten, creating a stretchy and smooth texture that results in a crispy yet chewy crust.
- Allow sufficient rising time in a draft-free, warm area to help dough double in volume and enhance flavor complexity.
- Experiment with alternative flour types like whole wheat or gluten-free blends for dietary accommodations without compromising pizza quality.
- Prep Time: 1 hour 15 minutes
- Cook Time: 12 minutes
- Category: Lunch, Dinner, Snacks
- Method: Baking
- Cuisine: Italian
Nutrition
- Serving Size: 4
- Calories: 450 kcal
- Sugar: 3 g
- Sodium: 700 mg
- Fat: 18 g
- Saturated Fat: 8 g
- Unsaturated Fat: 9 g
- Trans Fat: 0.2 g
- Carbohydrates: 48 g
- Fiber: 2 g
- Protein: 22 g
- Cholesterol: 40 mg
Nate Harper
Founder & Recipe Curator
Expertise
Single-Recipe Development, Farm-to-Table Cooking, Seasonal Menu Planning, Culinary Storytelling, Home Kitchen Innovation
Education
Cascade Culinary Institute – Central Oregon Community College
Certificate in Culinary Arts
Focus: Farm-to-table cuisine, sustainable cooking practices, and seasonal recipe creation.
Nate studied under experienced chefs who emphasized local sourcing, minimal waste, and building recipes from fresh, simple ingredients.
Nate Harper is the founder and creative force behind Make, Take, Bake. Raised in the wild beauty of Oregon’s high desert, Nate grew up surrounded by family gardens, farmers’ markets, and home kitchens that celebrated the seasons.
His early love for simple, honest food evolved into a professional passion when he attended Cascade Culinary Institute, where he sharpened his skills in creating recipes that are sustainable, satisfying, and made for everyday life.
Nate’s goal is to make cooking feel accessible, free of fuss, and full of flavor. He believes a single, thoughtfully built dish can stand alone, and sometimes even steal the show.