
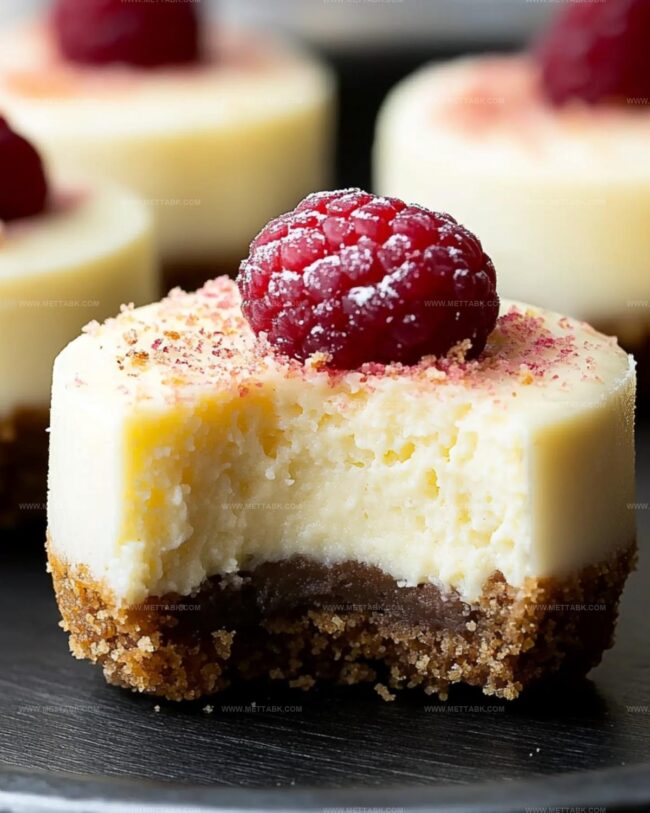
Fluffy Mini Protein Cheesecakes Recipe That Spark Joy
Tucking into a delightful mini protein cheesecakes treat promises pure indulgence without guilt.
Creamy textures meld with rich flavors that dance across your palate.
Dessert enthusiasts will adore these bite-sized delights crafted with smart nutrition in mind.
Protein-packed ingredients elevate this classic sweet into a wellness-friendly snack perfect for health-conscious individuals.
Minimal effort creates maximum satisfaction with these adorable little cheesecakes.
Compact yet powerful, each miniature dessert delivers a punch of deliciousness that keeps you coming back for more.
Mini Protein Cheesecakes Packed With Nutrition

Ingredients Needed for Mini Protein Cheesecakes
For the Base:For the Filling:For the Optional Topping:Step-by-Step Mini Protein Cheesecake Preparation
Step 1: Craft the Crispy Base
Warm up your oven to 350F (180C) and line a muffin tin with 6 paper liners. Grab a mixing bowl and crumble your favorite cookies into fine pieces.
Pour in melted butter and blend thoroughly. Distribute the buttery cookie mixture evenly across the muffin cups, using about 1.5 tablespoons per cup. Press down firmly to create a compact, sturdy foundation.
Step 2: Whip Up the Creamy Filling
Grab a large mixing bowl and combine these delightful ingredients:Grab your hand mixer and beat the mixture until silky smooth, which should take around a minute. Pour the luscious filling into each muffin cup.
If you’re craving extra fruity goodness, gently press 3 raspberries or blueberries into the center of each cheesecake.
Step 3: Bake and Cool
Slide the muffin tin into the preheated oven and bake for 20-22 minutes.
You’ll know they’re ready when the cheesecakes look set – firm but not wobbly. Allow them to cool at room temperature for half an hour.
Then, transfer to the refrigerator and let them chill for at least 3 hours to achieve perfect texture.
Step 4: Garnish and Devour
Top your mini cheesecakes with fresh berries and savor these delectable protein-packed treats straight from the fridge!
Tips That Help Mini Protein Cheesecakes
Flavor Variations for Mini Protein Cheesecakes
Pairing Ideas for Mini Protein Cheesecakes
Proper Storage for Mini Protein Cheesecakes

Seal cheesecakes in an airtight container and keep in the refrigerator for up to 5 days. Cover each cheesecake with plastic wrap to prevent drying out and absorbing other food odors.
Wrap individual cheesecakes tightly in plastic wrap, then place in a freezer-safe container. Freeze for maximum 2 months. Label with date for easy tracking.
Transfer frozen cheesecakes to the refrigerator overnight. Allow them to slowly defrost to maintain texture and prevent moisture condensation.
Gently warm at room temperature for 15-20 minutes before serving. Avoid microwaving, which can make the texture rubbery and compromise the delicate cheesecake structure.
FAQs
Yes, they contain Greek yogurt and cream cheese, which provide a significant protein boost compared to traditional cheesecakes.
Absolutely! Graham crackers, vanilla wafers, or digestive biscuits work great as alternative crust options.
Arrowroot flour helps stabilize the filling and provides a smoother texture, but you can substitute with cornstarch if needed.
They’re done when the edges look set and the center is slightly firm but not liquid – it should not be jiggly when gently shaken.
Print
Mini Protein Cheesecakes Recipe
- Total Time: 42 minutes
- Yield: 6 1x
Description
Silky smooth mini protein cheesecakes offer a guilt-free dessert that satisfies sweet cravings with powerful nutrition. Creamy texture and rich flavor combine perfectly, making you feel indulgent while supporting your fitness goals.
Ingredients
Base:
- 100 grams (3.5 ounces) crushed cookies
- 1 tablespoon softened butter or coconut oil
Filling:
- 2/3 cup (150 grams) non-fat Greek yogurt
- 2/3 cup (150 grams) light cream cheese
- 1 large egg
- 1 tablespoon arrowroot flour
- 1/4 cup granulated sweetener
- 1 tablespoon fresh lemon juice
- 1 teaspoon vanilla extract
- 1 teaspoon lemon zest
Topping:
- 1 cup fresh raspberries or blueberries (optional)
Instructions
- Preheat the oven to 350°F (180°C) and arrange 6 paper liners in a muffin tin, creating a uniform base for the mini cheesecakes.
- Crush the cookies and blend thoroughly with melted butter, creating a cohesive crust mixture that will hold together when pressed.
- Distribute the cookie crumb mixture evenly across the muffin cups, gently compressing the base to form a compact and level foundation.
- In a mixing bowl, combine Greek yogurt, cream cheese, egg, vanilla extract, lemon juice, lemon zest, and arrowroot flour, ensuring all ingredients are well integrated.
- Utilize a hand mixer to whip the filling until achieving a smooth, creamy consistency, approximately 60 seconds of blending.
- Carefully pour the prepared filling into each muffin cup, maintaining an even distribution across all six cups.
- If desired, gently press 3 raspberries or blueberries into the surface of each cheesecake for added flavor and visual appeal.
- Bake in the preheated oven for 20-22 minutes, watching for a set texture that appears firm yet slightly delicate.
- Remove from oven and allow the mini cheesecakes to cool at room temperature for 30 minutes, permitting gradual temperature reduction.
- Transfer the cooled cheesecakes to the refrigerator and chill for a minimum of 3 hours to achieve complete setting and optimal texture.
- Before serving, garnish with additional fresh berries and enjoy the chilled, protein-rich dessert.
Notes
- Swap cookie base with gluten-free alternatives like almond flour or ground nuts for those with wheat sensitivities.
- Use low-fat cream cheese and Greek yogurt to reduce overall calorie content while maintaining protein richness.
- Experiment with different berry combinations or add a drizzle of sugar-free chocolate for varied flavor profiles.
- Ensure ingredients are room temperature to prevent lumpy cheesecake texture and achieve smoother consistency.
- Prep Time: 20 minutes
- Cook Time: 22 minutes
- Category: Desserts, Snacks
- Method: Baking
- Cuisine: American
Nutrition
- Serving Size: 6
- Calories: 144 kcal
- Sugar: 3 g
- Sodium: 95 mg
- Fat: 6 g
- Saturated Fat: 3 g
- Unsaturated Fat: 3 g
- Trans Fat: 0 g
- Carbohydrates: 15 g
- Fiber: 1 g
- Protein: 7 g
- Cholesterol: 45 mg
Clara Bennett
Contributing Recipe Developer & Food Writer
Expertise
Baking and Pastry Development, Gluten-Free and Allergy-Friendly Recipe Creation, Culinary Storytelling and Food Journalism, Recipe Testing and Standardization, Southern Comfort Foods and Modern Twists
Education
Sullivan University – National Center for Hospitality Studies
Associate Degree in Culinary Arts
Focus: Baking and Pastry Arts, Recipe Testing, and Culinary Journalism.
Clara specialized in crafting desserts that blend classic Southern comfort with modern techniques, while developing strong writing skills to tell the story behind every dish.
Lane Community College (Certificate Program)
Certificate in Food Writing and Photography
Focus: Culinary storytelling, recipe formatting, food styling, and visual presentation.
Clara’s love of baking started young, powered by homemade pies, biscuits, and stories passed around the family table.
After earning her degree at Sullivan University and a food writing certificate at Lane Community College, she turned her passion into a craft: sharing recipes that are simple, soulful, and always full of heart.
She’s big on bold flavors, flexible ideas, and creating sweets that fit any table (yes, even if you’re gluten-free). When she’s not baking, you’ll find her wandering farmers’ markets, styling food for the next photo shoot, or working on her ever-growing recipe journal.