
Dreamy No-Bake Banana Pudding Cheesecake Recipe for Dessert Lovers
Creamy no-bake banana pudding cheesecake delivers pure dessert magic right to your plate.
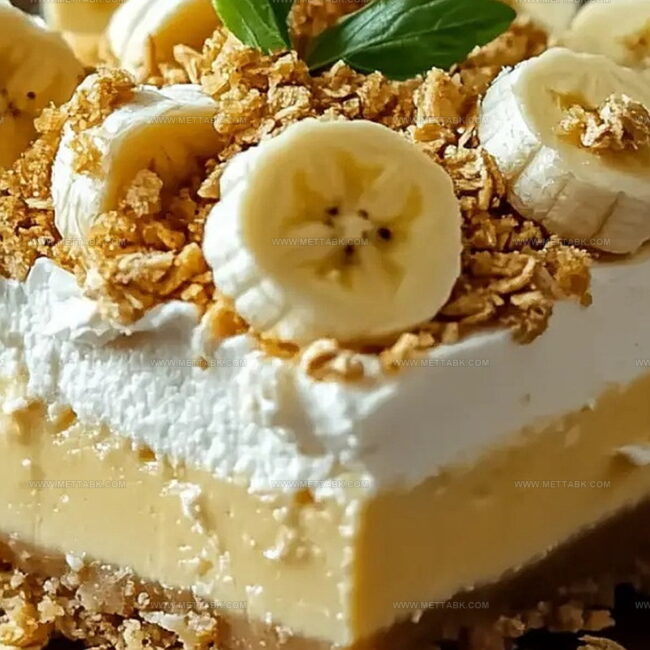
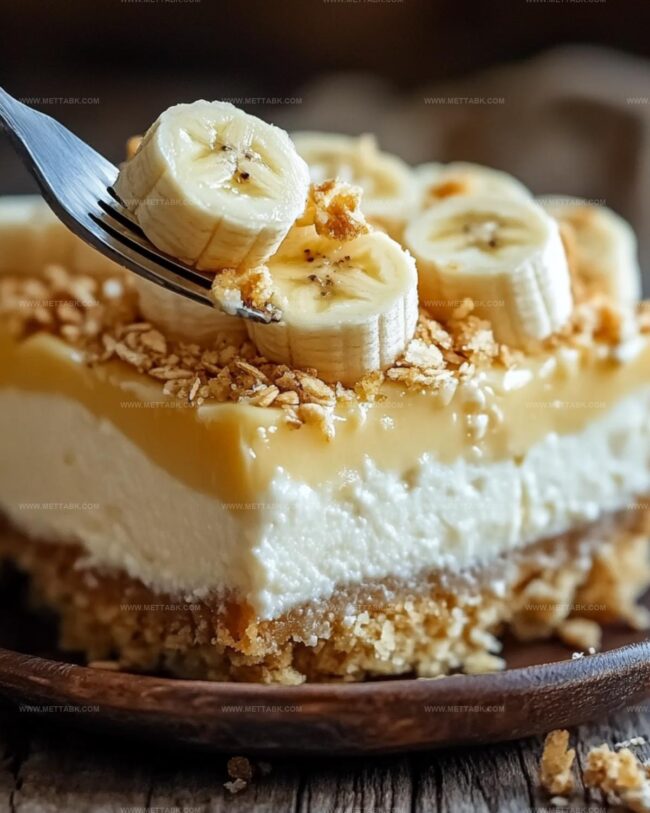
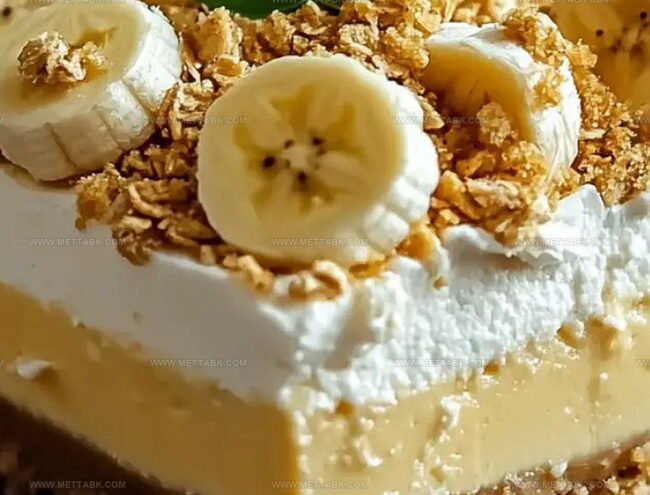
Sweet banana slices nestle between layers of velvety goodness.
Comfort meets indulgence in this simple yet spectacular treat.
Minimal kitchen effort produces maximum deliciousness with each heavenly spoonful.
Cold and smooth textures dance together, creating a memorable experience.
Rich cream cheese blends perfectly with ripe bananas, promising pure satisfaction.
Grab a fork and let’s make something extraordinary that will have everyone asking for seconds.
No-Bake Banana Pudding Cheesecake for Sweet Lovers
Essential Ingredients for Banana Pudding Cheesecake
For the Crust:For the Filling:For the Topping and Garnish:Easy Steps for No-Bake Cheesecake Success
Step 1: Crush Graham Crackers
Grab a pack of graham crackers and crush them into fine crumbs using a food processor or place them in a sealed plastic bag and crush with a rolling pin. The goal is to create a sandy, even texture that will form a delicious base for your cheesecake.
Step 2: Mix Crust Ingredients
Combine the graham cracker crumbs with:Stir these ingredients until they’re well blended and have a consistency that holds together when pressed.
Step 3: Create Cheesecake Base
Take your springform pan and firmly press the graham cracker mixture into the bottom.
Use the back of a spoon or the bottom of a measuring cup to create a smooth, compact layer. Make sure the crust is evenly distributed across the pan.
Step 4: Chill Crust
Pop the pan with the crust into the refrigerator. This helps the butter solidify and creates a sturdy foundation for your no-bake banana pudding cheesecake.
Let it cool while you prepare the next components of the dessert.
Tips to Make Creamy Banana Pudding Cheesecake
Delicious Twists on Banana Pudding Cheesecake
Serving Ideas to Complement Your Cheesecake
How to Store Banana Pudding Cheesecake
Store the cheesecake in an airtight container or cover tightly with plastic wrap. Keep refrigerated for up to 4 days to maintain freshness and prevent bacterial growth.
Wrap the entire cheesecake or individual slices in plastic wrap, then aluminum foil. Freeze for up to 2 months. Thaw overnight in the refrigerator before serving.
Let the refrigerated slice sit at room temperature for 15-20 minutes to soften. For a slightly warm experience, microwave on low power for 10-15 seconds.
Remove from the refrigerator 30 minutes before serving to allow the cheesecake to reach a creamy, smooth consistency and enhance its flavors.
FAQs
The melted butter acts as a binding agent, helping the graham cracker crumbs and sugar adhere and form a solid base when pressed firmly into the pan.
While a springform pan is ideal for easy removal, you can use a regular 9-inch cake pan, but you’ll need to line it with parchment paper for easier serving.
Use the back of a measuring cup or your fingers to press the graham cracker mixture evenly and firmly into the bottom of the pan, creating a solid, even layer.
Yes, chilling helps the crust set and become more stable, preventing it from crumbling when you add the cheesecake filling and making it easier to slice later.
Print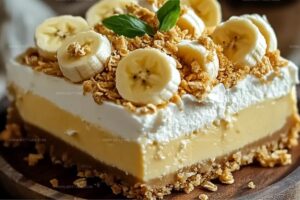
No-Bake Banana Pudding Cheesecake Recipe
- Total Time: 4 hours 20 minutes
- Yield: 8 1x
Description
Creamy no-bake banana pudding cheesecake brings Southern comfort straight to your dessert table. Layers of silky banana pudding and rich cheesecake create a delightful treat you’ll crave again and again.
Ingredients
Main Ingredients:
- 2 cups graham cracker crumbs
- 1/2 cup unsalted butter, melted
- 3 large bananas, ripe
- 16 ounces (454 grams) cream cheese, softened
- 1 cup heavy cream
- 1/2 cup powdered sugar
Binding and Flavoring Ingredients:
- 1 teaspoon vanilla extract
- 1/4 cup sour cream
- 2 tablespoons banana instant pudding mix
Garnish Ingredients:
- 1/2 cup whipped cream
- 2 tablespoons crushed graham crackers
- 1 banana, sliced (for topping)
Instructions
- Crush graham crackers into fine crumbs and blend thoroughly with melted butter and sugar until the mixture resembles wet sand.
- Transfer the cracker mixture into a 9-inch springform pan, using the back of a spoon to compress and create an even, firm base layer.
- Refrigerate the crust for approximately 15 minutes to set while preparing the cheesecake filling.
- Using an electric mixer, whip cream cheese until smooth and completely free of lumps.
- Gradually incorporate sweetened condensed milk, ensuring a silky, uniform consistency without overmixing.
- Mash ripe bananas into a creamy puree, then fold gently into the cream cheese mixture to distribute evenly.
- Add vanilla extract and mix until the banana flavor is well integrated throughout the filling.
- Pour the creamy banana cheesecake mixture over the chilled graham cracker crust, smoothing the top with a spatula.
- Refrigerate the dessert for minimum 4 hours or overnight to allow complete setting and flavor development.
- Before serving, garnish with additional sliced bananas and a light dusting of graham cracker crumbs for texture.
Notes
- Crush graham crackers finely for a smooth, compact crust that holds together perfectly without crumbling.
- Use room temperature cream cheese to ensure a silky, lump-free filling that blends seamlessly with other ingredients.
- Slice bananas just before assembling to prevent browning and maintain their fresh, vibrant flavor in the dessert.
- For a gluten-free version, swap graham crackers with gluten-free alternatives like almond flour or gluten-free cookie crumbs.
- Prep Time: 20 minutes
- Cook Time: 4 hours
- Category: Desserts
- Method: Chilling
- Cuisine: American
Nutrition
- Serving Size: 8
- Calories: 320 kcal
- Sugar: 18 g
- Sodium: 150 mg
- Fat: 20 g
- Saturated Fat: 10 g
- Unsaturated Fat: 8 g
- Trans Fat: 0.5 g
- Carbohydrates: 30 g
- Fiber: 2 g
- Protein: 4 g
- Cholesterol: 40 mg
Nate Harper
Founder & Recipe Curator
Expertise
Single-Recipe Development, Farm-to-Table Cooking, Seasonal Menu Planning, Culinary Storytelling, Home Kitchen Innovation
Education
Cascade Culinary Institute – Central Oregon Community College
Certificate in Culinary Arts
Focus: Farm-to-table cuisine, sustainable cooking practices, and seasonal recipe creation.
Nate studied under experienced chefs who emphasized local sourcing, minimal waste, and building recipes from fresh, simple ingredients.
Nate Harper is the founder and creative force behind Make, Take, Bake. Raised in the wild beauty of Oregon’s high desert, Nate grew up surrounded by family gardens, farmers’ markets, and home kitchens that celebrated the seasons.
His early love for simple, honest food evolved into a professional passion when he attended Cascade Culinary Institute, where he sharpened his skills in creating recipes that are sustainable, satisfying, and made for everyday life.
Nate’s goal is to make cooking feel accessible, free of fuss, and full of flavor. He believes a single, thoughtfully built dish can stand alone, and sometimes even steal the show.