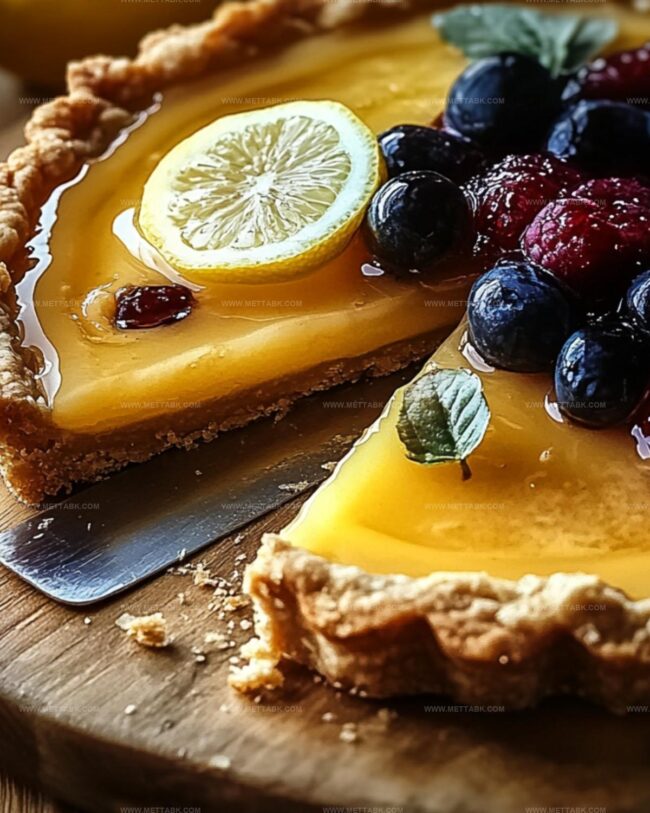
Sweet & Tangy No-Bake Lemon Tart Recipe: A Refreshing Treat
Crafting a delightful no-bake lemon tart brings pure sunshine to your dessert table.
Zesty citrus notes dance across a creamy landscape of pure indulgence.
Smooth textures merge with bright, tangy flavors that promise instant delight.
Minimal kitchen effort creates maximum taste satisfaction in this simple yet elegant treat.
Chilled ingredients combine effortlessly without requiring an oven’s heat.
Cool and refreshing, each slice delivers a burst of lemony happiness.
Prepare to experience a dessert that will become your new favorite summer sensation.
Variations to Add Flavor Twists
Pairing Suggestions to Complement Tart
How to Store No-Bake Lemon Tart Properly
Store the tart in an airtight container or cover with plastic wrap. Keep in the refrigerator for up to 3-4 days to maintain its creamy texture and fresh flavor.
Wrap the entire tart or individual slices tightly in plastic wrap, then aluminum foil. Freeze for up to 2 months. Thaw overnight in the refrigerator before serving.
Cut the tart into slices and store in separate sealed containers. This method helps preserve freshness and makes quick grab-and-go dessert options.
Since this is a no-bake dessert, simply remove from the refrigerator 10-15 minutes before serving to soften slightly and enhance the creamy texture.
FAQs
Fresh lemon juice provides the best flavor and brightness. Bottled juice works in a pinch but might taste slightly less vibrant and can have preservatives that alter the filling’s texture.
Make sure to press the crust firmly and evenly into the pan. Let the tart chill completely for at least 4 hours so the crust sets properly. Use a sharp knife and clean it between slices for neat cuts.
A standard 9-inch pie dish works perfectly fine. You can also use a springform pan or even individual small ramekins for personal-sized desserts.
No-Bake Lemon Tart to Cool and Refresh
Ingredients to Make No-Bake Lemon Tart
For the Crust:For the Lemon Filling:For the Garnish:Easy Instructions for No-Bake Lemon Tart
Step 1: Create Crumbly Crust Base
Grab a mixing bowl and toss in graham cracker crumbs, melted butter, and granulated sugar. Stir everything together until the mixture looks like wet sand.
Press the crumbly goodness firmly into a 9-inch tart pan, making sure to cover the bottom and sides evenly. Pop the crust into the refrigerator for 15 minutes to let it firm up and get super solid.
Step 2: Whip Up Zesty Lemon Filling
In a separate bowl, whisk together these sunny ingredients:Fold in whipped heavy cream gently until the mixture becomes silky smooth and looks like a dreamy, creamy cloud.
Step 3: Assemble Tangy Tart Masterpiece
Pour the luscious lemon filling into the chilled crust.
Use a spatula to spread the filling evenly, creating a perfectly smooth surface. Slide the tart into the refrigerator and let it chill for at least 4 hours.
This gives the filling time to set and develop its magical texture.
Step 4: Dress Up and Serve
Before serving, add some gorgeous finishing touches.
Top the tart with a dollop of whipped cream, arrange delicate lemon slices, or sprinkle fresh mint leaves for an extra pop of color and flavor. Slice into this refreshing treat and watch everyone’s eyes light up with pure dessert joy.
Tips to Perfect Your Tart Every Time
Print
No-Bake Lemon Tart Recipe
- Total Time: 20 minutes
- Yield: 8 1x
Description
Creamy lemon tart promises zesty sunshine on a plate, delivering tangy elegance without baking. Cool graham cracker crust cradles silky lemon filling, inviting you to savor each refreshing, luxurious bite.
Ingredients
Main Ingredients:
- 1 1/2 cups graham cracker crumbs
- 1/2 cup fresh lemon juice
- 1 cup sweetened condensed milk
- 1/2 cup heavy cream
Crust Ingredients:
- 1/3 cup unsalted butter, melted
- 2 tablespoons granulated sugar
Finishing Ingredients:
- 1 tablespoon lemon zest
- 1 teaspoon vanilla extract
Optional Garnish:
- Whipped cream
- Lemon slices
- Fresh mint leaves
Instructions
- Crush graham crackers into fine crumbs and blend thoroughly with melted butter and sugar until mixture resembles wet sand-like consistency.
- Press the crumb mixture firmly and evenly into a 9-inch tart pan, ensuring compact and uniform base. Chill in refrigerator for 15 minutes to solidify.
- Whisk sweetened condensed milk with freshly squeezed lemon juice, incorporating zesty lemon zest and aromatic vanilla extract until smooth and fully integrated.
- Gently fold whipped heavy cream into the lemon mixture, creating a light and creamy texture without deflating the volume.
- Transfer the silky lemon filling into the chilled crust, using a spatula to spread evenly and eliminate any air pockets.
- Refrigerate the tart for 4-5 hours, allowing the filling to set completely and develop a firm, slice-able consistency.
- Before serving, optionally decorate with delicate dollops of whipped cream, thin lemon slice garnishes, or sprinkled fresh mint leaves to enhance visual appeal and provide complementary flavors.
- Slice chilled tart with a sharp knife and serve immediately for maximum freshness and creamy texture.
Notes
- Swap graham crackers with gluten-free alternatives like almond flour or crushed gluten-free cookies for a celiac-friendly version.
- Reduce sugar content by using monk fruit sweetener or stevia in the crust and filling for a low-carb option.
- Enhance zesty flavor by adding an extra tablespoon of lemon zest or using Meyer lemons for a more complex citrus profile.
- Stabilize whipped cream by chilling the mixing bowl and beaters beforehand, ensuring a firmer and more voluminous texture.
- Prep Time: 20 minutes
- Cook Time: 0 minutes
- Category: Desserts
- Method: Chilling
- Cuisine: French
Nutrition
- Serving Size: 8
- Calories: 246 kcal
- Sugar: 21 g
- Sodium: 60 mg
- Fat: 13 g
- Saturated Fat: 8 g
- Unsaturated Fat: 4 g
- Trans Fat: 0.2 g
- Carbohydrates: 28 g
- Fiber: 0.5 g
- Protein: 3 g
- Cholesterol: 40 mg


Nate Harper
Founder & Recipe Curator
Expertise
Single-Recipe Development, Farm-to-Table Cooking, Seasonal Menu Planning, Culinary Storytelling, Home Kitchen Innovation
Education
Cascade Culinary Institute – Central Oregon Community College
Certificate in Culinary Arts
Focus: Farm-to-table cuisine, sustainable cooking practices, and seasonal recipe creation.
Nate studied under experienced chefs who emphasized local sourcing, minimal waste, and building recipes from fresh, simple ingredients.
Nate Harper is the founder and creative force behind Make, Take, Bake. Raised in the wild beauty of Oregon’s high desert, Nate grew up surrounded by family gardens, farmers’ markets, and home kitchens that celebrated the seasons.
His early love for simple, honest food evolved into a professional passion when he attended Cascade Culinary Institute, where he sharpened his skills in creating recipes that are sustainable, satisfying, and made for everyday life.
Nate’s goal is to make cooking feel accessible, free of fuss, and full of flavor. He believes a single, thoughtfully built dish can stand alone, and sometimes even steal the show.