The Dreamiest Oreo Dessert Cups Recipe for Sweet Tooth Moments
Sweet dreams come true with these delectable oreo dessert cups that promise pure indulgence.
Creamy layers of chocolatey goodness await you in every delightful bite.
Crushing cookies becomes an art form when crafting these irresistible treats.
Decadent textures blend seamlessly, creating a dessert that speaks directly to your inner child.
Minimal ingredients and simple steps make this recipe accessible for anyone with a passion for sweets.
Simple yet sophisticated, these cups deliver a knockout punch of flavor that will leave everyone asking for seconds.
Each spoonful brings a smile, transforming an ordinary moment into something extraordinary.
Why Oreo Dessert Cups Are So Creamy and Fun
What You’ll Need for Oreo Dessert Cups
For the Crust:For the Filling:For the Topping:How to Make No-Bake Oreo Dessert Cups
Step 1: Crush Oreo Cookies
Pulverize Oreo cookies into fine crumbs using a food processor or rolling pin. Break them down completely until you achieve a sandy texture that will create a delicious base for your dessert cups.
Step 2: Create Cookie Crust
Mix crushed Oreo crumbs with melted butter, stirring until the mixture feels like wet sand. Distribute the mixture evenly into serving cups, pressing firmly to form a solid, compact crust that will hold together beautifully.
Step 3: Whip Cream Cheese Mixture
In a mixing bowl, blend cream cheese with powdered sugar until the mixture becomes silky smooth and free of lumps. Use an electric mixer to ensure a perfectly creamy consistency that will melt in your mouth.
Step 4: Prepare Whipped Cream
Whip heavy cream with vanilla extract, beating until the mixture forms stiff, glossy peaks. The cream should stand up straight and hold its shape when the whisk is lifted, creating a light and airy texture.
Step 5: Combine Cream Mixtures
Gently fold the whipped cream into the cream cheese mixture, using a spatula to blend carefully. Incorporate the two mixtures until they create a harmonious, fluffy filling with no streaks.
Step 6: Fill Dessert Cups
Spoon or pipe the creamy filling over the Oreo cookie crust in each serving cup. Spread the mixture evenly, ensuring a smooth and elegant top layer that looks as delicious as it tastes.
Step 7: Add Final Touches
Garnish the dessert cups with mini Oreo cookies, strategically placing them on top for a delightful crunch and visual appeal. These little cookies will add an extra burst of chocolate flavor.
Step 8: Chill and Serve
Refrigerate the dessert cups for at least one hour to allow the flavors to meld and the filling to set. When ready to serve, the cups will be perfectly chilled and ready to delight your taste buds.
Tips to Get Perfect Layers in Oreo Cups
Flavor Variations for Oreo Dessert Cup Layers
What to Serve Alongside Oreo Dessert Cups
Storage Advice for Oreo Dessert Cup Desserts
Store leftover Oreo dessert cups in an airtight container in the refrigerator for up to 3-4 days. Cover each cup with plastic wrap to prevent them from absorbing other food odors.
Wrap individual dessert cups tightly in plastic wrap, then place in a freezer-safe container. Freeze for up to 2 months. Thaw overnight in the refrigerator before serving.
Keep the Oreo crust crisp by storing the cups with a small piece of paper towel in the container to absorb excess moisture.
Always serve these dessert cups cold directly from the refrigerator to maintain their creamy texture and prevent melting.
FAQs
Press the Oreo crumb mixture firmly and evenly into the cup’s bottom using the back of a spoon or your fingers to create a compact base that holds together well.
Yes, reduced-fat cream cheese works perfectly and won’t significantly change the texture or taste of the dessert cups.
No problem! Simply use a spoon to carefully transfer the cream mixture into the cups, ensuring an even distribution and smooth surface.
Absolutely! You can prepare these Oreo cups up to 2 days ahead and store them covered in the refrigerator, which actually allows the flavors to meld together nicely.
Print
Oreo Dessert Cups Recipe
- Total Time: 1 hour 20 minutes
- Yield: 12 1x
Description
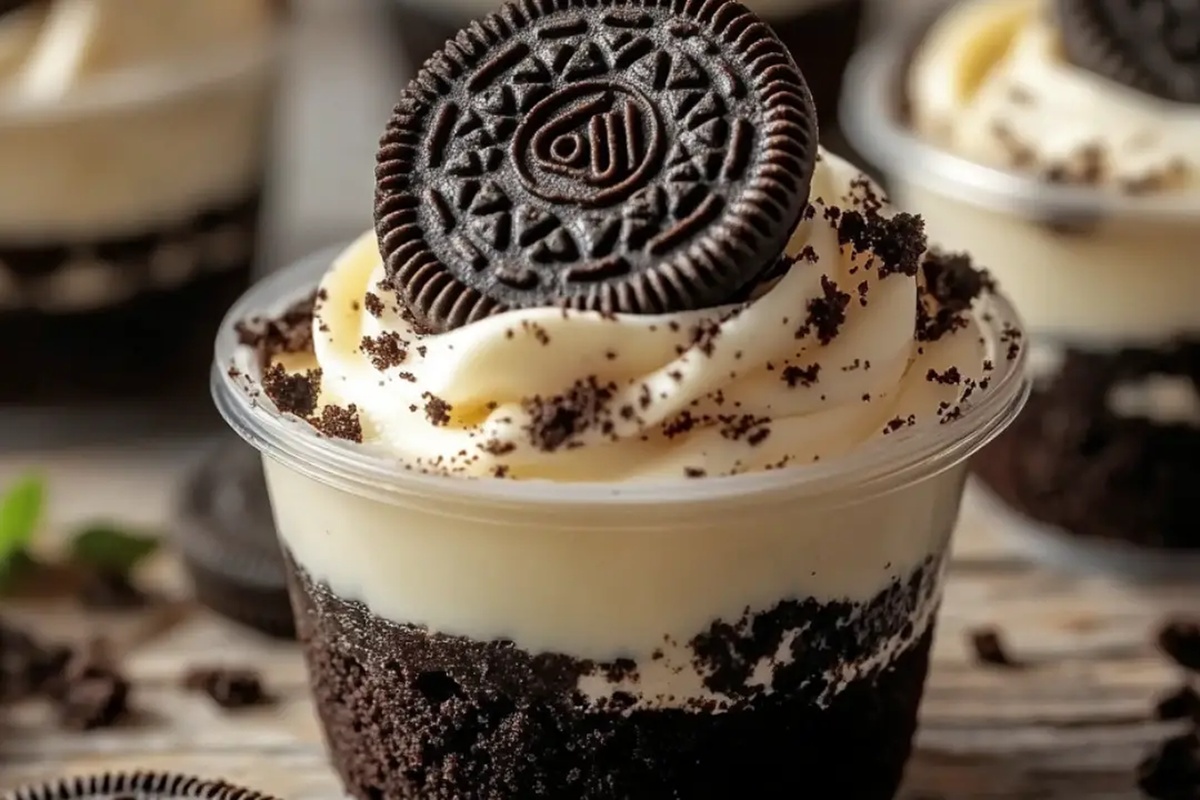
Creamy Oreo Dessert Cups blend chocolate cookie crumbs with rich, silky pudding layers that promise pure indulgence. Chilled and delightful, these elegant treats bring smooth textures and irresistible sweetness you’ll crave after every meal.
Ingredients
Main Ingredients:
- 2 1/2 cups Oreo cookie crumbs
- 8 ounces (226 grams) cream cheese, softened
- 1 1/2 cups heavy whipping cream
Dairy and Sweet Components:
- 1/4 cup melted salted butter
- 1 cup powdered sugar
- 1 teaspoon pure vanilla extract
Garnish:
- 28 mini Oreos
Instructions
- Crush Oreo cookies into fine crumbs, then blend thoroughly with melted butter to create a cohesive base mixture.
- Distribute the buttery Oreo crumb mixture evenly across individual serving cups, firmly pressing down to establish a compact foundation.
- Using an electric mixer, whip cream cheese with powdered sugar until achieving a silky, aerated consistency without lumps.
- Separately whip heavy cream and vanilla extract, beating until forming distinct, sturdy peaks that hold their shape.
- Delicately incorporate the whipped cream into the cream cheese mixture, using gentle folding techniques to maintain volume and prevent deflation.
- Carefully transfer the luxurious cream filling into each prepared cup, either spooning or piping the mixture to create an elegant presentation.
- Garnish each dessert cup with miniature Oreo cookies, strategically placed for visual appeal and extra crunch.
- Refrigerate the assembled dessert cups for minimum 60 minutes, allowing flavors to meld and texture to set perfectly before serving.
Notes
- Crush Oreos finely for a smoother, more consistent crust that holds together perfectly.
- Use room temperature cream cheese to ensure a silky, lump-free mixture without overmixing.
- Whip heavy cream just until stiff peaks form to maintain its light, airy texture and prevent butter-like consistency.
- For a gluten-free version, swap regular Oreos with gluten-free chocolate sandwich cookies and ensure all ingredients are certified gluten-free.
- Prep Time: 20 minutes
- Cook Time: 1 hour
- Category: Desserts
- Method: Chilling
- Cuisine: American
Nutrition
- Serving Size: 12
- Calories: 270
- Sugar: 18 g
- Sodium: 110 mg
- Fat: 20 g
- Saturated Fat: 12 g
- Unsaturated Fat: 7 g
- Trans Fat: 0.5 g
- Carbohydrates: 23 g
- Fiber: 1 g
- Protein: 3 g
- Cholesterol: 55 mg
Nate Harper
Founder & Recipe Curator
Expertise
Single-Recipe Development, Farm-to-Table Cooking, Seasonal Menu Planning, Culinary Storytelling, Home Kitchen Innovation
Education
Cascade Culinary Institute – Central Oregon Community College
Certificate in Culinary Arts
Focus: Farm-to-table cuisine, sustainable cooking practices, and seasonal recipe creation.
Nate studied under experienced chefs who emphasized local sourcing, minimal waste, and building recipes from fresh, simple ingredients.
Nate Harper is the founder and creative force behind Make, Take, Bake. Raised in the wild beauty of Oregon’s high desert, Nate grew up surrounded by family gardens, farmers’ markets, and home kitchens that celebrated the seasons.
His early love for simple, honest food evolved into a professional passion when he attended Cascade Culinary Institute, where he sharpened his skills in creating recipes that are sustainable, satisfying, and made for everyday life.
Nate’s goal is to make cooking feel accessible, free of fuss, and full of flavor. He believes a single, thoughtfully built dish can stand alone, and sometimes even steal the show.