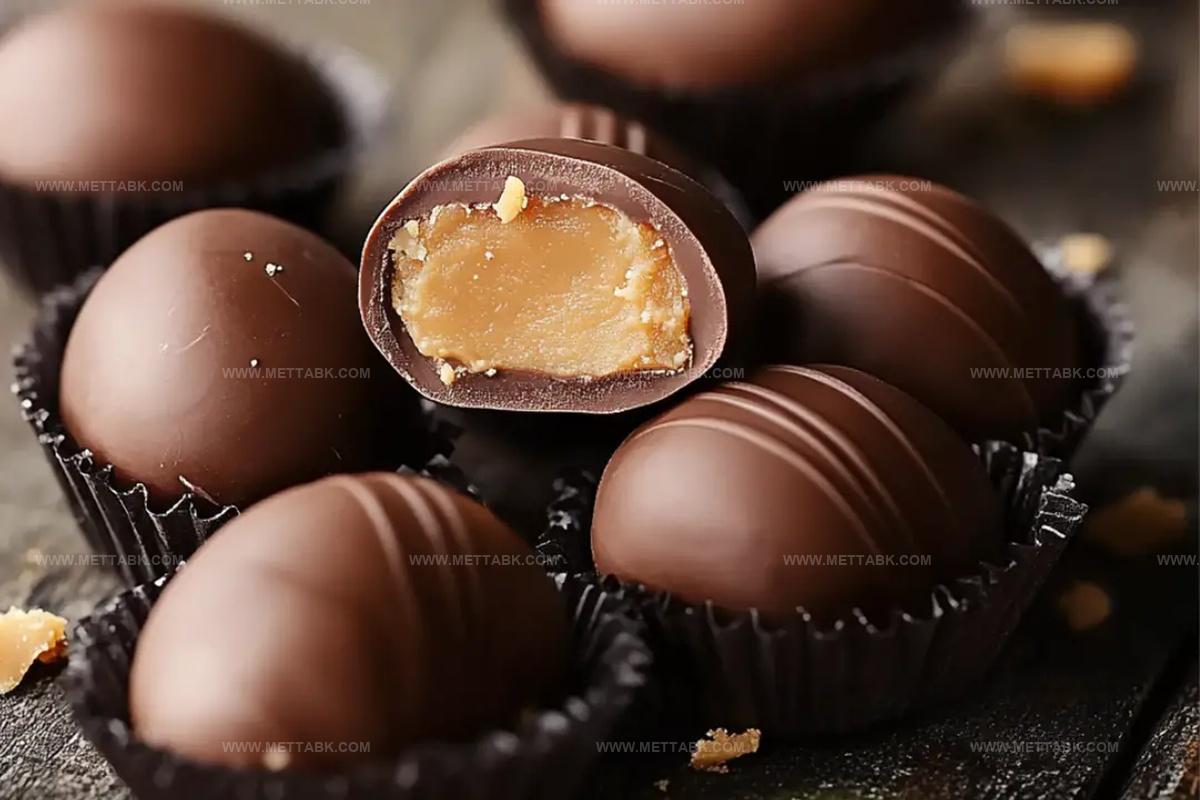
The Most Scrumptious Peanut Butter Eggs (Like Reeses) Recipe Ever
Sweet memories of childhood treats come flooding back with these homemade peanut butter eggs that rival the classic reese’s version.
Chocolate and creamy filling dance together in a nostalgic symphony of flavor.
Crafting these delectable morsels requires minimal ingredients and simple techniques anyone can master.
No special baking skills needed for this crowd-pleasing dessert.
Smooth peanut butter mixed with powdered sugar creates the signature rich center that melts in your mouth.
Dipping each egg in melted chocolate transforms them into irresistible bite-sized delights.
Whip up a batch and watch everyone’s eyes light up with pure dessert joy.
Peanut Butter Eggs (Like Reeses) Everyone Loves
Ingredients to Make Peanut Butter Eggs
For the Peanut Butter Base:For the Coating:For the Optional Decorations:How to Create Peanut Butter Eggs
Step 1: Create Creamy Peanut Butter Base
In a spacious mixing bowl, combine the following ingredients:Blend everything together using a hand mixer or wooden spoon until the mixture becomes silky and uniform. Gradually fold in powdered sugar, stirring consistently until the mixture transforms into a thick, moldable dough.
Step 2: Craft Egg-Shaped Treats
Grab a baking sheet and line it with parchment paper. Using your hands, scoop small portions of the peanut butter mixture and shape them into elegant egg-like ovals.
Place these delicate treats on the prepared sheet. Transfer the baking sheet to the freezer and let the eggs chill for 30 minutes, allowing them to firm up beautifully.
Step 3: Melt Chocolate Coating
Select a microwave-safe bowl and break chocolate into small pieces. Microwave in short 30-second bursts, stirring between each interval to ensure smooth melting.
If desired, add a touch of coconut oil to create an extra glossy finish.
Step 4: Dunk and Decorate
Take a fork and carefully dip each frozen peanut butter egg into the warm chocolate.
Ensure complete coverage, allowing excess chocolate to drip back into the bowl. Gently place the coated eggs back onto the parchment-lined sheet.
For an extra fancy touch, drizzle additional melted chocolate or sprinkle decorative toppings.
Step 5: Chill and Savor
Slide the chocolate-covered eggs into the refrigerator and let them set for at least 15 minutes.
Once the chocolate has hardened, your homemade peanut butter treats are ready to devour and share with lucky friends and family!
Pro Tips for Peanut Butter Eggs Success
Variations to Customize Peanut Butter Eggs
Pairings That Complement Peanut Butter Eggs
Storage Tips for Peanut Butter Eggs
Store peanut butter eggs in an airtight container between layers of parchment paper. Keep them chilled for up to 2 weeks to maintain freshness and texture.
Wrap individual eggs tightly in plastic wrap, then place in a freezer-safe container. Freeze for 3 months without losing quality or flavor.
Remove eggs from freezer and let sit at room temperature for 10-15 minutes before enjoying. Avoid microwaving to prevent chocolate from melting.
Gently warm eggs in the refrigerator before serving to restore their perfect chocolate coating and creamy peanut butter texture.
FAQs
Yes, but you might need to add more powdered sugar to help the dough hold its shape since natural peanut butter is usually runnier.
Always freeze the peanut butter eggs for 30 minutes before dipping in chocolate, and work quickly when coating to keep them firm.
Milk chocolate, dark chocolate, or semi-sweet chocolate chips all work great. Choose your favorite or what you have on hand.
Absolutely! These peanut butter eggs can be prepared and stored in the refrigerator for up to 2 weeks in an airtight container.
Print
Peanut Butter Eggs (Like Reeses) Recipe
- Total Time: 1 hour 10 minutes
- Yield: 24 1x
Description
Homemade peanut butter eggs dance with rich chocolate coating, creating a nostalgic treat that rivals classic Reese’s. Sweet memories and creamy indulgence blend perfectly for chocolate lovers craving a delightful Easter or anytime snack you’ll absolutely adore.
Ingredients
Filling Ingredients:
- 1 cup creamy peanut butter
- 4 tablespoons unsalted butter, softened
- 1 cup powdered sugar
- 1/2 teaspoon vanilla extract
- 1/4 teaspoon salt
Chocolate Coating Ingredients:
- 12 ounces milk chocolate or semi-sweet chocolate, melted
- 1 tablespoon coconut oil or vegetable shortening (optional)
Instructions
- Prepare a smooth, creamy base by blending peanut butter with softened butter, vanilla extract, and a pinch of salt in a mixing bowl until fully incorporated.
- Gradually fold powdered sugar into the mixture, working it until a dense, moldable dough forms that holds its shape without crumbling.
- Spread parchment paper on a baking sheet and carefully sculpt the dough into egg-shaped portions, approximately the size of a small palm.
- Transfer the raw egg shapes to the freezer for 30 minutes, allowing them to solidify and maintain their delicate structure.
- Melt chocolate using microwave technique, heating in brief 30-second bursts and stirring between intervals until achieving a glossy, smooth consistency.
- Gently submerge each frozen peanut butter egg into the melted chocolate, using a fork to ensure complete coverage and allow excess chocolate to drip off.
- Carefully place chocolate-coated eggs back onto the parchment-lined tray, creating a uniform arrangement for even cooling.
- Refrigerate the confections for 15-20 minutes until chocolate sets completely, creating a crisp, glossy exterior.
- Optional: Drizzle additional melted chocolate or sprinkle decorative elements for enhanced visual appeal before final chilling.
Notes
- Soften butter and peanut butter at room temperature for easier mixing and smoother texture.
- Adjust powdered sugar gradually to control dough consistency and prevent crumbling.
- Use a cookie scoop or spoon for uniform egg shapes and consistent sizing.
- Chill peanut butter mixture before shaping to make handling easier and maintain definition.
- Melt chocolate slowly and carefully to prevent seizing or burning.
- Add coconut oil to chocolate for smoother coating and glossy finish.
- Use high-quality dark, milk, or white chocolate for different flavor variations.
- For gluten-free version, ensure powdered sugar is certified gluten-free.
- Substitute peanut butter with almond or sunflower seed butter for nut-free alternative.
- Store in airtight container in refrigerator for up to one week.
- Prep Time: 20 minutes
- Cook Time: 50 minutes
- Category: Desserts, Snacks
- Method: Freezing
- Cuisine: American
Nutrition
- Serving Size: 24
- Calories: 190 kcal
- Sugar: 14 g
- Sodium: 90 mg
- Fat: 13 g
- Saturated Fat: 4.5 g
- Unsaturated Fat: 7.5 g
- Trans Fat: 0 g
- Carbohydrates: 16 g
- Fiber: 1.5 g
- Protein: 4.5 g
- Cholesterol: 10 mg


Nate Harper
Founder & Recipe Curator
Expertise
Single-Recipe Development, Farm-to-Table Cooking, Seasonal Menu Planning, Culinary Storytelling, Home Kitchen Innovation
Education
Cascade Culinary Institute – Central Oregon Community College
Certificate in Culinary Arts
Focus: Farm-to-table cuisine, sustainable cooking practices, and seasonal recipe creation.
Nate studied under experienced chefs who emphasized local sourcing, minimal waste, and building recipes from fresh, simple ingredients.
Nate Harper is the founder and creative force behind Make, Take, Bake. Raised in the wild beauty of Oregon’s high desert, Nate grew up surrounded by family gardens, farmers’ markets, and home kitchens that celebrated the seasons.
His early love for simple, honest food evolved into a professional passion when he attended Cascade Culinary Institute, where he sharpened his skills in creating recipes that are sustainable, satisfying, and made for everyday life.
Nate’s goal is to make cooking feel accessible, free of fuss, and full of flavor. He believes a single, thoughtfully built dish can stand alone, and sometimes even steal the show.