Zesty Pepperoni Chicken Legs Recipe: A Family Favorite
Juicy pepperoni chicken legs have a magical way of turning an ordinary dinner into a flavor explosion!
Crispy skin and bold spices create an irresistible combination that makes everyone lean in closer.
Every bite promises a delightful crunch with intense seasoning that dances across your taste buds.
Marinades work their magic, infusing each tender piece of meat with zesty goodness.
Simple ingredients come together effortlessly to craft a meal that feels both comforting and exciting.
Quick preparation means you can have this mouthwatering dish on the table faster than ordering takeout.
Dive into this recipe and watch your dinner table transform with one seriously delicious plate of chicken legs.
Winning Pepperoni Chicken Legs Recipe
Ingredients for Flavorful Pepperoni Chicken Legs
For the Protein:For the Coating:For the Topping and Seasoning:How to Cook Pepperoni Chicken Legs to Perfection
Step 1: Prepare Oven and Baking Sheet
Crank up your oven to 375°F (190°C). Line a baking sheet with parchment paper or lightly grease it to prevent sticking.
Step 2: Set Up Coating Station
Grab three separate shallow dishes. In the first dish, crack and whisk eggs.
In the second dish, pour flour. In the third dish, crush crackers into fine crumbs.
Step 3: Coat Chicken Drumsticks
Dunk each chicken drumstick into the whisked eggs, ensuring complete coverage. Next, roll the egg-coated drumstick in flour, then generously coat with cracker crumbs, pressing gently to help crumbs adhere.
Step 4: Initial Baking
Place coated drumsticks on the prepared baking sheet. Slide into the preheated oven and bake for 25 minutes.
Flip the drumsticks halfway through cooking to ensure even browning.
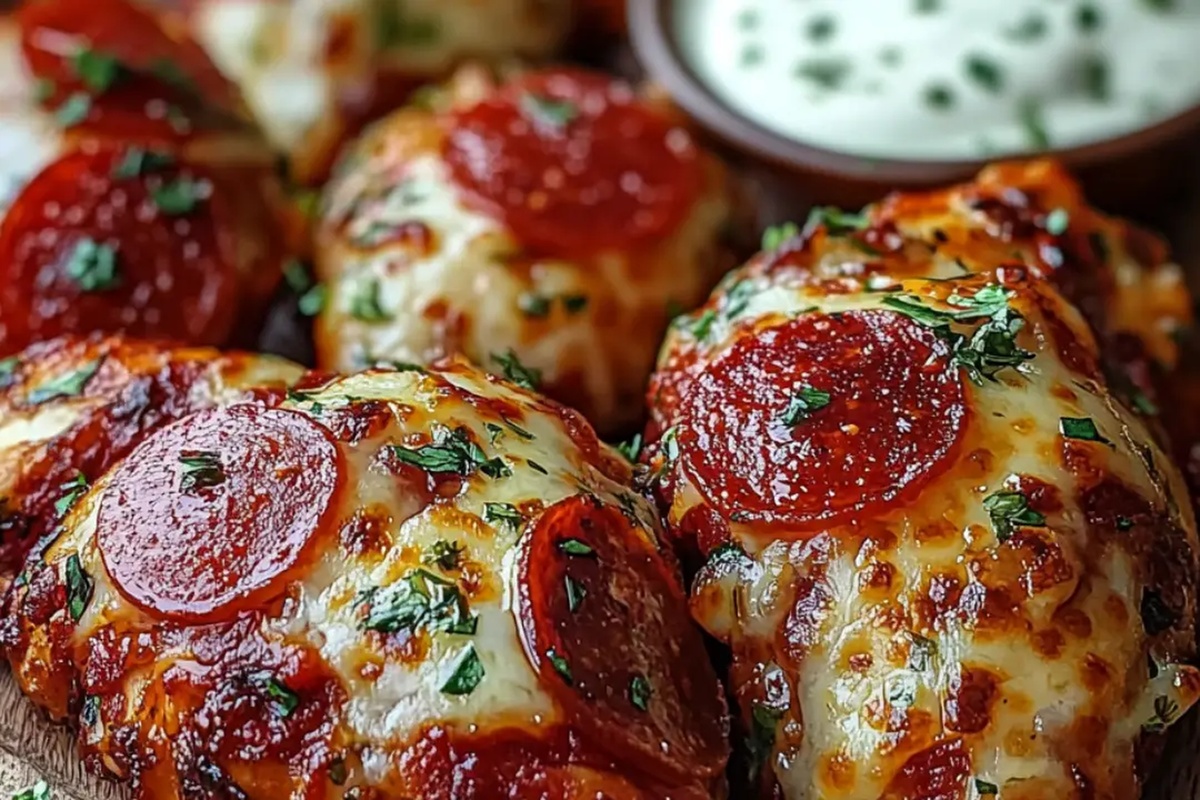
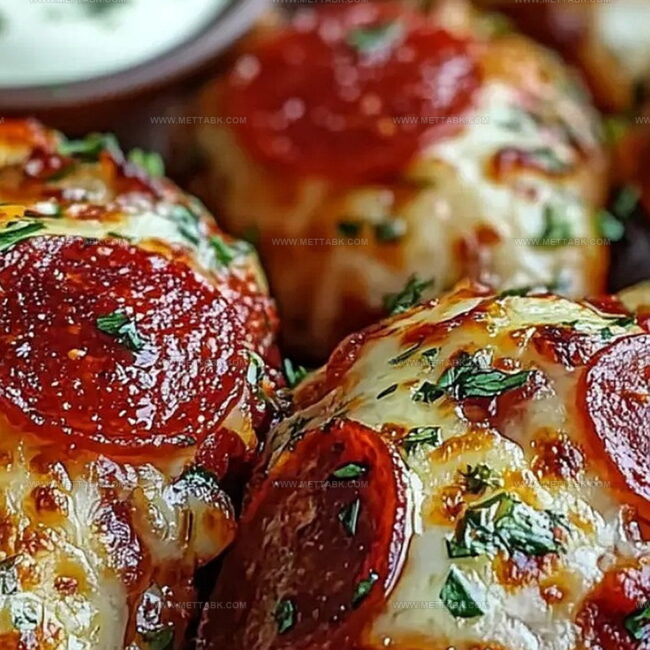
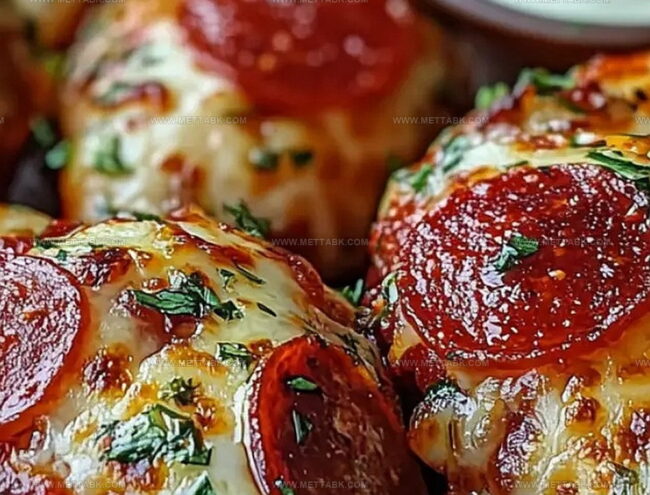
Step 5: Add Cheesy Pepperoni Topping
Remove drumsticks from oven and top each with:Step 6: Final Bake
Return the drumsticks to the oven and bake for an additional 10 minutes, or until:Step 7: Garnish and Serve
Sprinkle the drumsticks with:Serve hot and enjoy your crispy, cheesy pepperoni chicken drumsticks!
Tips for Crispy and Juicy Chicken Legs
Variations on Pepperoni Chicken Legs
Pairings to Enjoy with Chicken Legs
Savor Zesty Sidekicks for Pepperoni Chicken Legs:Proper Storage for Pepperoni Chicken Legs
Store leftover chicken legs in an airtight container for up to 3-4 days. Keep them in the coldest part of the refrigerator to maintain freshness and prevent bacterial growth.
Wrap individual chicken legs tightly in plastic wrap, then place in a freezer-safe bag. Freeze for up to 2 months. Label the bag with the date to track storage time.
Preheat oven to 350F. Place chicken legs on a baking sheet, cover with foil to prevent drying. Warm for 15-20 minutes until internal temperature reaches 165F.
Reheat in 30-second intervals, checking temperature between each interval. Add a splash of marinara sauce to keep meat moist and prevent rubbery texture.
FAQs
Ritz or buttery crackers are ideal because they provide a rich, crispy texture that adheres perfectly to the chicken legs and creates a delicious golden-brown crust.
Absolutely! Salami or sliced ham can be great alternatives that still provide a savory flavor profile and complement the cheesy chicken legs.
No preparation needed. Just pat the chicken legs dry with paper towels to ensure the egg and cracker coating sticks well, then proceed with the recipe steps.
Yes, most kids love this dish because it combines crispy chicken, melted cheese, and pepperoni – making it a fun and tasty meal that’s easy to eat.
Print
Pepperoni Chicken Legs For The Win! Recipe
- Total Time: 50 minutes
- Yield: 6 1x
Description
Sizzling pepperoni chicken legs deliver a mouthwatering fusion of Italian and American flavors that dance across taste buds. Crispy, spicy, and irresistibly juicy, you’ll find this dish impossible to resist.
Ingredients
Main Ingredients:
- 6 chicken drumsticks
- 8 slices of pepperoni
- 1 1/2 cups shredded mozzarella
- 1 cup marinara sauce
Coating Ingredients:
- 1 cup flour
- 2 eggs, beaten
- 1 1/2 cups crushed crackers
- 1 teaspoon garlic powder
- 1/2 teaspoon salt
Seasoning and Garnish:
- 2 tablespoons grated parmesan
- 1 tablespoon chopped oregano
Instructions
- Prepare the oven by heating to 375°F (190°C) for optimal cooking temperature.
- Create a coating station with beaten eggs, preparing to transform the chicken drumsticks into a crispy delight.
- Dredge each drumstick thoroughly in flour, ensuring complete coverage for maximum crunch.
- Roll the flour-coated drumsticks in crushed crackers, pressing gently to help the coating adhere completely.
- Arrange the prepared drumsticks on a baking sheet, allowing space between each piece for even heat circulation.
- Roast in the preheated oven for 25 minutes, turning the drumsticks midway to ensure uniform golden browning.
- Carefully remove the partially cooked drumsticks and generously spread marinara sauce over each piece.
- Sprinkle shredded mozzarella cheese across the sauced drumsticks, creating a melty base.
- Strategically place pepperoni slices on top of the cheese for additional flavor and visual appeal.
- Return to the oven and bake for an additional 10 minutes until the cheese is fully melted and slightly bubbling.
- Garnish with freshly grated parmesan and finely chopped oregano just before serving to enhance the final presentation.
Notes
- Crisp coating works best with finely crushed crackers, ensuring an even, golden-brown crunch that adheres perfectly to chicken.
- Prevent soggy bottoms by using a wire rack on the baking sheet, allowing hot air to circulate and maintain the drumsticks’ crispy exterior.
- For a gluten-free version, swap wheat flour with almond or coconut flour and use gluten-free crackers or breadcrumbs as the coating.
- Swap pepperoni with turkey pepperoni or thin salami slices to reduce fat content while maintaining the delicious savory flavor profile.
- Prep Time: 15 minutes
- Cook Time: 35 minutes
- Category: Lunch, Dinner, Snacks
- Method: Baking
- Cuisine: American
Nutrition
- Serving Size: 6
- Calories: 338 kcal
- Sugar: 2 g
- Sodium: 850 mg
- Fat: 18 g
- Saturated Fat: 7 g
- Unsaturated Fat: 9 g
- Trans Fat: 0.1 g
- Carbohydrates: 18 g
- Fiber: 1.5 g
- Protein: 28 g
- Cholesterol: 110 mg
Nate Harper
Founder & Recipe Curator
Expertise
Single-Recipe Development, Farm-to-Table Cooking, Seasonal Menu Planning, Culinary Storytelling, Home Kitchen Innovation
Education
Cascade Culinary Institute – Central Oregon Community College
Certificate in Culinary Arts
Focus: Farm-to-table cuisine, sustainable cooking practices, and seasonal recipe creation.
Nate studied under experienced chefs who emphasized local sourcing, minimal waste, and building recipes from fresh, simple ingredients.
Nate Harper is the founder and creative force behind Make, Take, Bake. Raised in the wild beauty of Oregon’s high desert, Nate grew up surrounded by family gardens, farmers’ markets, and home kitchens that celebrated the seasons.
His early love for simple, honest food evolved into a professional passion when he attended Cascade Culinary Institute, where he sharpened his skills in creating recipes that are sustainable, satisfying, and made for everyday life.
Nate’s goal is to make cooking feel accessible, free of fuss, and full of flavor. He believes a single, thoughtfully built dish can stand alone, and sometimes even steal the show.