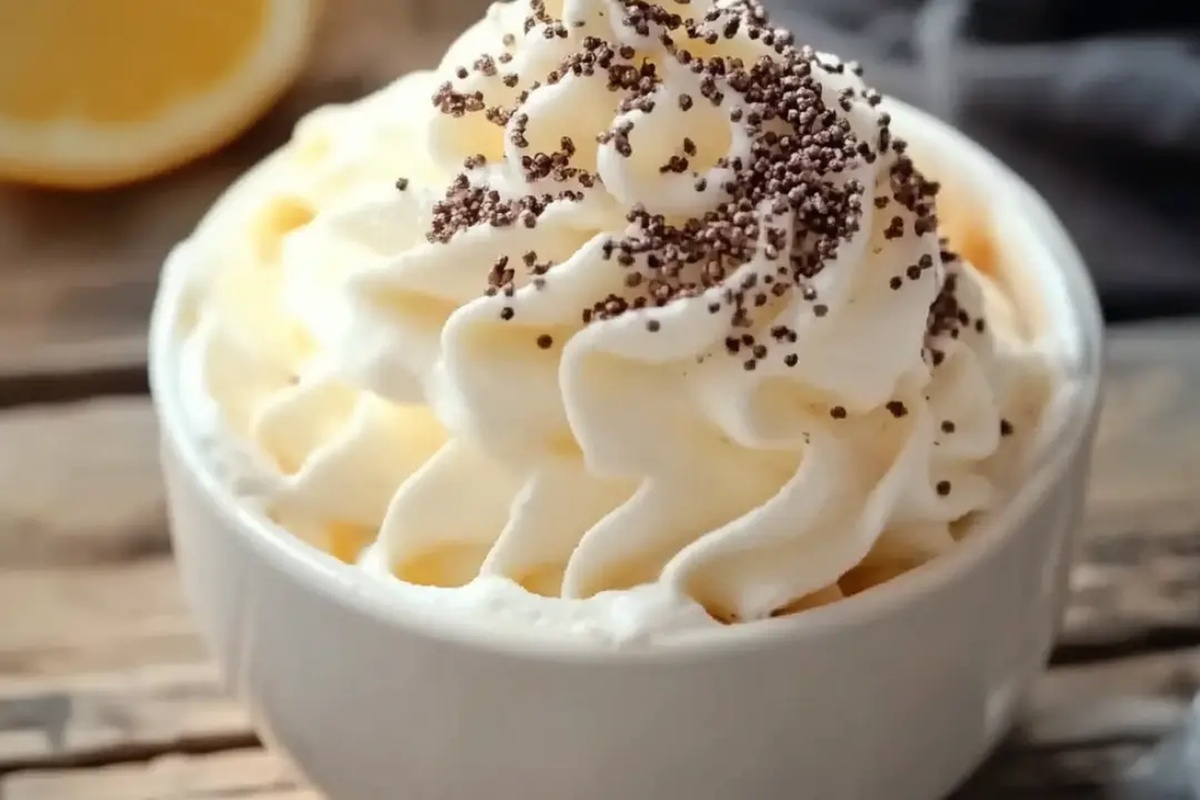
The Dreamiest Pudding Cool Whip Frosting Recipe for Sweet Treats
Dreamy cool whip frosting pudding blends creamy textures into a delightful dessert sensation.
Clouds of sweetness dance across your palate with each silky spoonful.
Simple ingredients create magic in your kitchen without complicated techniques.
Softness melts effortlessly, promising pure indulgence in every bite.
Smooth and luscious, this recipe whispers comfort and joy.
Comfort meets creativity in a dessert that sparks smiles and memories.
Why Pudding Cool Whip Frosting Works So Well
Ingredients Needed for Pudding Cool Whip Frosting
For the Base:For the Creamy Elements:For the Optional Flavor Enhancers:How to Prepare Pudding Cool Whip Frosting Properly
Step 1: Blend Creamy Base
In a spacious mixing bowl, pour in the pudding mix, powdered sugar, milk, and vanilla extract. These ingredients will create a delightful foundation for your dreamy frosting.
Step 2: Whip to Smoothness
Grab your electric mixer and beat the mixture on medium-high speed. Watch as the ingredients transform into a silky, luscious blend that’s smooth as silk.
Continue mixing for about 2 minutes until the texture becomes wonderfully thickened.
Step 3: Fold in Fluffy Clouds
Gently introduce Cool Whip into the bowl.
With your mixer on medium speed, blend until the frosting becomes light and airy. The Cool Whip will add a cloud-like softness that makes this frosting irresistibly smooth.
Step 4: Get Creative with Frosting
Your magical frosting is now ready to elevate any dessert! Spread it generously over:Step 5: Preserve the Deliciousness
Transfer any leftover frosting to an airtight container.
Tuck it safely in the refrigerator to keep it fresh and creamy for future sweet adventures.
Tips to Make Smooth Pudding Cool Whip Frosting
Variations for Pudding Cool Whip Frosting
Best Pairings With Pudding Cool Whip Frosting
How to Store Pudding Cool Whip Frosting Safely
Transfer the frosting to an airtight container, seal tightly, and store in the refrigerator for up to 5-7 days. Keep away from strong-smelling foods to prevent flavor absorption.
Spoon the frosting into a freezer-safe container, leaving some space for expansion. Cover with plastic wrap and a lid, then freeze for up to 2 months. Thaw overnight in the refrigerator before use.
After refrigeration, let the frosting sit at room temperature for 10-15 minutes. Use an electric mixer to restore its original light and fluffy texture, adding a splash of milk if needed.
For easy future use, divide the frosting into smaller portions before storing, using individual containers or freezer bags for convenient thawing and measuring.
FAQs
Yes, you can swap out the pudding flavor to create different taste profiles. Vanilla, chocolate, and pistachio work especially well with this frosting recipe.
The Cool Whip helps stabilize the frosting, making it suitable for basic cake decorating and spreading. However, it’s not as firm as traditional buttercream for intricate piping designs.
While an electric mixer creates the smoothest texture, you can use a whisk and mix vigorously by hand. Just ensure all ingredients are thoroughly combined and no lumps remain.
Print
Pudding Cool Whip Frosting Recipe
- Total Time: 12 minutes
- Yield: 8 1x
Description
Creamy chocolate pudding meets cool whip frosting in this irresistible dessert sensation. Sweet layers blend perfectly, creating a heavenly treat that delights your taste buds with minimal effort and maximum indulgence.
Ingredients
Main Ingredients:
- 1 package (3.4 ounces / 96 grams) instant vanilla pudding mix
- 8 ounces (226 grams) Cool Whip, thawed
Sweeteners:
- 2 tablespoons powdered sugar
Liquid and Flavor Enhancers:
- 1/2 cup (120 milliliters) milk
- 1 teaspoon vanilla extract
Instructions
- Whisk together pudding mix, powdered sugar, milk, and vanilla extract in a spacious mixing vessel until ingredients are thoroughly integrated.
- Engage an electric mixer at medium-high velocity, blending the mixture for approximately 120 seconds until achieving a silky, slightly dense consistency.
- Gently fold Cool Whip into the developing cream, continuing to blend at medium speed until the frosting transforms into a cloud-like, uniform texture.
- Apply the freshly prepared frosting immediately to your desired confectionery canvas – whether decorating cakes, embellishing cupcakes, adorning cookies, or preparing as a delectable dipping sauce.
- For optimal preservation, transfer any remaining frosting into a sealed container and refrigerate promptly to maintain its pristine quality and prevent bacterial growth.
Notes
- Experiment with different pudding flavors like chocolate, vanilla, or pistachio to create unique frosting variations that match your dessert theme.
- Chill the mixing bowl and beaters beforehand to help the frosting set faster and achieve a more stable, fluffy texture.
- For a lighter version, substitute low-fat milk and sugar-free pudding mix to reduce calories without compromising taste.
- Keep the frosting chilled until ready to use, as it can soften quickly at room temperature, potentially losing its smooth, creamy consistency.
- Prep Time: 10 minutes
- Cook Time: 2 minutes
- Category: Desserts
- Method: Blending
- Cuisine: American
Nutrition
- Serving Size: 8
- Calories: 106 kcal
- Sugar: 9 g
- Sodium: 111 mg
- Fat: 5 g
- Saturated Fat: 2.5 g
- Unsaturated Fat: 2 g
- Trans Fat: 0 g
- Carbohydrates: 14 g
- Fiber: 0 g
- Protein: 1 g
- Cholesterol: 6 mg
Clara Bennett
Contributing Recipe Developer & Food Writer
Expertise
Baking and Pastry Development, Gluten-Free and Allergy-Friendly Recipe Creation, Culinary Storytelling and Food Journalism, Recipe Testing and Standardization, Southern Comfort Foods and Modern Twists
Education
Sullivan University – National Center for Hospitality Studies
Associate Degree in Culinary Arts
Focus: Baking and Pastry Arts, Recipe Testing, and Culinary Journalism.
Clara specialized in crafting desserts that blend classic Southern comfort with modern techniques, while developing strong writing skills to tell the story behind every dish.
Lane Community College (Certificate Program)
Certificate in Food Writing and Photography
Focus: Culinary storytelling, recipe formatting, food styling, and visual presentation.
Clara’s love of baking started young, powered by homemade pies, biscuits, and stories passed around the family table.
After earning her degree at Sullivan University and a food writing certificate at Lane Community College, she turned her passion into a craft: sharing recipes that are simple, soulful, and always full of heart.
She’s big on bold flavors, flexible ideas, and creating sweets that fit any table (yes, even if you’re gluten-free). When she’s not baking, you’ll find her wandering farmers’ markets, styling food for the next photo shoot, or working on her ever-growing recipe journal.