Easy Red Velvet Waffles Recipe: A Sweet Morning Delight
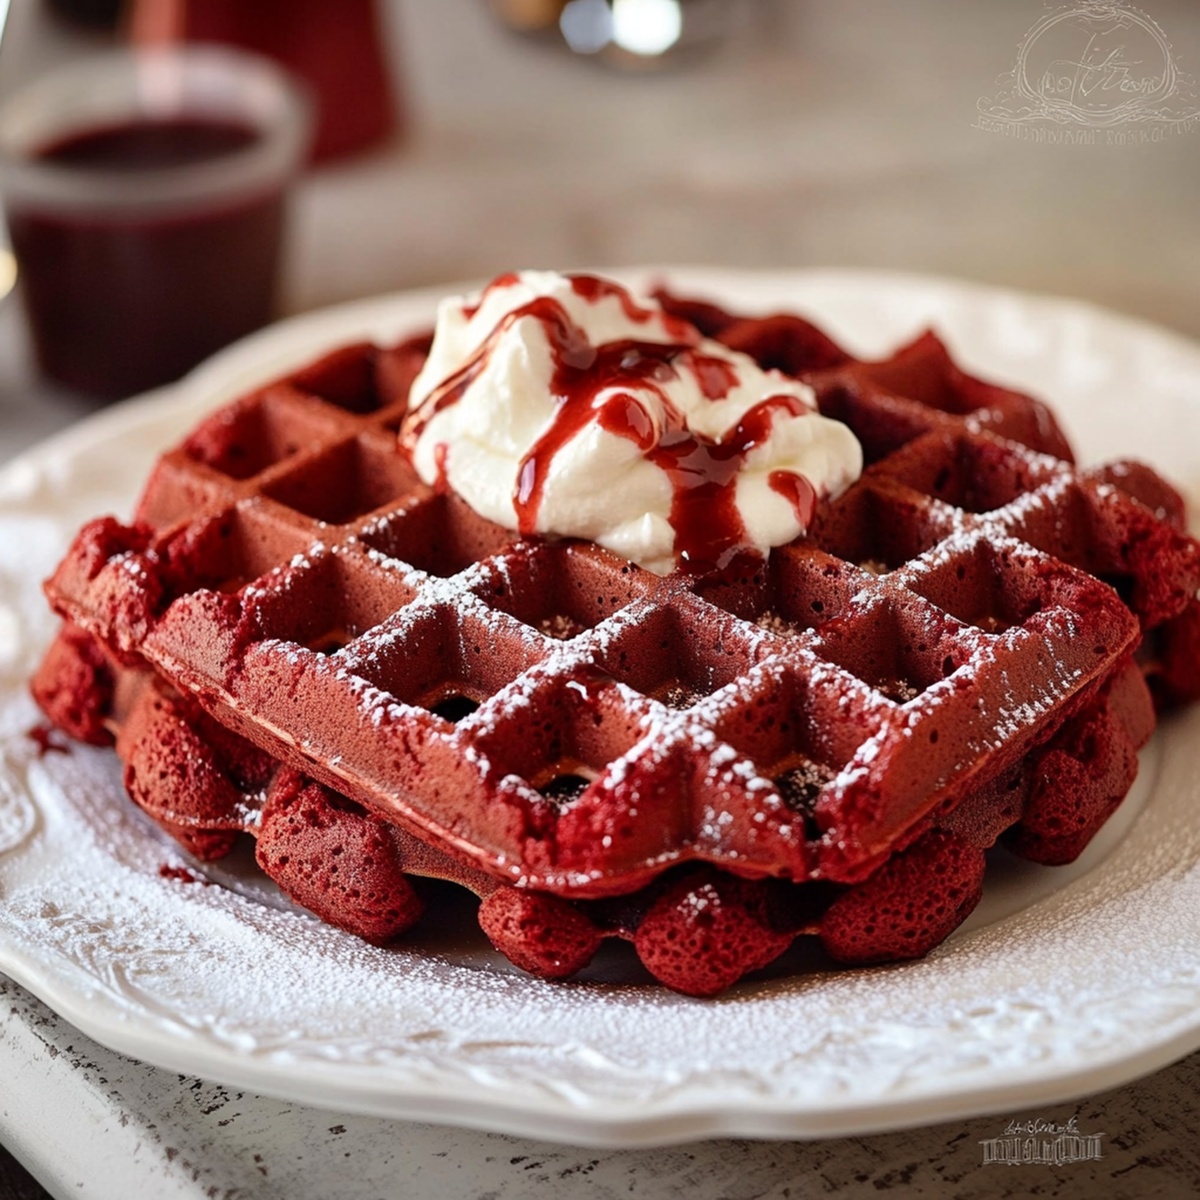
Crispy, decadent red velvet waffles dance between dessert and breakfast with irresistible charm.
Chocolate undertones weave through each golden-edged square, promising pure indulgence.
Soft crimson batter creates magical morning moments that sparkle with unexpected delight.
Cream cheese drizzles transform ordinary mornings into luxurious experiences.
Southern kitchens inspire this playful twist on classic comfort food.
Whipped toppings and cocoa hints make these waffles feel like a celebration.
Rich textures and vibrant colors invite you to savor every delectable bite.
Why Red Velvet Waffles Bring Joy to Breakfast
Ingredients for Soft and Vibrant Red Velvet Waffles
Dry Ingredients:Wet Ingredients:Topping and Garnish:How to Whip Up Red Velvet Waffles Perfectly

Step 1: Whisk Dry Ingredients
In a spacious mixing bowl, combine flour, cocoa powder, baking powder, and sugar. Use a whisk to blend these ingredients thoroughly, ensuring no lumps remain and creating a uniform dry mixture.
Step 2: Blend Wet Components
Grab another bowl and mix together:Whisk these ingredients until they transform into a smooth, vibrant red liquid with a consistent texture.
Step 3: Create Waffle Batter
Pour the wet ingredients into the dry mixture.
Gently fold and stir until just combined. Be careful not to overmix, as this can make the waffles tough.
The batter should look slightly lumpy and have a beautiful deep red color.
Step 4: Prepare Waffle Iron
Plug in the waffle iron and set it to medium-high heat.
Lightly spray or brush the cooking surfaces with cooking oil to prevent sticking. Allow the iron to heat up completely before adding batter.
Step 5: Cook Waffles
Ladle the red velvet batter onto the center of the waffle iron, covering about three-quarters of the surface. Close the lid and cook until the steam significantly reduces and stops escaping.
This typically takes 4-5 minutes.
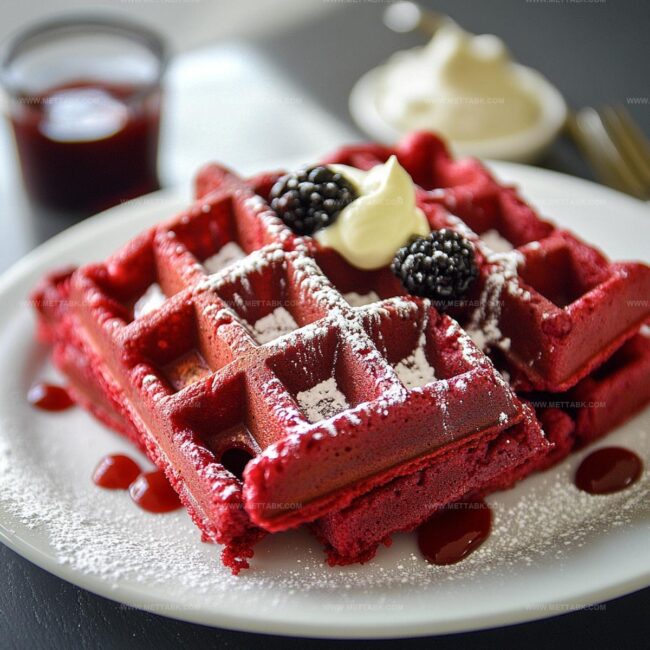
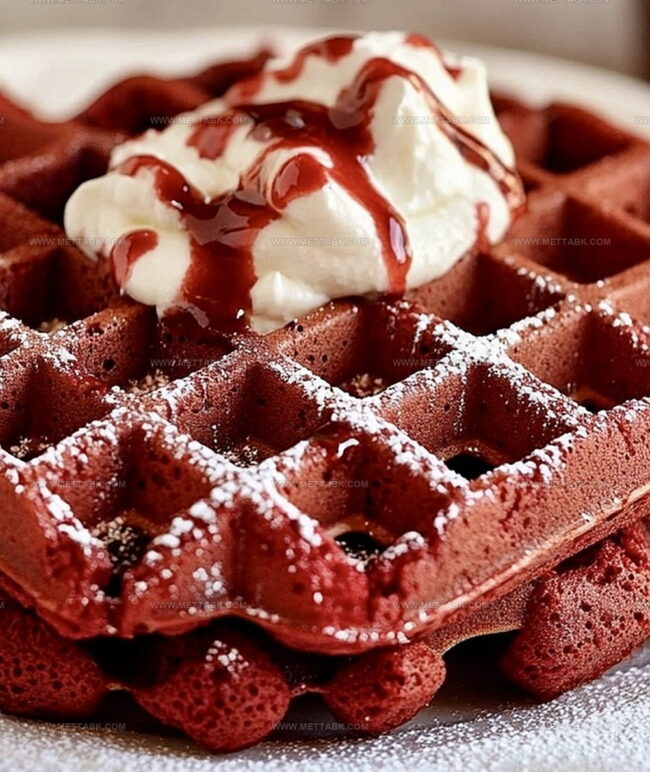
Step 6: Serve With Flair
Carefully remove the waffle using a fork or tongs.
Transfer to a plate and top with:Enjoy your decadent red velvet waffles while they’re warm and crispy!
Tips for Red Velvet Waffles That Impress
Fun Twists on Classic Red Velvet Waffles

Pairings That Match Red Velvet Waffles Beautifully
How to Store Red Velvet Waffles for Freshness
FAQs
The vibrant red color comes from red food coloring, which is added to the batter along with cocoa powder to create the classic red velvet appearance.
Yes, you can substitute buttermilk with regular milk mixed with a tablespoon of vinegar or lemon juice. Let the mixture sit for 5 minutes before using to create a similar tangy flavor and texture.
The waffles are done when steam stops escaping from the waffle iron and they have a golden-brown crispy exterior. This typically takes about 4-5 minutes of cooking.
Print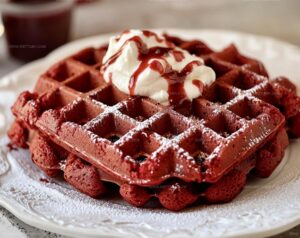
Red Velvet Waffles Recipe
- Total Time: 20 minutes
- Yield: 4 1x
Description
Indulgent red velvet waffles bring Southern charm to breakfast tables with their rich crimson color and cream cheese glaze. Chocolate-kissed batter and luxurious toppings make this classic treat irresistible for weekend brunch lovers.
Ingredients
- 2 cups all-purpose flour (240 g)
- 2 tbsps cocoa powder (10 g)
- 2 tsps baking powder
- 1/2 cup granulated sugar (100 g)
- 2 large eggs
- 1 cup buttermilk (240 ml)
- 2 tbsps red food coloring
- 1 tsp vanilla extract
- Cream cheese frosting (for topping)
Instructions
- Sift dry ingredients – flour, cocoa powder, baking powder, and sugar – into a spacious mixing vessel, ensuring thorough blending of components.
- Whisk together wet ingredients – buttermilk, eggs, vibrant crimson food coloring, and aromatic vanilla extract – until achieving a silky, uniform consistency.
- Merge wet and dry mixtures, gently folding until just incorporated, avoiding overmixing to maintain waffle tenderness.
- Activate waffle iron and apply a delicate coating of culinary lubricant to prevent sticking.
- Ladle batter onto preheated surface, allowing it to spread across approximately three-quarters of the cooking platform.
- Allow waffles to transform into a crisp, mahogany-hued delicacy, monitoring until steam dissipates (roughly 4-5 minutes at medium-high temperature).
- Extract waffle with precision using a heat-resistant utensil, ensuring structural integrity.
- Embellish with velvety cream cheese frosting and garnish with freshly sliced, ruby-red strawberries for a luxurious presentation.
Notes
- Check waffle batter consistency by ensuring it’s smooth and lump-free, preventing uneven cooking and texture.
- Experiment with natural food coloring alternatives like beetroot powder for a healthier red hue without artificial additives.
- Allow waffle batter to rest for 5-10 minutes before cooking to help flour absorb liquid and create a more tender result.
- Use room temperature ingredients to promote better mixing and achieve a more uniform waffle batter texture.
- Prep Time: 15 minutes
- Cook Time: 5 minutes
- Category: Breakfast, Snacks, Desserts
- Method: Frying
- Cuisine: American
Nutrition
- Serving Size: 4
- Calories: 350 kcal
- Sugar: 20 g
- Sodium: 300 mg
- Fat: 15 g
- Saturated Fat: 7 g
- Unsaturated Fat: 6 g
- Trans Fat: 0.5 g
- Carbohydrates: 45 g
- Fiber: 2 g
- Protein: 6 g
- Cholesterol: 60 mg
Clara Bennett
Contributing Recipe Developer & Food Writer
Expertise
Baking and Pastry Development, Gluten-Free and Allergy-Friendly Recipe Creation, Culinary Storytelling and Food Journalism, Recipe Testing and Standardization, Southern Comfort Foods and Modern Twists
Education
Sullivan University – National Center for Hospitality Studies
Associate Degree in Culinary Arts
Focus: Baking and Pastry Arts, Recipe Testing, and Culinary Journalism.
Clara specialized in crafting desserts that blend classic Southern comfort with modern techniques, while developing strong writing skills to tell the story behind every dish.
Lane Community College (Certificate Program)
Certificate in Food Writing and Photography
Focus: Culinary storytelling, recipe formatting, food styling, and visual presentation.
Clara’s love of baking started young, powered by homemade pies, biscuits, and stories passed around the family table.
After earning her degree at Sullivan University and a food writing certificate at Lane Community College, she turned her passion into a craft: sharing recipes that are simple, soulful, and always full of heart.
She’s big on bold flavors, flexible ideas, and creating sweets that fit any table (yes, even if you’re gluten-free). When she’s not baking, you’ll find her wandering farmers’ markets, styling food for the next photo shoot, or working on her ever-growing recipe journal.