Irresistible Strawberry Heart Hand Pies Recipe for Sweet Moments
Crafting a delightful strawberry heart hand pies recipe brings sweet moments of joy right into your kitchen.
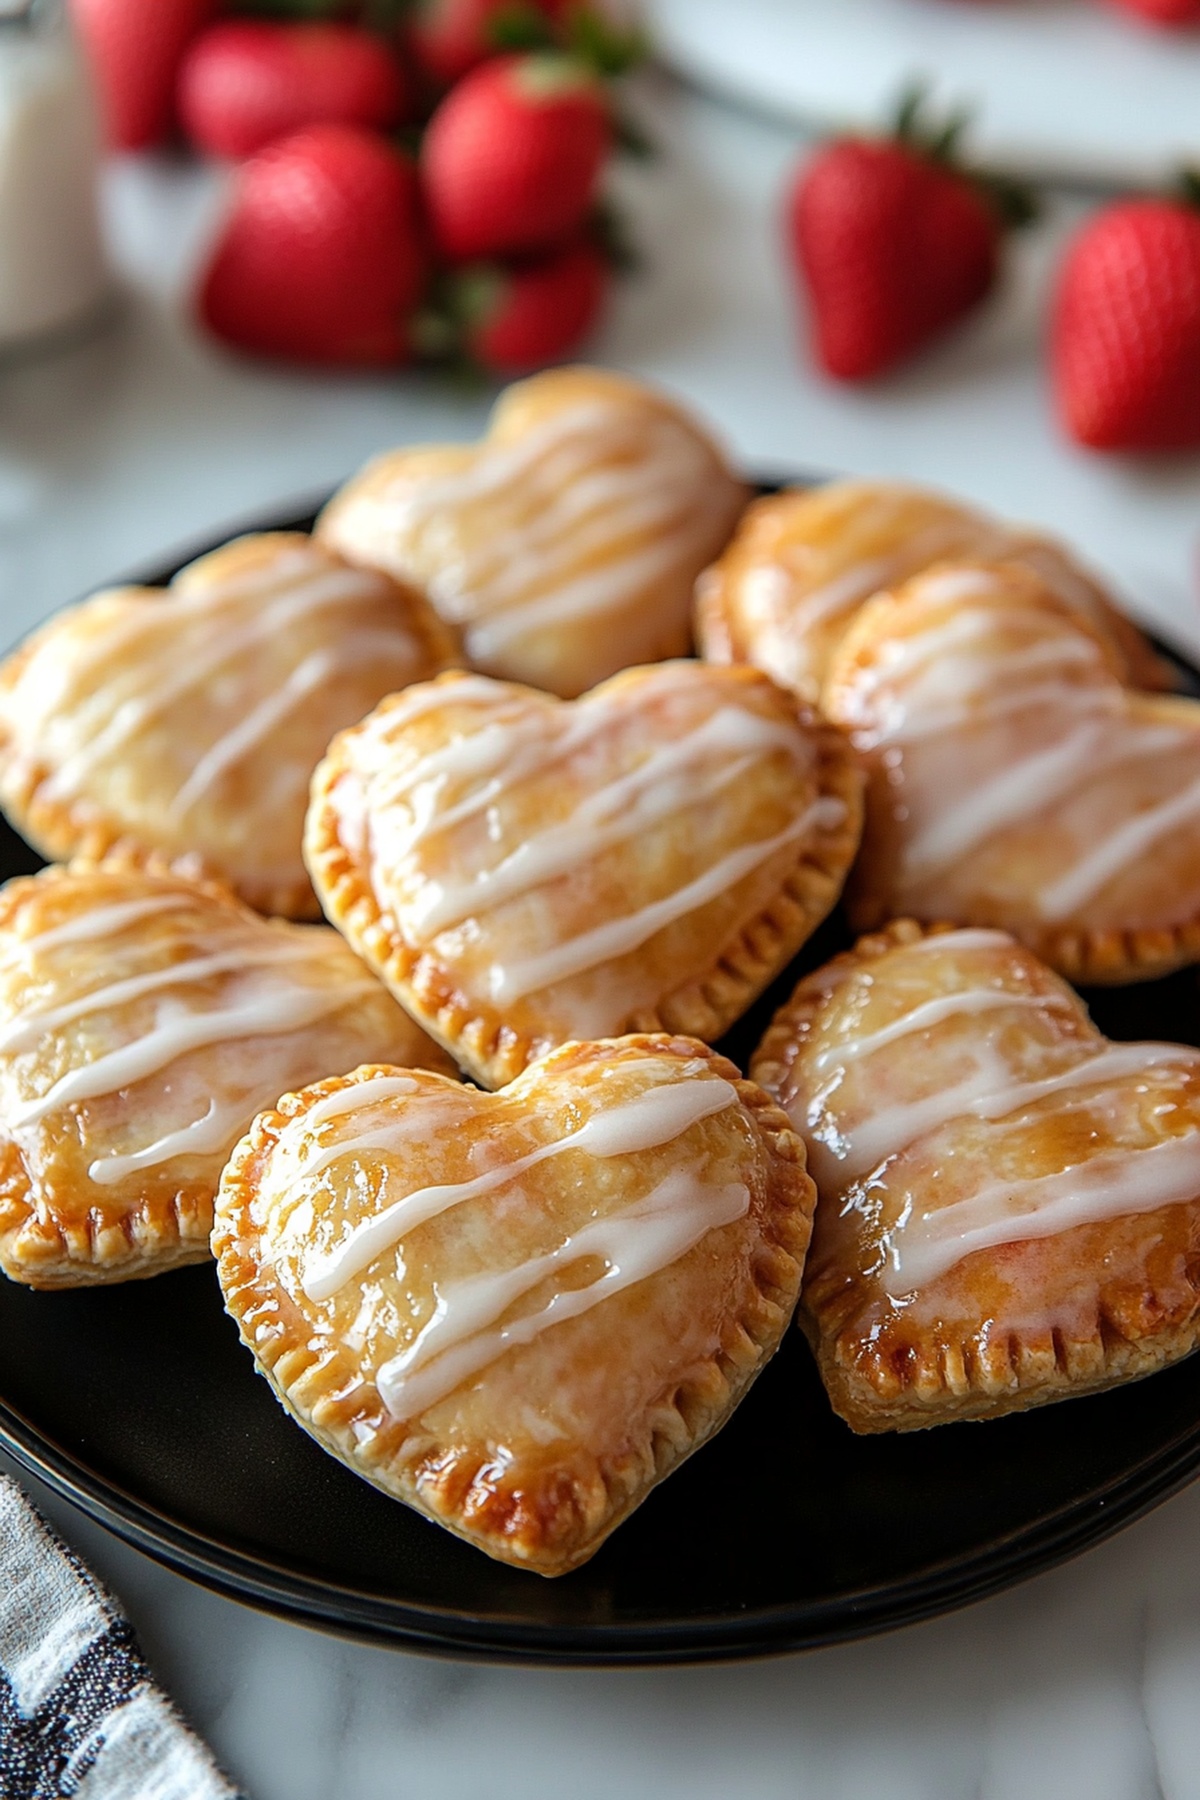
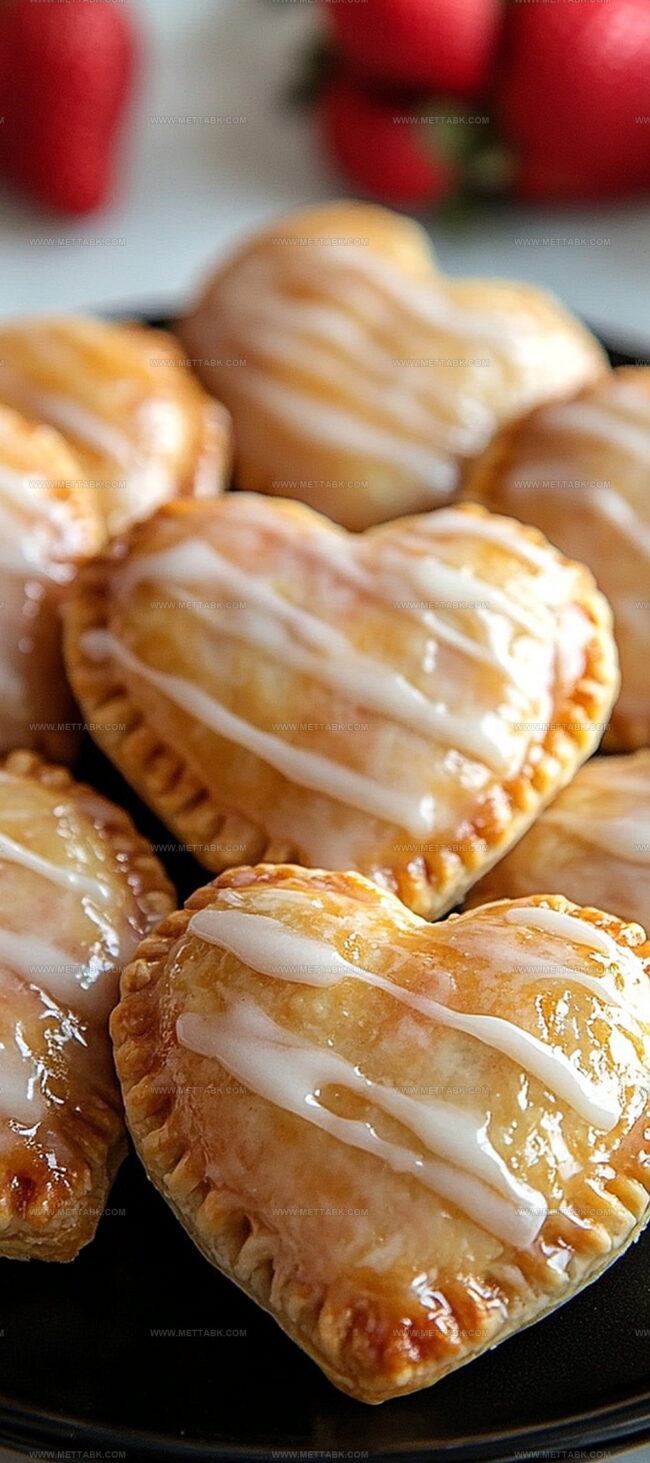
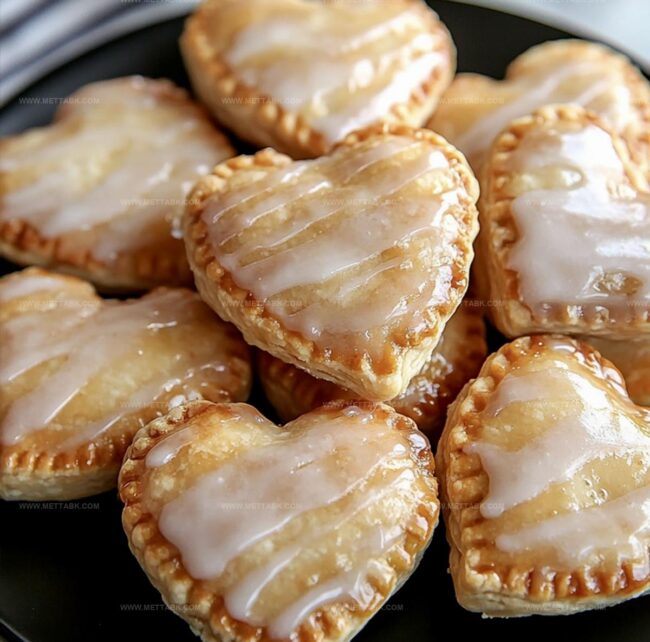
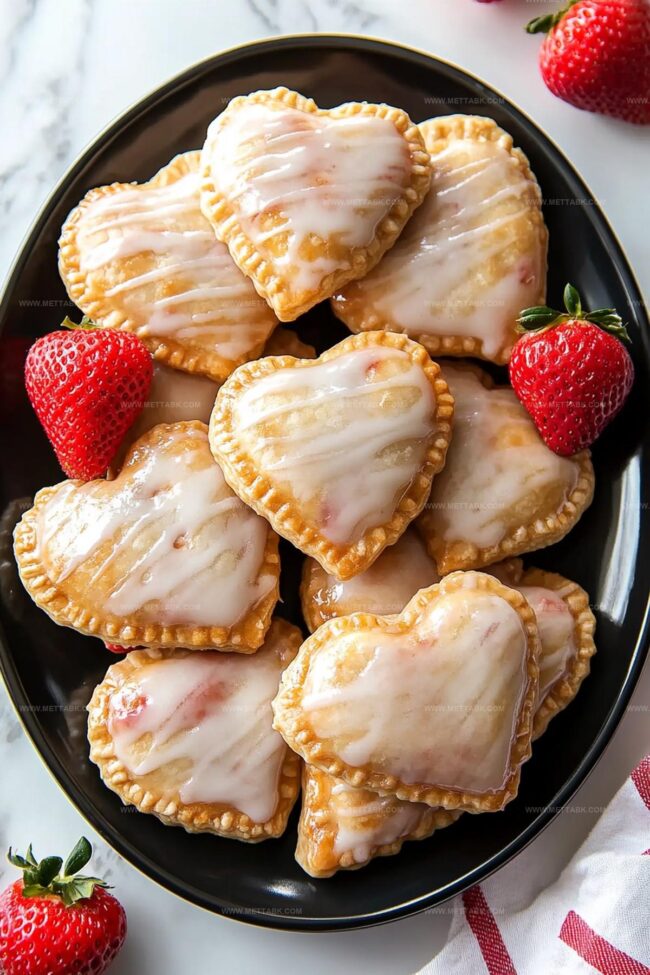
Soft pastry hugs luscious fruit filling with playful charm.
Romantic shapes make these treats perfect for special occasions or spontaneous afternoon surprises.
Delicate crimped edges seal in bright berry flavors that dance across your palate.
Homemade desserts like these connect us through simple, genuine ingredients and shared happiness.
Each miniature pie carries warmth and love, promising delectable memories with every single bite.
You’ll find these heart-shaped treasures irresistibly charming and surprisingly easy to create.
Strawberry Heart Hand Pies Highlights

Ingredients for Strawberry Heart Hand Pies
How to Prepare Strawberry Heart Hand Pies
Step 1: Warm Up the Oven
Set your oven to 400°F. Cover two baking sheets with parchment paper for easy cleanup.
Step 2: Create Egg Magic
Whisk together:Blend until smooth and set nearby.
Step 3: Prepare the Dough Canvas
Sprinkle flour on your work surface.
Roll out pie crusts until they’re thin and flexible.
Step 4: Shape Lovely Hearts
Use a heart-shaped cookie cutter to transform dough into 24 cute pieces.
You’ll need 12 bottom and 12 top crusts.
Step 5: Create Steam Escape Routes
Gently poke tiny holes in top crusts using a fork.
These little vents help prevent pie explosions during baking.
Step 6: Build Delicious Layers
Place bottom crusts on work surface.
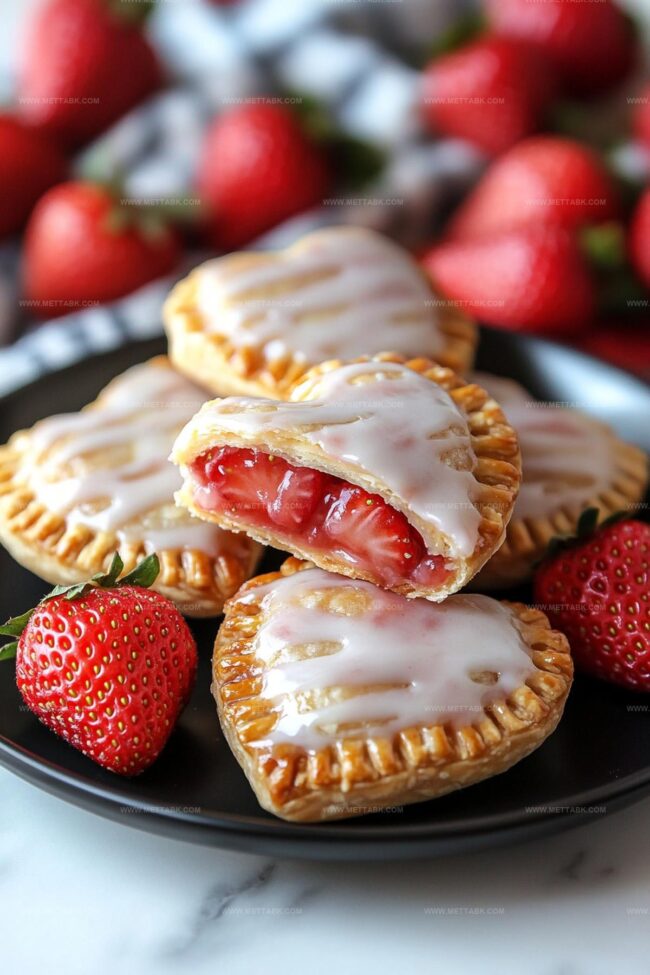
Dollop strawberry jam in center of each piece. Carefully cover with top crusts and press edges together.
Step 7: Add Golden Shine
Brush egg mixture over pie tops. This creates a beautiful golden glow when baked.
Step 8: Bake to Perfection
Transfer pies to prepared baking sheets. Slide into oven and bake for 20 minutes until they turn gorgeous golden brown.
Step 9: Cool Down
Move pies to wire rack. Let them chill completely before decorating.
Step 10: Whip Up Sweet Glaze
Mix in a bowl:Stir until silky smooth.
Step 11: Decorate with Deliciousness
Drizzle glaze over cooled pies.
Wait two hours for glaze to set before serving your beautiful treats.
Expert Tips for Strawberry Heart Hand Pies
Variations of Strawberry Heart Hand Pies

Pairing Ideas for Strawberry Heart Hand Pies

Storage Guidelines for Strawberry Heart Hand Pies
FAQs

The key is to not overfill the pies. Use exactly one tablespoon of jam and leave a small border around the edges. Crimp the edges tightly with a fork to create a seal that prevents leakage.
Absolutely! While strawberry jam works perfectly, you can experiment with raspberry, blueberry, or apricot jam. Just ensure the jam is thick and not too runny to maintain the pie’s structure.
Use a sharp heart-shaped cookie cutter and press down firmly and cleanly. If the dough sticks, lightly dust the cutter with flour before each cut. Press straight down without twisting to ensure clean edges.
Print
Strawberry Heart Hand Pies Recipe
- Total Time: 50 minutes
- Yield: 8 1x
Description
Handcrafted strawberry heart hand pies embody sweet romance and rustic charm from Southern kitchens. Delicate pastry pockets filled with fresh strawberries offer a delightful treat you will cherish with each tender bite.
Ingredients
- 2 premade 9-inch pie crusts (or homemade pie dough)
- 3/4 cup (180 ml) strawberry jam
- 1 large egg
- 1 tbsp (15 ml) water
- 1 cup (120 g) powdered sugar
- 2 tbsps (30 ml) milk
- 1 tsp (5 ml) vanilla extract
- All-purpose flour (for dusting)
Instructions
- Prepare the oven environment by heating to 400°F and positioning parchment-lined baking sheets for optimal pie placement.
- Create an egg wash by whisking egg and water until thoroughly blended, reserving for later application.
- Dust work surface with flour and carefully roll pie crusts to maintain consistent thickness, aiming for approximately 13-inch diameter.
- Utilize a heart-shaped cookie cutter to extract 24 precise dough pieces, strategically maximizing dough usage by re-rolling remaining scraps.
- Perforate top crusts with fork tines to facilitate steam release during baking, preventing potential structural compromise.
- Position bottom dough pieces and center a tablespoon of strawberry jam, then delicately overlay perforated top crusts, meticulously sealing edges with fork crimping.
- Enhance visual appeal by gently brushing assembled pies with prepared egg wash, ensuring even golden coverage.
- Carefully transfer pies onto prepared baking sheets, maintaining spacing between each piece, and bake for approximately 20 minutes until achieving rich golden-brown coloration.
- Extract pies from oven and transition to wire cooling rack, allowing complete temperature reduction before glazing.
- Construct vanilla glaze by blending powdered sugar, milk, and vanilla extract until achieving smooth, pourable consistency.
- Embellish cooled pies with delicate glaze drizzle, permitting two-hour setting period for optimal presentation and texture.
Notes
- Make extra dough for perfect heart shapes, preventing waste and ensuring consistent sizing.
- Chill the cut-out dough pieces for 15 minutes before filling to maintain crisp edges and prevent spreading during baking.
- Use room temperature jam for easier spreading and more even distribution inside the hand pies.
- Consider freezing assembled uncooked pies for quick future baking, storing them between parchment layers to prevent sticking.
- Experiment with alternative fruit preserves like raspberry or mixed berry for flavor variations.
- Sprinkle coarse sugar on top before baking to add delightful texture and extra sweetness.
- Use gluten-free pie crust to make recipe suitable for those with wheat sensitivities.
- Reduce baking time by 2-3 minutes if using smaller cookie cutters to prevent over-browning.
- Prep Time: 30 minutes
- Cook Time: 20 minutes
- Category: Desserts, Snacks
- Method: Baking
- Cuisine: American
Nutrition
- Serving Size: 8
- Calories: 230 kcal
- Sugar: 18 g
- Sodium: 150 mg
- Fat: 9 g
- Saturated Fat: 3 g
- Unsaturated Fat: 4 g
- Trans Fat: 0.1 g
- Carbohydrates: 34 g
- Fiber: 1 g
- Protein: 2 g
- Cholesterol: 25 mg
Clara Bennett
Contributing Recipe Developer & Food Writer
Expertise
Baking and Pastry Development, Gluten-Free and Allergy-Friendly Recipe Creation, Culinary Storytelling and Food Journalism, Recipe Testing and Standardization, Southern Comfort Foods and Modern Twists
Education
Sullivan University – National Center for Hospitality Studies
Associate Degree in Culinary Arts
Focus: Baking and Pastry Arts, Recipe Testing, and Culinary Journalism.
Clara specialized in crafting desserts that blend classic Southern comfort with modern techniques, while developing strong writing skills to tell the story behind every dish.
Lane Community College (Certificate Program)
Certificate in Food Writing and Photography
Focus: Culinary storytelling, recipe formatting, food styling, and visual presentation.
Clara’s love of baking started young, powered by homemade pies, biscuits, and stories passed around the family table.
After earning her degree at Sullivan University and a food writing certificate at Lane Community College, she turned her passion into a craft: sharing recipes that are simple, soulful, and always full of heart.
She’s big on bold flavors, flexible ideas, and creating sweets that fit any table (yes, even if you’re gluten-free). When she’s not baking, you’ll find her wandering farmers’ markets, styling food for the next photo shoot, or working on her ever-growing recipe journal.