
Sizzling Beef Rissoles Recipe: Homemade Comfort on a Plate
Crafting delectable beef rissoles brings pure culinary joy to your kitchen adventures.
Savory aromas will soon fill the air with mouthwatering anticipation.
Tender meat blends perfectly with fragrant herbs and spices.
Crispy edges promise a delightful texture that melts in your mouth.
Simple ingredients combine to create something truly extraordinary.
Home cooks can master this classic dish with confidence.
The Beef Rissoles You’ll Want to Make Often

Ingredients for Flavorful Beef Rissoles
For the Meat:For the Binding and Flavor Enhancers:For the Aromatics and Seasonings:For the Cooking:For the Optional Gravy:How to Cook Perfect Beef Rissoles
Step 1: Mix Flavorful Beef Blend
Grab a spacious mixing bowl and toss in ground beef with all the delicious companions. Your flavor team includes:Dive in with your hands or a sturdy spoon, blending everything together.
Keep your touch gentle to ensure tender rissoles.
Step 2: Shape Perfect Patties
Divide your meaty mixture into 8-10 portions.
Roll each portion into a compact ball, then gently press down to create round or oval patties. Aim for consistent sizes to guarantee even cooking.
Step 3: Sizzle Golden Rissoles
Heat olive oil in a large skillet over medium flame. Carefully place patties into the hot pan, leaving space between each.
Cook for 4-5 minutes per side until they transform into golden-brown delights. Ensure internal temperature hits 160°F for safe consumption.
Transfer cooked rissoles to a paper towel-lined plate to absorb extra oil.
Step 4: Craft Luxurious Gravy
In the same skillet, melt butter over medium heat.
Sprinkle flour and stir constantly for 1-2 minutes to create a silky roux. Slowly pour beef broth, whisking continuously to prevent lumps.
Add soy sauce and season with salt and pepper. Let the gravy simmer and thicken for 3-5 minutes.
Adjust consistency by adding more broth if needed.
Step 5: Serve and Enjoy
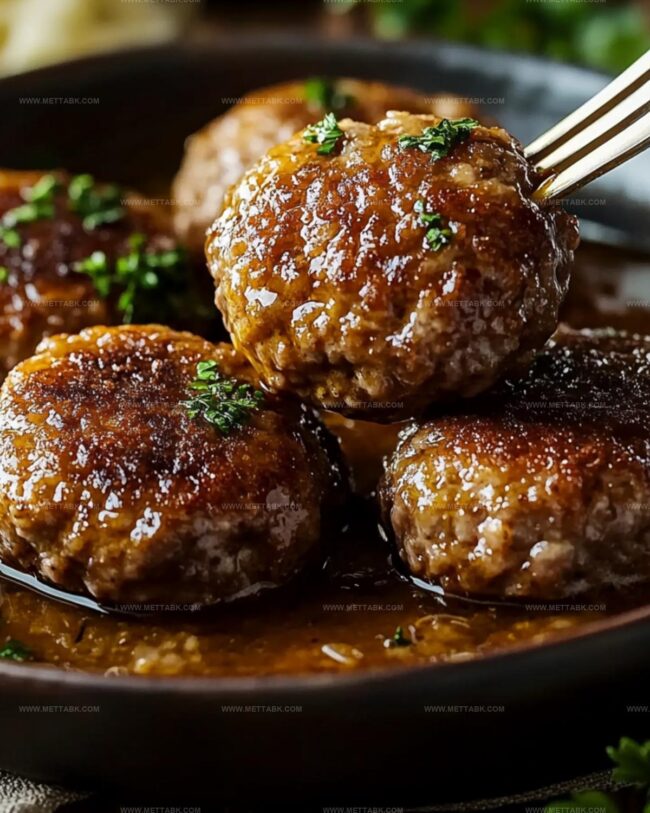
Place rissoles on plates, drizzle with rich gravy or serve on the side for dipping.
Complement with creamy mashed potatoes, vibrant steamed vegetables, or a crisp salad for a satisfying meal.
Tips to Achieve Juicy and Tender Rissoles

Variations to Try with Beef Rissoles
Pairing Suggestions to Serve Alongside
Storage Advice for Leftover Rissoles
Store leftover beef rissoles in an airtight container within 2 hours of cooking. Keep them in the refrigerator for up to 3-4 days. Place a paper towel between layers to absorb moisture and prevent sticking.
Wrap individual rissoles tightly in plastic wrap or aluminum foil, then place in a freezer-safe container. Freeze for up to 2-3 months. Label the container with the date for easy tracking.
Place rissoles on a microwave-safe plate. Cover with a damp paper towel to retain moisture. Heat on medium power for 1-2 minutes, checking halfway through to ensure even warming. Add a splash of broth to prevent dryness.
Preheat oven to 350°F.
FAQs
Beef rissoles are small, pan-fried meat patties made from ground beef mixed with herbs, breadcrumbs, and seasonings, originating from Portuguese and European cuisine.
Yes, you can substitute ground beef with ground pork, chicken, or turkey for variety while maintaining similar preparation techniques.
Mix ingredients gently, use an egg as a binder, and ensure breadcrumbs are evenly distributed throughout the meat mixture to help hold the rissoles together.
No, you can use regular, panko, or homemade breadcrumbs. The key is to ensure they’re evenly mixed and help bind the meat mixture.
Print
The Beef Rissoles Recipe
- Total Time: 35 minutes
- Yield: 4 1x
Description
Hearty beef rissoles bring Mediterranean comfort to dinner tables with rich, herby flavors. Crispy on the outside and juicy within, this classic dish invites you to savor a delicious homestyle meal that connects tradition and taste.
Ingredients
Meat:
- 1 pound (1 lb) ground beef
Herbs and Spices:
- 1 teaspoon garlic powder
- 1 teaspoon dried oregano
- Salt and pepper to taste
Binding and Flavor Ingredients:
- 1 large egg
- 1/2 cup breadcrumbs
- 1/4 cup grated parmesan cheese
- 1 small onion, finely chopped
- 1 tablespoon Worcestershire sauce
Cooking Fat:
- 2 tablespoons olive oil
Gravy Ingredients:
- 2 tablespoons butter
- 2 tablespoons all-purpose flour
- 1 cup beef broth
- 1 tablespoon soy sauce
- Salt and pepper to taste
Instructions
- Blend ground beef with aromatics and seasonings in a spacious mixing bowl, combining onion, breadcrumbs, Parmesan, egg, Worcestershire sauce, garlic powder, oregano, salt, and pepper. Gently incorporate ingredients to maintain meat’s tenderness, avoiding excessive manipulation.
- Portion the meat mixture into 8-10 uniform segments, carefully shaping each into rounded or slightly flattened patties with consistent thickness.
- Warm olive oil in a large skillet over medium heat (approximately 350°F). Strategically place rissoles in the pan, ensuring sufficient spacing between each patty to promote even browning.
- Sear rissoles for 4-5 minutes per side, rotating once a golden-brown crust develops. Verify internal temperature reaches 160°F for complete cooking, indicating food safety.
- Transfer cooked rissoles onto paper towel-lined plate to absorb excess oil, allowing them to rest and retain moisture.
- Optional gravy preparation: Utilize the same skillet, melting butter and incorporating flour to create a smooth roux. Gradually introduce beef broth, whisking continuously to prevent lumps.
- Enhance gravy with soy sauce, adjusting seasoning with salt and pepper. Simmer for 3-5 minutes until desired thickness is achieved, adding additional broth if needed for consistency.
- Present rissoles accompanied by gravy, complemented with mashed potatoes, steamed vegetables, or a crisp salad for a satisfying meal.
Notes
- Gentle meat handling prevents tough rissoles, so mix ingredients lightly and avoid compressing the mixture too firmly when forming patties.
- Experiment with alternative protein options like ground turkey or plant-based alternatives for dietary flexibility and diverse flavor profiles.
- Use a meat thermometer to ensure precise doneness, maintaining 160°F internal temperature for food safety without overcooking the rissoles.
- Allow rissoles to rest briefly after cooking to help retain moisture and develop richer, more concentrated flavors before serving.
- Prep Time: 15 minutes
- Cook Time: 20 minutes
- Category: Lunch, Dinner, Snacks, Appetizer
- Method: Frying
- Cuisine: Australian
Nutrition
- Serving Size: 4
- Calories: 374 kcal
- Sugar: 1 g
- Sodium: 547 mg
- Fat: 27 g
- Saturated Fat: 8 g
- Unsaturated Fat: 16 g
- Trans Fat: 0.5 g
- Carbohydrates: 10 g
- Fiber: 1 g
- Protein: 28 g
- Cholesterol: 125 mg
Nate Harper
Founder & Recipe Curator
Expertise
Single-Recipe Development, Farm-to-Table Cooking, Seasonal Menu Planning, Culinary Storytelling, Home Kitchen Innovation
Education
Cascade Culinary Institute – Central Oregon Community College
Certificate in Culinary Arts
Focus: Farm-to-table cuisine, sustainable cooking practices, and seasonal recipe creation.
Nate studied under experienced chefs who emphasized local sourcing, minimal waste, and building recipes from fresh, simple ingredients.
Nate Harper is the founder and creative force behind Make, Take, Bake. Raised in the wild beauty of Oregon’s high desert, Nate grew up surrounded by family gardens, farmers’ markets, and home kitchens that celebrated the seasons.
His early love for simple, honest food evolved into a professional passion when he attended Cascade Culinary Institute, where he sharpened his skills in creating recipes that are sustainable, satisfying, and made for everyday life.
Nate’s goal is to make cooking feel accessible, free of fuss, and full of flavor. He believes a single, thoughtfully built dish can stand alone, and sometimes even steal the show.