
Juicy Turkey Cheddar Lunch Roll Ups Recipe for Tasty Bites
Crafting delightful turkey cheddar lunch roll ups brings pure midday excitement to your meal prep!
Savory ingredients dance together in this quick and playful sandwich alternative.
Soft tortillas become the perfect canvas for your culinary creativity.
Rolled and packed with protein-rich slices, these handheld treats promise satisfaction in every bite.
Lunch monotony disappears with these simple yet ingenious wraps.
Minimal effort delivers maximum flavor, making your midday meal something to genuinely anticipate.
You’ll love how these roll ups solve boring lunch dilemmas with delicious simplicity.
Why Turkey Cheddar Lunch Roll Ups Are a Quick and Tasty Meal

Ingredients for Turkey Cheddar Lunch Roll Ups

How to Make Turkey Cheddar Lunch Roll Ups

Step 1: Whip Up Creamy Spread
Grab a mixing bowl and blend softened cream cheese with finely chopped green onions, a pinch of salt, and a dash of pepper. Mix until the ingredients are perfectly combined and smooth.
Step 2: Prepare Tortilla Canvas
Lay out a fresh tortilla on a clean surface. Spread the cream cheese mixture evenly across the entire tortilla, making sure to cover every inch right to the edges.
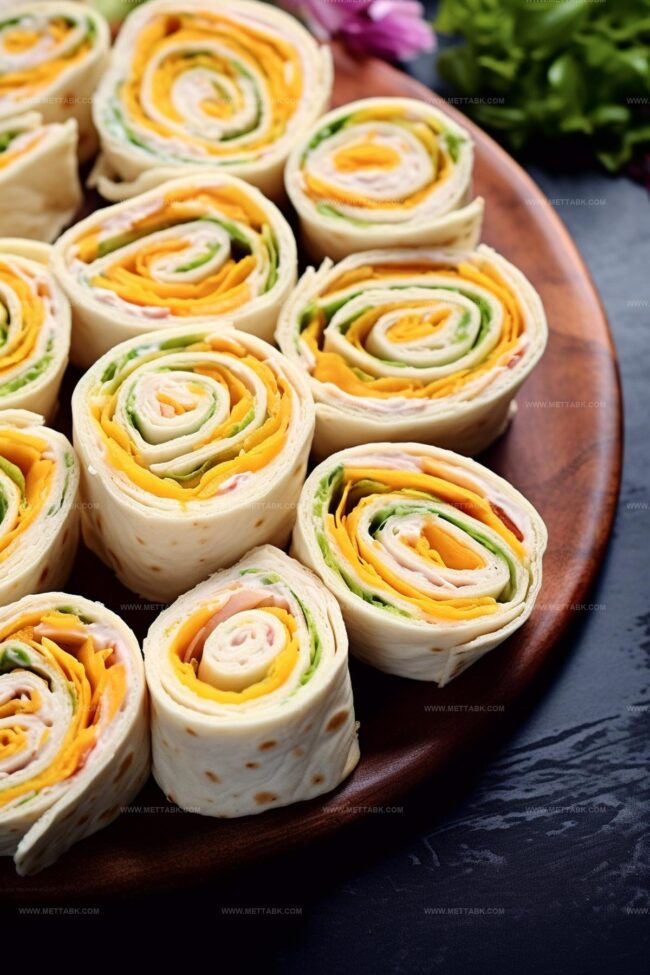
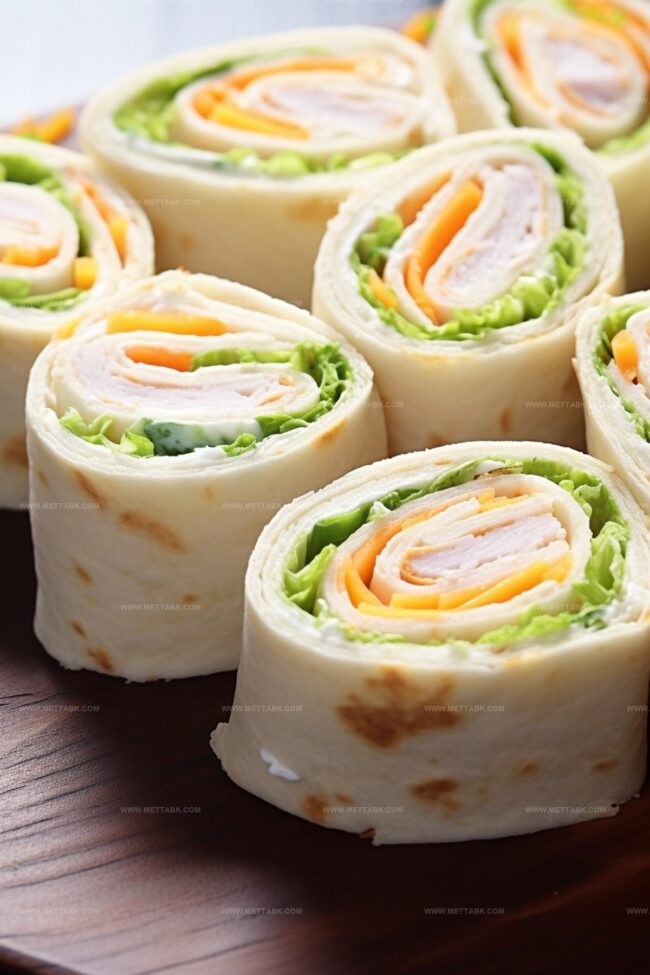
Step 3: Layer Delicious Fillings
Sprinkle a bed of crisp, shredded lettuce over the cream cheese layer. Arrange your protein and cheese with precision:Position these near the edge of the tortilla, leaving a small border.
Step 4: Roll with Precision
Start rolling the tortilla from one end, applying gentle pressure to create a tight, compact roll. If the edges need extra help staying together, dab a bit more cream cheese as a tasty “glue”.
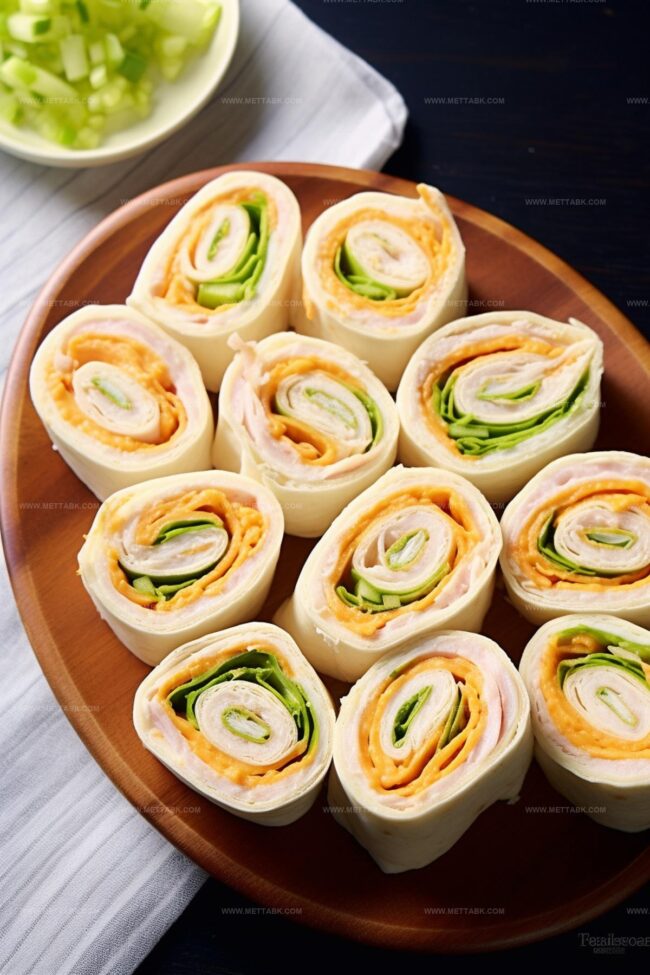
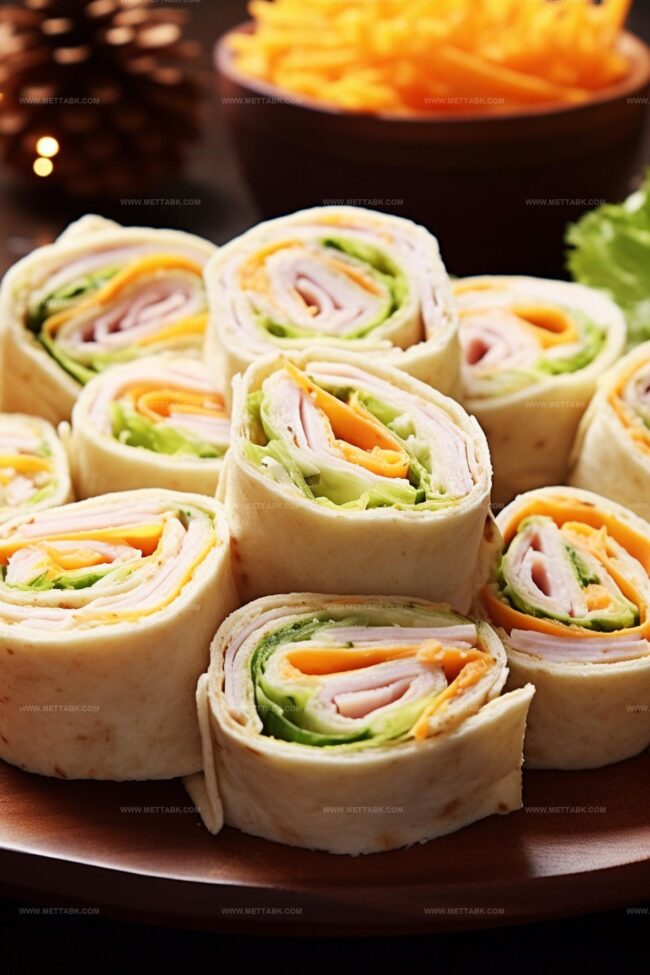
Step 5: Slice and Prepare
Cut the roll in half, then slice each half into five bite-sized pieces. Trim off the ends where filling might be sparse for a clean, professional look.
Step 6: Serve and Enjoy
Present these delightful roll-ups immediately. The fresh ingredients and perfect texture are best enjoyed right away for maximum flavor and crunch.
Pro Tips for Flavorful Turkey Cheddar Lunch Roll Ups
Variations to Try with Turkey Cheddar Lunch Roll Ups
Pairing Suggestions for Turkey Cheddar Lunch Roll Ups
Storage Tips for Turkey Cheddar Lunch Roll Ups
FAQs

The cream cheese mixture with green onion, salt, and pepper adds a zesty and creamy flavor that complements the turkey and cheddar perfectly.
Yes, you can use whole wheat, spinach, or regular flour tortillas depending on your preference and dietary needs.
Spread cream cheese mixture to the edges and roll tightly. If needed, use a small amount of cream cheese as a “glue” to seal the edge.
Absolutely! You can prepare these in advance and store them in an airtight container in the refrigerator for a quick and easy lunch option.
Print
Turkey Cheddar Lunch Roll Ups Recipe
- Total Time: 15 minutes
- Yield: 2 1x
Description
Savory turkey cheddar lunch roll ups combine zesty deli meat with creamy cheese in a quick, satisfying midday meal. Rolled tortillas deliver convenient protein and flavor for busy individuals seeking a simple, delicious lunch option.
Ingredients
- 6 slices deli turkey
- 4 slices aged cheddar cheese
- 2 tortillas (standard-sized)
- 4 oz (113 g) cream cheese
- 1/4 cup lettuce (finely shredded)
- 1 green onion (sliced thinly)
- salt (fine, to taste)
- black pepper (freshly ground, to taste)
Instructions
- Whip the cream cheese with finely chopped green onions, seasoning with salt and pepper until smooth and well-integrated.
- Lay a tortilla flat on a clean work surface and spread the cream cheese mixture edge to edge, creating a complete flavor foundation.
- Sprinkle shredded lettuce across the tortilla, maintaining an even layer for consistent texture.
- Arrange turkey slices and cheddar cheese on the left side of the tortilla, positioning them slightly away from the outer edge to facilitate easier rolling.
- Tightly roll the tortilla from one end, using additional cream cheese as a binding agent if needed to secure the wrap.
- Slice the rolled tortilla in half, then cut each section into five bite-sized pieces, discarding the uneven end pieces for a polished presentation.
- Serve immediately to preserve the crisp lettuce and maintain the roll’s structural integrity and fresh flavor profile.
Notes
- Customize the cream cheese blend by adding herbs like dill or chives for extra flavor complexity.
- Swap traditional tortillas with low-carb alternatives like lettuce wraps or gluten-free versions for dietary accommodations.
- Use cold ingredients and chill the rolled tortillas briefly to help them maintain structural integrity and prevent unraveling during slicing.
- Consider experimenting with different protein options like ham, chicken, or roast beef to provide variety and keep the dish interesting for repeated meals.
- Prep Time: 15 minutes
- Cook Time: 0 minutes
- Category: Lunch, Snacks
- Method: Rolling
- Cuisine: American
Nutrition
- Serving Size: 2
- Calories: 520 kcal
- Sugar: 3 g
- Sodium: 940 mg
- Fat: 38 g
- Saturated Fat: 16 g
- Unsaturated Fat: 20 g
- Trans Fat: 0.5 g
- Carbohydrates: 20 g
- Fiber: 2 g
- Protein: 30 g
- Cholesterol: 110 mg
Clara Bennett
Contributing Recipe Developer & Food Writer
Expertise
Baking and Pastry Development, Gluten-Free and Allergy-Friendly Recipe Creation, Culinary Storytelling and Food Journalism, Recipe Testing and Standardization, Southern Comfort Foods and Modern Twists
Education
Sullivan University – National Center for Hospitality Studies
Associate Degree in Culinary Arts
Focus: Baking and Pastry Arts, Recipe Testing, and Culinary Journalism.
Clara specialized in crafting desserts that blend classic Southern comfort with modern techniques, while developing strong writing skills to tell the story behind every dish.
Lane Community College (Certificate Program)
Certificate in Food Writing and Photography
Focus: Culinary storytelling, recipe formatting, food styling, and visual presentation.
Clara’s love of baking started young, powered by homemade pies, biscuits, and stories passed around the family table.
After earning her degree at Sullivan University and a food writing certificate at Lane Community College, she turned her passion into a craft: sharing recipes that are simple, soulful, and always full of heart.
She’s big on bold flavors, flexible ideas, and creating sweets that fit any table (yes, even if you’re gluten-free). When she’s not baking, you’ll find her wandering farmers’ markets, styling food for the next photo shoot, or working on her ever-growing recipe journal.