
Fluffy Homemade Baked Cheese Buns Recipe: A Golden Delight
Golden, pillowy baked cheese buns burst with irresistible flavor that makes mouths water instantly.
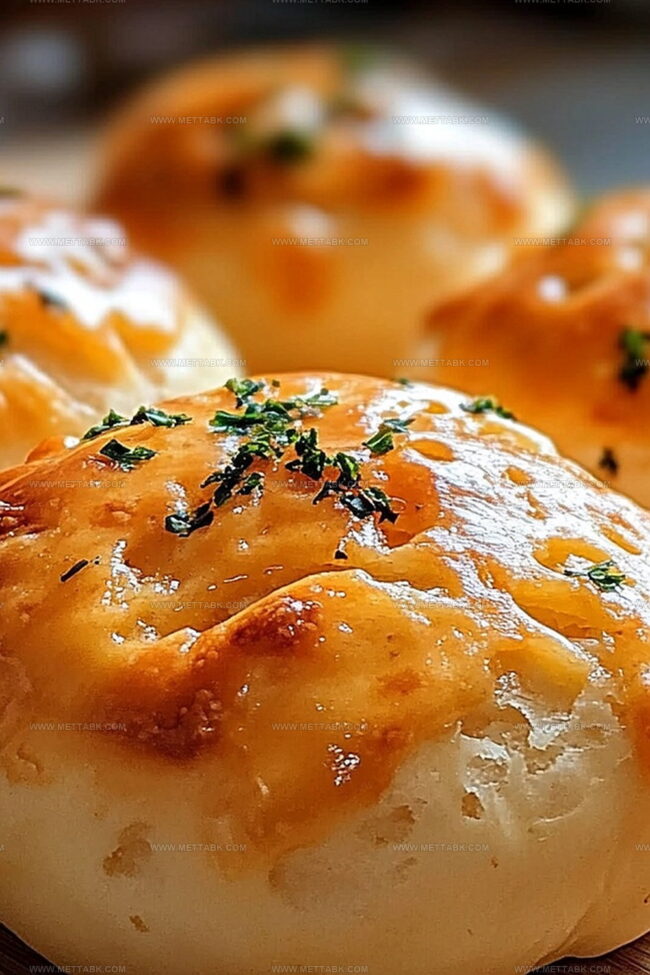
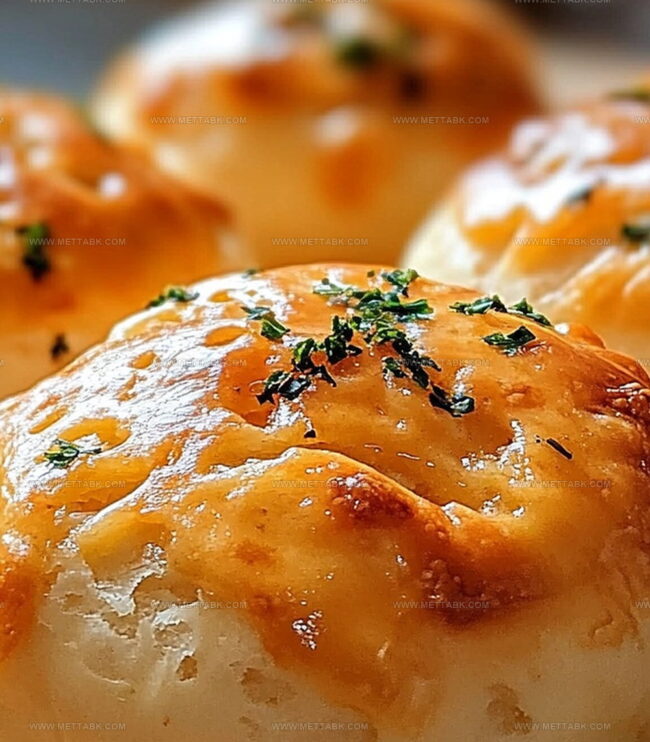
Melted cheese creates a magical center inside these warm, soft delights.
Comfort meets culinary creativity in this simple yet spectacular recipe.
Each bite promises a delectable journey through creamy, rich textures.
Crispy edges complement the gooey interior, making these buns impossible to resist.
Cheese lovers will adore this straightforward approach to creating something truly special.
You can whip up these delightful treats in no time and impress everyone at the table.
Baked Cheese Buns That Bring Warmth and Flavor

Ingredients for Soft and Cheesy Baked Cheese Buns
Yeast Base:Dry Ingredients:Optional Topping:How to Bake Baked Cheese Buns with Golden Crust

Step 1: Activate Yeast
Mix warm water, sugar, and yeast in a large mixing bowl. Let the mixture sit and become bubbly and frothy for about 5 minutes.
Step 2: Create Soft Dough
Add flour and salt to the yeast mixture. Stir and blend ingredients until a smooth, soft dough begins to form.
The mixture should start pulling away from the bowl’s sides.
Step 3: Knead and Develop Texture
Transfer the dough onto a lightly floured surface.
Knead the dough by pushing, folding, and turning for approximately 8 minutes. The dough will become stretchy and smooth with a silky appearance.
Step 4: First Rise
Lightly coat a clean bowl with olive oil. Place the dough inside and cover with a clean kitchen towel.
Let the dough rest and rise in a warm spot for about 1 hour until it doubles in size.
Step 5: Shape Bread Bites
Gently press down the risen dough to release air bubbles.
Roll and shape the dough into small, uniform round balls. Arrange these balls on a parchment-lined baking sheet, leaving space between each.
Step 6: Bake to Golden Perfection
Preheat the oven to 375°F. Bake the bread bites for 15-20 minutes until they turn a beautiful golden brown color.
The tops should look lightly crisp and the bottoms evenly colored.
Helpful Tips for Perfect Baked Cheese Buns Every Time
Creative Variations on Baked Cheese Buns to Try
Pairings That Enhance Baked Cheese Buns Enjoyment
How to Keep Baked Cheese Buns Fresh and Soft
FAQs
Active dry yeast or instant yeast are both suitable. Just ensure the yeast is fresh and hasn’t expired for optimal rising and texture.
Yes, you can experiment with cheddar, mozzarella, or parmesan. Choose cheeses that melt well and complement the bread’s flavor.
The dough should double in size and look puffy. When you gently press the dough with a finger, it should slowly spring back, indicating it’s ready.
Absolutely. Kneading develops gluten, which gives the buns their soft, stretchy texture. Eight minutes of kneading ensures the dough is smooth and elastic.
Print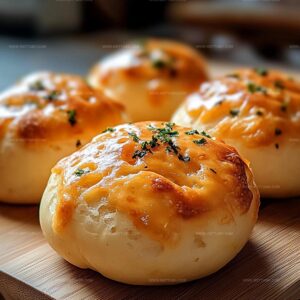
Baked Cheese Buns Recipe
- Total Time: 1 hour 50 minutes
- Yield: 8 1x
Description
Homemade Brazilian cheese buns (pão de queijo) deliver pure comfort with authentic Brazilian flavors. Cheesy, warm rolls blend traditional ingredients into a simple yet delectable gluten-free treat you’ll crave again and again.
Ingredients
- 1 cup Shredded Cheese (cheddar or mozzarella)
- 2 cups All-Purpose Flour
- 3/4 cup (180 ml) Warm Water (110°F/43°C)
- 2 tbsps (30 ml) Olive Oil
- 2 tsps Instant Yeast
- 1 tsp Sugar
- 1 tsp Salt
Instructions
- Activate yeast by whisking warm water, sugar, and yeast together in a spacious mixing vessel. Allow the mixture to bloom and become foamy for approximately 5 minutes.
- Incorporate flour and salt into the yeast mixture, blending thoroughly until a cohesive, soft dough emerges.
- Transfer the dough onto a lightly dusted work surface and knead vigorously for 8-10 minutes, developing its elasticity and smooth texture.
- Coat a clean bowl with olive oil, nestle the dough inside, and drape with a clean kitchen towel. Allow the dough to rise in a warm environment for 60-75 minutes until it doubles in volume.
- Gently deflate the risen dough by pressing down with your palms, then portion and roll into uniform spherical shapes.
- Arrange the dough balls on a parchment-lined baking sheet, ensuring adequate spacing between each piece.
- Heat the oven to 375°F (190°C) and position the rack in the center position. Bake the cheese buns for 15-20 minutes until they transform into a rich golden-brown color with a crisp exterior.
Notes
- Activate the yeast perfectly by ensuring water temperature is between 100-110°F to create optimal rising conditions.
- Experiment with different cheese blends like sharp cheddar, mozzarella, or parmesan for varied flavor profiles and textures.
- Brush the buns with melted butter or egg wash before baking to achieve a golden, glossy exterior that enhances visual appeal and adds richness.
- For gluten-free options, substitute wheat flour with a blend of almond and gluten-free all-purpose flour to maintain soft, tender bun texture.
- Prep Time: 90 minutes
- Cook Time: 20 minutes
- Category: Breakfast, Snacks
- Method: Baking
- Cuisine: Brazilian
Nutrition
- Serving Size: 8
- Calories: 167 kcal
- Sugar: 1 g
- Sodium: 232 mg
- Fat: 6 g
- Saturated Fat: 2.8 g
- Unsaturated Fat: 3.2 g
- Trans Fat: 0 g
- Carbohydrates: 22 g
- Fiber: 1 g
- Protein: 6 g
- Cholesterol: 10 mg
Clara Bennett
Contributing Recipe Developer & Food Writer
Expertise
Baking and Pastry Development, Gluten-Free and Allergy-Friendly Recipe Creation, Culinary Storytelling and Food Journalism, Recipe Testing and Standardization, Southern Comfort Foods and Modern Twists
Education
Sullivan University – National Center for Hospitality Studies
Associate Degree in Culinary Arts
Focus: Baking and Pastry Arts, Recipe Testing, and Culinary Journalism.
Clara specialized in crafting desserts that blend classic Southern comfort with modern techniques, while developing strong writing skills to tell the story behind every dish.
Lane Community College (Certificate Program)
Certificate in Food Writing and Photography
Focus: Culinary storytelling, recipe formatting, food styling, and visual presentation.
Clara’s love of baking started young, powered by homemade pies, biscuits, and stories passed around the family table.
After earning her degree at Sullivan University and a food writing certificate at Lane Community College, she turned her passion into a craft: sharing recipes that are simple, soulful, and always full of heart.
She’s big on bold flavors, flexible ideas, and creating sweets that fit any table (yes, even if you’re gluten-free). When she’s not baking, you’ll find her wandering farmers’ markets, styling food for the next photo shoot, or working on her ever-growing recipe journal.