
Sizzling Cheesy Enchilada Chili Recipe That Warms Your Soul
Crafting the perfect cheesy enchilada chili requires more than just ingredients, it’s about creating comfort on a plate.
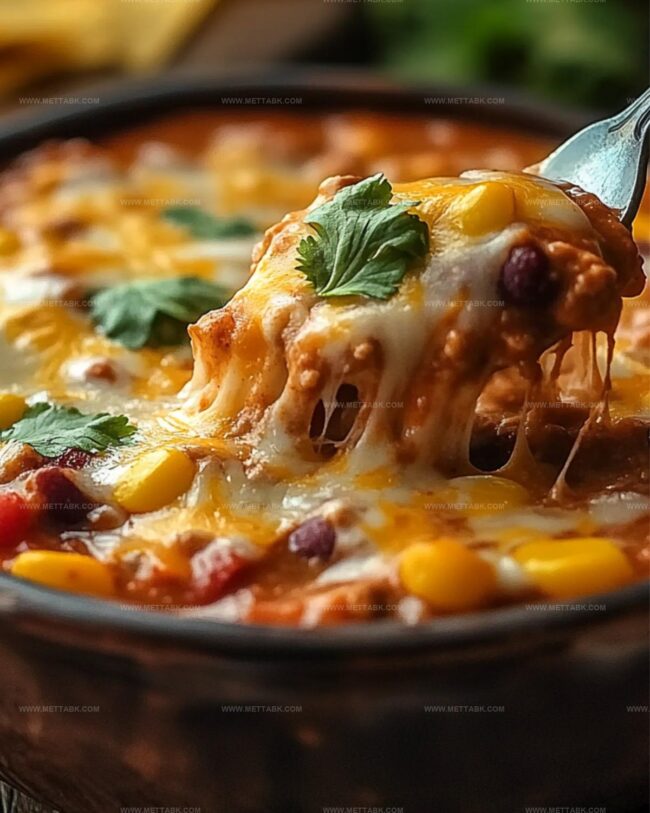
Warmth radiates from this hearty dish that combines bold Mexican-inspired flavors with creamy, melted goodness.
Spices dance through each bite, promising a culinary adventure that satisfies deep hunger.
Layers of rich, complex tastes tell a story of culinary passion and home-style cooking.
Peppers, beans, and cheese blend seamlessly in a symphony of deliciousness that makes mouths water.
Home cooks can easily master this recipe with a few simple techniques.
Dive into a bowl that promises to become your new favorite weeknight meal.
Cheesy Enchilada Chili That Warms the Soul
Ingredients for Cheesy Enchilada Chili
For the Meats:For the Dairy and Sauce:For the Vegetables and Beans:For the Seasonings:For the Optional Serving:How to Make Rich and Spicy Chili
Step 1: Sizzle Savory Ground Beef
Heat a skillet over medium flame. Toss in the ground beef and cook until it transforms into a rich, golden-brown delight.
Tip out any extra grease to keep things lean and delicious.
Step 2: Spice Up the Meat
Sprinkle taco seasoning over the beef and splash in some water.
Let the meat dance and simmer until the liquid vanishes completely.
Step 3: Create the Chili Base
Slide the seasoned beef into a massive Dutch oven or hefty pot.
Pour in these flavor-packed ingredients:Whisk everything together until the sour cream melts into a creamy, dreamy blend.
Step 4: Load Up with Veggie Goodness
Stir in these colorful additions:Step 5: Simmer to Perfection
Crank up the heat until the mixture bubbles enthusiastically.
Immediately drop to a gentle simmer. Let the chili bubble softly, stirring occasionally to prevent any sneaky bottom-of-the-pot burning.
Step 6: Serve with Crunch
Ladle the steaming chili into bowls. Crush tortilla chips or Fritos on top for an irresistible crispy finish.
Dive in and enjoy the flavor explosion!
Tips for Balancing Cheese and Spice

Variations to Try with Your Chili

Pairing Suggestions for Chili Dishes
Savor the Flavor Companions: Perfect Pairings for Cheesy Enchilada Chili
Storage Tips for Chili Leftovers
FAQs
This chili combines the flavors of enchiladas and chili, using salsa con queso and unique ingredients like potato soup to create a creamy, rich texture that sets it apart from classic chili recipes.
Yes, you can add diced jalapeños, use hot salsa con queso, or include a dash of hot sauce to increase the heat level according to your preference.
Absolutely! This chili freezes well and can be stored in the refrigerator for 3-4 days, making it perfect for preparing ahead of time and enjoying throughout the week.
Print
Cheesy Enchilada Chili Recipe
- Total Time: 35 minutes
- Yield: 6 1x
Description
Hearty Mexican-inspired Cheesy Enchilada Chili delivers bold southwestern flavors in one comforting bowl. Spicy ground beef, melted cheese, and rich tomato base promise a satisfying meal that brings festive warmth to hungry tables.
Ingredients
Main Proteins:
- 1 pound ground beef
- 1 cup pinto beans or black beans
Spices and Seasonings:
- 2 tablespoons taco seasoning
- 1 can fire-roasted diced green chilis
Liquid and Additional Ingredients:
- 1 jar Tostitos Salsa Con Queso
- 1 can potato soup
- 1 1/4 cups sour cream
- 1 1/4 cups beef broth
- 1/2 cup chicken broth
- 1/4 cup water
- 1 cup frozen corn
- Tortilla chips or Fritos (for serving)
Instructions
- In a skillet over medium heat, thoroughly brown the ground beef, ensuring complete cooking and draining any excess fat.
- Sprinkle taco seasoning over the beef and add water, simmering until liquid completely evaporates and meat is well-coated.
- Transfer seasoned beef to a large Dutch oven or pot, creating the base for the chili.
- Pour in salsa con queso, potato soup, and sour cream, stirring continuously to create a smooth, creamy consistency.
- Incorporate beef and chicken broths, mixing thoroughly to develop a rich, layered flavor profile.
- Add diced green chilis, providing a subtle heat and vibrant flavor to the chili.
- Stir in frozen corn and pinto beans, enhancing texture and nutritional value.
- Raise temperature to bring the mixture to a vigorous boil, then immediately reduce heat to a gentle simmer.
- Allow chili to cook for 15-20 minutes, stirring periodically to prevent bottom scorching and ensure even heating.
- Ladle into serving bowls and accompany with crispy tortilla chips or Fritos for a satisfying crunch.
Notes
- Drain ground beef thoroughly to prevent greasy texture and reduce unnecessary fat content.
- Experiment with lean ground turkey or plant-based crumbles for healthier protein alternatives.
- Consider using low-sodium broths and reduced-fat sour cream to make the chili more diet-friendly.
- Customize heat levels by selecting mild or spicy salsa con queso and adjusting taco seasoning intensity.
- Prep Time: 15 minutes
- Cook Time: 20 minutes
- Category: Lunch, Dinner
- Method: Simmering
- Cuisine: Mexican
Nutrition
- Serving Size: 6
- Calories: 410 kcal
- Sugar: 5 g
- Sodium: 900 mg
- Fat: 28 g
- Saturated Fat: 12 g
- Unsaturated Fat: 14 g
- Trans Fat: 0.5 g
- Carbohydrates: 20 g
- Fiber: 5 g
- Protein: 25 g
- Cholesterol: 70 mg
Nate Harper
Founder & Recipe Curator
Expertise
Single-Recipe Development, Farm-to-Table Cooking, Seasonal Menu Planning, Culinary Storytelling, Home Kitchen Innovation
Education
Cascade Culinary Institute – Central Oregon Community College
Certificate in Culinary Arts
Focus: Farm-to-table cuisine, sustainable cooking practices, and seasonal recipe creation.
Nate studied under experienced chefs who emphasized local sourcing, minimal waste, and building recipes from fresh, simple ingredients.
Nate Harper is the founder and creative force behind Make, Take, Bake. Raised in the wild beauty of Oregon’s high desert, Nate grew up surrounded by family gardens, farmers’ markets, and home kitchens that celebrated the seasons.
His early love for simple, honest food evolved into a professional passion when he attended Cascade Culinary Institute, where he sharpened his skills in creating recipes that are sustainable, satisfying, and made for everyday life.
Nate’s goal is to make cooking feel accessible, free of fuss, and full of flavor. He believes a single, thoughtfully built dish can stand alone, and sometimes even steal the show.